Love to Laugh and Learn

Fun and interesting learning activities to do with the children in your life

  • Home
  • About Me
  • Attractions
  • Recipes
  • Privacy Policy

Christmas Angels to Laugh and Learn With

December 11, 2011 by Mama Carmody 28 Comments

Christmas Angels to Laugh and Learn With


Christmas Angels – Appeared to shepherds to announce the birth of Christ

Luke 2: 8-10 “And there were shepherds living out in the fields nearby, keeping watch over their flocks at night. An angel of the Lord appeared to them, and the glory of the Lord shone around them, and they were terrified. But the angel said to them, ‘Do not be afraid. I bring you good news that will cause great joy for all the people.’”

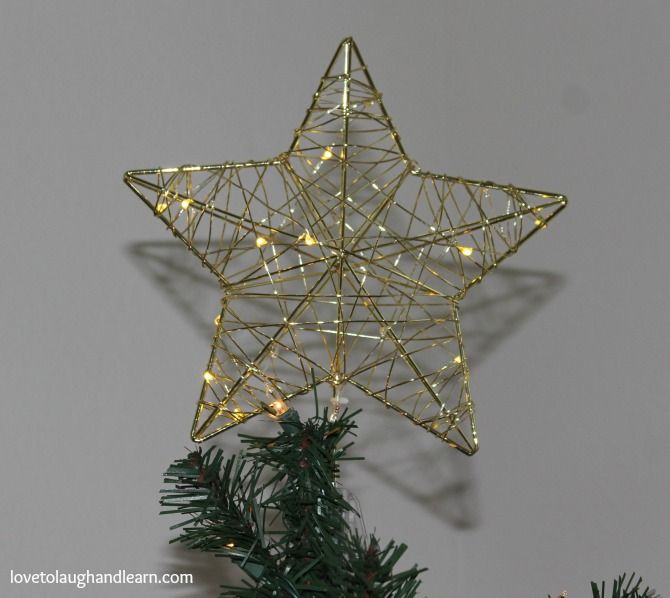
The Christmas Angels appeared in the sky, over the fields near Bethlehem. They announced the birth of Christ. You will usually find either an angel or a star on the top of a Christmas tree because of the importance of their appearances in the sky.

Following are some activities to do in relation to the angels. I hope you and the children in your life enjoy them.

Coloring Pages

If your child likes to color, here are a couple of free coloring pages from about.com
Angel coloring page
Cheerful Angel

Crafts:

Paper Plate Angels
I just had to share these adorable little angels I found online. They are made from paper plates. Click on Paper Plate Angels to go to the link. The one thing that I didn’t see mentioned, in the instructions, was the size of the paper plate. I used a small 6-inch sized plate. It made an adorable little angel. I was very happy with the size. If you want to put it on top of a large Christmas tree, I would use a bigger paper plate.

Christmas Angels from a paper plate.

Hand Print Angel
I have used this craft in my preschool classrooms. The parents always adore them. I love hand print crafts because they become a piece of family history. Be sure to always date the back of any special craft your child does and put their name on it. It will make a great conversation piece as you decorate for Christmas, in later years.

1) Trace the child’s hand three times. Have them keep their fingers together. Don’t spread them out like a fan.
2) Cut out the hand prints.
3) Use one hand print as the body of the angel and the other two as the wings. The wings will look the best if you be sure to place the hand prints so that the thumbs are facing down. (Refer to picture)

Christmas Angels made from hand prints

4) You can either cut out a circle to use for the head or you can use a picture of your child’s head. They both make nice looking angels.
5) As a final touch, (which I forgot to add to one of my samples) you can make a halo out of a silver or gold pipe cleaner or make one out of a piece of aluminum foil. To make the halo out of aluminum foil, cut off an 8 inch by 1 inch piece of aluminum foil. Gently squish and twist it. Then form it into a circle and tape it to the back of the angel’s head.

Christmas Angels from Handprint

Story Time

  “The Christmas Angel” by Hans Wilhelm
Reading Level: Ages 3 – 8
Your child will fall in love with this adorable little angel. All he wants to do is to travel from heaven down to earth; so he can sing his special song to the Son of God. But his wings are too small and he is not allowed to make the trip. Find out what happens to the scared little angel after his accidental fall off of a cloud.

“An Angel Came to Nazareth” by Anthony Knott
Reading Level: Ages 5 and up
This is a very interesting poem of an angel who came to a stable in Nazareth. The angel asks a camel, a donkey, a horse and an ox to pick which one of the four travelers they would carry. One of them would end up carrying “the greatest of them all.” Can you guess, before ever reading the poem, which animal carried “the greatest of them all”?

Please take the time to stop by my Facebook page, Love to Laugh and Learn, and tell me about any of the crafts or books that you shared with your children. I would love to see pictures too.

Related Posts:

The Santa Claus Debate
The True Meaning of Christmas
The Christmas Star
Love to Learn the Meaning of Candy Canes for Christmas
Review – Christmas on Monument Circle, Indianapolis

Save

Filed Under: Christmas, Holidays Tagged With: angels, christian, christmas, Christmas angels, Christmas symbols, December, family friendly, family friendly activities, fun learning, God, holiday, holidays, Jesus, love to laugh and learn, spiritual

The Christmas Star

December 14, 2011 by Mama Carmody 13 Comments

The Christmas Star


Christmas Star

The Christmas Star: A heavenly sign that the wise men were able to follow to find the birth place of Jesus

“Teach the children that the star is the heavenly sign of promise,” he said. “God sent a Savior to the world and the star was the sign of that promise being fulfilled. The countless shining stars in the heavens, one star for each person on earth, represents the hope of all mankind.” (A quote from the story, Teach the Children the True Meaning of Christmas)

Matthew 2:2b “We saw His star when it rose and have come
to worship Him.”

Matthew 2:9 “After they had heard the king, they went on their way,
and the star they had seen when it rose went ahead of them
until it stopped over the place where the child was.”

The Christmas Star and the Christmas Angel would take turns setting on the top of our Christmas tree. To me, both are important because each one announced the birth of God’s Son. Here are some different activities to use during this blessed holiday season as you remember the real reason for the season.

Finger Play

A Shining Star
(Action Rhyme)

On the very first Christmas night,
(Put hands together; lay head on hands as if sleeping.)
A wondrous star shone big and bright.
(Hold hands above head; move fingers like stars shining.)
It marked the spot where the baby lay,
(Pretend to rock baby.)
So kings and shepherds could come to pray.
(Fold hands and kneel.)
– Original Author Unknown

Crafts

Cinnamon Ornaments
Cinnamon ornaments were something that I made with my children when they were younger. Between Thanksgiving and Christmas we would make ornaments to give to family and friends as presents. They were always a big hit. This is a wonderful gift that also makes your house smell delicious. I am using the recipe from allrecipes.com because I have no idea where my recipe has gone.

Ingredients
1 cup ground cinnamon
1 tablespoon ground cloves
1 tablespoon ground nutmeg
3/4 cup applesauce
2 tablespoons glue

Directions
1. In a medium bowl, stir together the cinnamon, cloves, and nutmeg. Mix in the applesauce and glue. Work the mixture with your hands 2 to 3 minutes to form a ball. If mixture is too wet, add more cinnamon. If mixture is too dry, add more applesauce.
2. Lightly dust a clean surface with cinnamon. Roll out the dough to 1/4 inch thickness. Cut out shapes with cookie cutters, and use a toothpick or straw to make a hole at the top for hanging with a ribbon.
3. Dry in a slow oven 200 degrees F (100 degrees C) for several hours, or air dry in a sunny spot for 4 or 5 days. When dry, decorate with gingham and/ or ribbon.

Popsicle Star
I have created a lot of popsicle crafts in my time and enjoyed every one. This would be a good one if you have children of different ages. The older ones can create the stars and the younger ones can paint them and add sparkles or buttons to give it a little extra “shine”. Although I’m sure that some of the older children will want to add their own artistic touches to the stars. (This craft came from kaboose.com)

Materials Needed:
• 10 Popsicle sticks, coloured or plain
• Hot glue gun or ordinary glue
• Length of fishing line
• Paint or markers, glitter, etc.

Instructions:
1. Draw up a template of a star using craft sticks.
2. Place one stick inside one line then add some glue to the top. Position second stick on this.
3. Continue step 2 until all 10 sticks are in place.
4. Attach some fishing line to one point for hanging.
5. Decorate as desired. Using the colors yellow, gold, red and green make for a great Christmas star. Try different colors for theme parties, or use glow-in-the-dark paint for a magical bedroom at night.

Homemade Paper Stars
I recently found this ornament on the Family Fun website. I have never done this craft before but I can’t wait until my great-niece, nephews and grandkids are old enough to do this with them. It looks like it could get messy but sometimes messy is half the fun.

Materials Needed:
• 3 (9- by 12-inch) sheets of construction paper
• Blender
• Very hot water
• Folded cloth towel
• Plate
• 3-inch star-shaped cookie cutter
• Sieve
• Glitter
• Rag
• Baking sheet
• Ribbon loops

Instructions:
1. Tear 3 (9- by 12-inch) sheets of construction paper into small pieces, about the size of a domino, and place them in a blender. Pour in about 1 1/2 cups of very hot water and let it sit for 5 minutes. Meanwhile put a folded cloth towel on a plate, add a paper towel and top with a 3-inch star-shaped cookie cutter.
2. Heat the oven to 200 degrees. Pulse the blender until the mix is pulpy, about 30 seconds. Ina sieve set over the sink, drain the pulp, then spoon some into the cookie cutter to the top, taking care to fill the points. Sprinkle with glitter. Use a rag to press the pulp down into the cookie cutter until most of the water is gone, then gently push the star out onto a baking sheet. Repeat to make two more stars.
3. Bake them for 2 hours or until the moisture has evaporated (they should be firm and lightweight). Let the stars cool, the glue ribbon loops to the backs for hanging. Makes 3 stars.

Snacks

Here are a couple of healthier alternatives to cookies, as you are making crafts and reading books together.

Crispy Cheese Stars from FamilyFun.com
I love cheese so these look extra yummy to me.

Ingredients
• Flour tortillas
• Sliced cheese (cheddar, provolone, or mozzarella)
• Chili powder or paprika

Instructions:
1. Heat the oven to 350º. Use the larger cookie cutter to cut out stars from flour tortillas (about 5 per 10-inch tortilla). It’s easy for kids to do if you use a rolling pin to roll back and forth over the cutter. Bake the stars on a foil-covered cookie sheet for 5 minutes.
2. Use the smaller cookie cutter to cut out an equal number of cheese stars from the sliced cheese and place them atop the tortilla ones. Bake the stars for 2 more minutes or so until the cheese melts.
3. Sprinkle the stars with chili powder or paprika and let them cool before serving.

Star Fruit – A little fruit with your cheese is always a good thing.

Story Time

The Christmas Star Book & Advent Calendar by Marcus Pfister
Reading Level: Ages 4 – 8
Here is another great book from the author of “The Rainbow Fish”. The sparkling silver stars add so much to the illustrations. A wonderful story of how the shepherds, the Wise Men and even the animals followed the star to Bethlehem, where they welcomed the Holy Child.

Small Camel Follows the Star by Rachel W.N. Brown
Reading Level: Ages 3 to 8 yrs old
This is a sweet story of Small Camel’s first trip across the desert. It is a special trip to follow the, much sought after, star that leads the wise men to Bethlehem. Under the star they find the young King, in a very simple house. I love that this story in Biblically correct, in the fact that the wise men find the baby King, a few months later, in a house. (Matthew 2: 1- 12)

Song of the Stars: A Christmas Story
by Sally Lloyd-Jones
Reading Level: Ages 4 – 8
I love the way this story describes how all of creation was anticipating the arrival of our Savior. It talks of how the trees, the flowers and the animals were crying out, “It’s time. It’s time,” as the birth of Jesus drew near. This was a very different way to look at the Nativity scene. No shepherd, no wise men but all of creation celebrating: “Heaven’s Son sleeping under the stars that He made.”

Related Posts:

The Santa Claus Debate
The True Meaning of Christmas
Christmas Angels to Laugh and Learn With
Love to Learn About the Nativity
Love to Learn the Meaning of Candy Canes for Christmas
Review – Christmas on Monument Circle, Indianapolis

Filed Under: Christmas, Learning Activities Tagged With: christian, christmas, Christmas star, Christmas symbols, December, family friendly, family friendly activities, God, holiday, holidays, Jesus, love to laugh and learn, making learning fun, spiritual, star

Love to Laugh and Learn at the Apple Orchard

September 23, 2013 by Mama Carmody 24 Comments

Love to Laugh and Learn at the Apple Orchard


Learning experiences at the apple orchard can be so much fun. I like to incorporate a little learning in everything I do but I don’t want it to be heavy handed. I don’t want the kids to actually realize they are learning. All I want them to experience is fun.

There is so much learning that can happen at an apple orchard. The lessons can be complex, such as learning about how bees pollinate or the growing cycle of an apple. Or the lesson can be very simple, like learning that the apples in the grocery store actually grow on trees.

Today, We Go for Simple

We are headed to the apple orchard with our 2 year old, great-nephew. I like to start learning opportunities with a book so we began by reading, “Picking Apples” by Gail Saunders-Smith. It was a great book for a young child; lots of pictures and a small amount of descriptive text. It describes picking apples from the tree to storing them in large wooden crates and finally trucking them everywhere. We were able to see the big wooden crates at the apple orchard; just like in the book!

We decided to head to Stuckey’s Farm today because they grow my husband’s favorite apples; McIntosh. When we arrive a gentleman gives us a basket and a bag to gather our apples in. Jeremiah wanted to carry the basket.

Love to Laugh and Learn at the Apple Orchard – Carrying the basket

We climbed onto a wagon behind a big tractor, to get a ride out to the area that the McIntosh apples were at.

Love to Laugh and Learn at the Apple Orchard – Riding on the Wagon

The Art of Picking Apples

The first apple Jeremiah picked came right off the tree with no problem…

Love to Laugh and Learn at the Apple Orchard – Picking Apples

…but the next one wouldn’t let go so Uncle Pat stepped in to explain if you just turn the apple a couple of times, it will come right off the tree.

Love to Laugh and Learn at the Apple Orchard – Picking Apples with Uncle Pat

This only had to be explained once and then Jeremiah became an expert apple picker.

Love to Learn and Learn at the Apple Orchard – Picking Apples Collage

We finished our day up with a frozen apple cider slushie…

Love to Laugh and Learn at the Apple Orchard – Frozen Apple Cider Slushie

…and a special apple Bento meal. Bento meals come from Japan and are in divided boxes. They do some pretty creative things with food and I find them fun for kids. Jeremiah’s apple themed meal consisted of a peanut butter and apple butter sandwich, cut with an apple shaped cookie cutter. There were a couple of apple cars, made from apple slices and grapes, and some cooked carrots.

Love to Laugh and Learn at the Apple Orchard – Apple Bento Meal

We spent a little time at the playground before we left.

Love to Laugh and Learn at the Apple Orchard – Playing

Stuckey’s Farm is opening a new fun area called Adventure Acres. It consists of a 20′ tall tube slide, a barrel train pulled by a real tractor, pedals cars and more. We are going to have to go back and check that out, once it opens.

Learning Opportunities Jeremiah had at the Apple Orchard

1. That apples in the grocery store come from apple trees.

2. He got to see the big wooden crates the apples are stored in; just like we read about in the book.

3. He was able to watch a machine wash the apples then some workers sorted them and put them in bags.

4. He got the experience of receiving and following directions on how to get stubborn apples off the tree.

5. He was able to experience nature and enjoy climbing around and under the trees.

Future Learning Opportunities at the Apple Orchard

1. We can learn about bees because there is a beehive that you can safely observe from inside the orchard store.

Love to Laugh and Learn at the Apple Orchard – Bee Hive at Stuckey’s

2. We can learn about the life cycle of an apple tree; from seed to apple.

3. We can see how apple cider is made. They make their own apple cider. You can watch the machines make it and fill the bottles but they weren’t manufacturing any the day we were there.

4. We can take apples home and make applesauce and other recipes. Cooking has so many learning opportunities and it’s fun.

We had so much fun at the apple orchard. I can’t wait to go again. Have you been to an apple orchard? What did you like about your trip? Maybe you live in an area where you go to orange groves instead of apple orchards. I would love to hear about your experiences.

You can find more fun activities with apples on an earlier post called, “A is for Apple: You Can Learn More Than Your ABC’s from Apples”.

More Books about the Apple Orchard:

Out and About at the Apple Orchard by Diane Mayr
Reading Level: Ages 5 to 8 yrs old
This is a very good book that describes the activities that go on at an apple orchard. The book explains how the apples start as flowers and how the bees help the flowers change into fruit. Your child will learn about the many things the orchard workers need to do to help the apples grow. It is a fun little book. The pictures in this book are brightly drawn illustrations. Although, I prefer photo illustrations in books I am using for learning purposes, the drawings are quite adorable.

Related Posts:

Pumpkins are Orange; and Other Learning Concepts
A is for Apple: You Can Learn More Than Your ABC’s from Apples
Colors – Overview
Shapes – Overview
Fun with Music – Overview

Filed Under: Attractions and Events, Learning Activities Tagged With: apple orchard, apples, family friendly, family friendly activities, family friendly events, fun learning, laugh, learning, learning fun, learning opportunities, love to laugh, love to laugh and learn, making learning fun, picking apples

📸 Capture the Moment: First and Last Day of School Signs for Every Grade

July 11, 2025 by Mama Carmody Leave a Comment

Can you believe it? In some places, school is already starting this month. One of my daughter’s favorite back-to-school traditions is taking a First Day of School photo of my grandkids — it’s a simple moment that turns into a sweet keepsake. That’s why I created a fun, colorful set of First Day of School signs and Last Day of School signs for kids from Preschool through 12th Grade — and I’m giving away a free version to help you capture those memories. Whether you homeschool, teach, or are simply trying to remember what day it is, the new school year always seems to sneak up on us.

First Day of School signs & Last Day of School signs – What’s Included?

I designed three different styles of the first day of school signs to match different age groups:

Preschool – 4th Grade

Bright and playful — with crayons, scissors, and paint trays.

5th – 8th Grade

Still fun, but a little more grown-up — featuring globes, books, and backpacks.

High School (Freshman–Senior Year)

Clean, classic, and stylish enough for teens who “don’t do cute.”

Each design includes:

  • A First Day of School sign
  • A Last Day of School sign
    (Perfect for comparing just how much they’ve grown!)

Want the Free Printable Version?

You can download the non-editable version of the signs for FREE when you sign up to receive updates from Love to Laugh and Learn.

These free signs show the grade level only (no name or date fields), and they are ready to print and use instantly.

And yes — the watermarks will be removed when the signs are delivered to your inbox!

Click here: 👉 Free First and Last Day of School Signs

Want to Personalize Them with Your Child’s Name and Date?

If you’d like to customize the signs digitally, I also offer a fully editable version in my Teachers Pay Teachers store for just $5.

The editable set includes:

  • Canva links for all 3 styles
  • The ability to type in your child’s name and date before printing
  • Matching first and last day signs for every grade from preschool through 12th
  • Free graphics (no Canva Pro needed!)

Start the School Year with a Smile

These signs are an easy way to start a new tradition or continue an old one. Whether you use the free version or grab the editable one, I hope they help make your child’s school year just a little more special — and a lot more memorable.

With love,
Mama Carmody

📍 P.S. I’d love to see your First Day photos! Tag @LoveToLaughandLearn or send me a message — it truly makes my day!

Related Posts

Teaching Shapes to Preschoolers: An Overview of Fun Learning Activities

Teaching Your Child Colors – Overview

Filed Under: Free Printables Tagged With: Back to School, back to school printables, editable school signs, end of school year, family friendly, family friendly activities, first day of school printable, first day of school signs, free printable, free printable school signs, free resources for parents, last day of school signs, love to laugh and learn, Mama Carmody, school photo signs

Learning Through Laughter: Why Learning Should Be Fun

July 19, 2025 by Mama Carmody Leave a Comment

A colorful vertical Pinterest image collage with photos of children learning through fun activities like crafts, cooking, and music. Text reads: “Learning Through Laughter: Why Learning Should Be Fun.”

“A joyful heart is good medicine…” – Proverbs 17:22

My Mission

From the very beginning of Love to Laugh and Learn, my mission has been simple: to show that learning should be fun — not serious and stiff, but filled with joy and meaning. In fact, the more joy we bring into it, the more it sticks.

Natural Learners

Children are natural learners—curious, creative, and constantly absorbing the world around them. But here’s the key: they learn best when they’re having fun.

Whether it’s identifying colors, discovering shapes, or exploring the roles of community helpers, I’ve always believed in making learning hands-on, engaging, and joyful. Flashcards have their place, and repetition absolutely helps secure knowledge—but I believe that repetition works best when it’s wrapped in meaningful play, exploration, and real-life application.

Love to Laugh and Learn Has Grown

Over the years, Love to Laugh and Learn has grown—just like the little ones it serves. My background is strongest with early childhood (birth to Kindergarten), but now that I’m a grandmother to kids who are 9½ and 12, you’ll notice the blog is expanding to include content for older children, too.

You’ll find posts that cover:

  • Early learning basics like colors, shapes, and numbers
  • Themed units like Fun with Music, where we explore instruments and sounds
  • Holiday activities filled with crafts and conversations
  • Community helper studies that bring real-world roles into focus
  • Printable resources, educational games, and more!

In the early days of the blog, I often highlighted family-friendly attractions and events around Indianapolis, where I used to live. Now, after a decade in Texas, I’m looking forward to doing the same here—especially once my daughter, son-in-law, and grandkids move back nearby. I’m excited to start reviewing local sites and activities again that make learning an adventure.

My Goal

It is still my goal is to support families and teachers alike in creating joyful, meaningful learning moments. Most ideas can be adapted wherever you live and whatever stage your learners are in—whether you’re homeschooling, supplementing school lessons, or simply having fun at home.

Science Behind Learning Should Be Fun

And in case you need some science to back it all up: Dr. Kathy Hirsh-Pasek, a senior fellow at the Brookings Institution and professor of psychology at Temple University, says:

“Play is not a break from learning. It’s the way young children learn.”
Research shows that playful learning boosts cognitive development, social-emotional skills, and long-term memory retention (Zosh et al., 2017, American Academy of Pediatrics).

So whether you’re a parent, grandparent, teacher, or caregiver, I’m so glad you’re here. Let’s laugh, explore, and learn together—because learning should be fun, every step of the way.

Most sincerely,
Mama Carmody
Love to Laugh and Learn

Related Posts

Learning Should Be Fun (my blog’s first ever post)

Colors – Overview

Teaching Shapes to Preschoolers: An Overview of Fun Learning Activities

Filed Under: Uncategorized Tagged With: educational activities, family friendly, family friendly activities, fun learning, homeschool, homeschool ideas, learning fun, Learning Should Be Fun, learning through laughter

  • 1
  • 2
  • 3
  • …
  • 11
  • Next Page »

Don’t Miss This Great Book

Categories

  • Articles
  • Attractions and Events
  • Autumn/Fall
  • Children's Books
  • Christmas
  • Coloring Pages
  • Colors
  • Community Helpers
  • Contest
  • Cooking with Kids
  • eBundles
  • Free Printables
  • Gardening
  • Halloween
  • Holidays
  • Learning Activities
  • Music
  • Reviews
  • Sensory Bins
  • Shapes
  • Thanksgiving
  • Uncategorized

Follow Me on Bloglovin

Follow on Bloglovin

Recent Posts

  • The Lame Valentine Sensory Bin
  • Hearts: Learning Activities for Shapes
  • “Someone I Love Has Gone to Heaven”
  • The Santa Claus Debate
  • Love to Learn about the Nativity
  • Children’s Books About the Nativity
  • The True Meaning of Christmas
  • Christmas Angels to Laugh and Learn With

Check This Out

Holiday Toy List – STEM Toys

Books

US Family Guide

USFamilyGuide.com

Recent Comments

  • Mama Carmody on Your Favorite Childhood Book
  • Lisa Smiley on Your Favorite Childhood Book
  • Harlow's Harvest on Eggs in a Nest: Cooking with Kids

Copyright © 2026 · Lifestyle Pro Theme on Genesis Framework · WordPress · Log in