Love to Laugh and Learn

Fun and interesting learning activities to do with the children in your life

  • Home
  • About Me
  • Attractions
  • Recipes
  • Privacy Policy

Dig into Gardening: Fun Activities, Science Projects, and Healthy Eating Tips

May 7, 2025 by Mama Carmody Leave a Comment

Children and an adult planting vegetables together in a garden, promoting fun gardening activities for kids and healthy outdoor learning

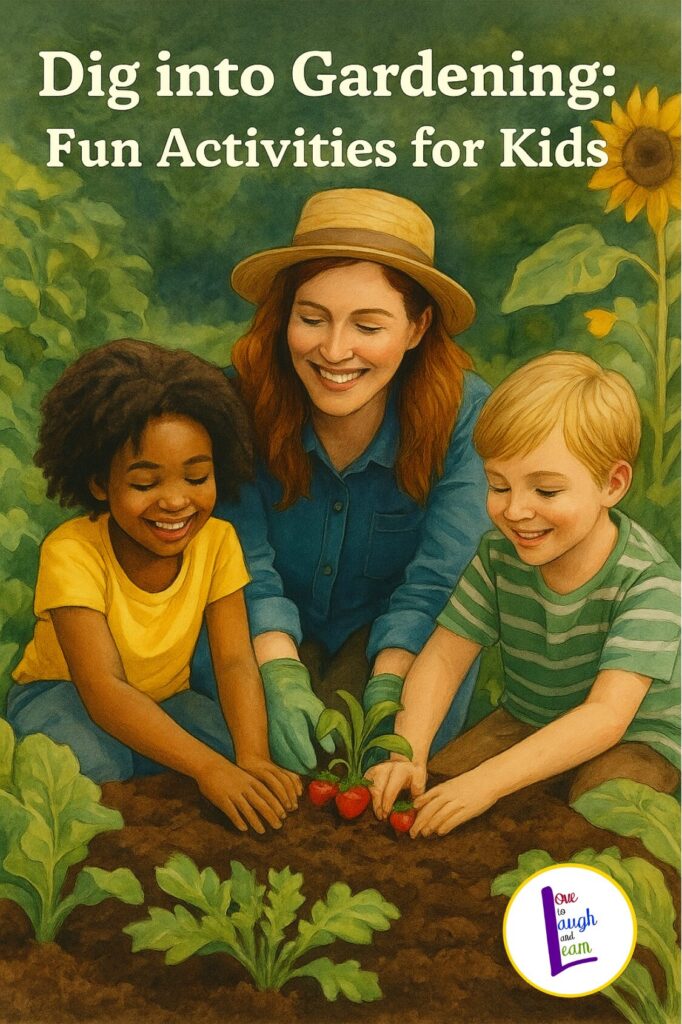
Gardening with kids is a joyful, hands-on way to spark curiosity, teach science, and encourage healthy eating habits. Whether you’re planting a single pot on a balcony or creating a full backyard garden, there are endless opportunities to have fun while learning. In this post, you’ll discover gardening activities for kids that blend science, creativity, and delicious rewards. Plus, we’ll share free printables to help your little gardeners dig right in!

If you enjoy gardening with kids, be sure to check out our earlier post, Earth Day: Gardening with Children, for even more fun ideas!

Plant a Rainbow Garden

Planting a rainbow garden is a colorful and exciting project for children. Choose fruits and vegetables that represent each color of the rainbow—red tomatoes, orange carrots, yellow peppers, green lettuce, blue blueberries, and purple eggplants.

Activity Idea: Use our free Rainbow Garden worksheet to have children draw or write the name of a plant for each color. Challenge them to think of more options than just the examples provided!

Fun Science: How Plants Grow

Gardening is packed with natural science lessons. Talk about the life cycle of a plant—from seed to sprout to flower to fruit. Let kids track their plants’ growth with our free Garden Observation Sheets, perfect for ages 4-12.

Activity Idea: Start a “plant journal” where children record weather conditions, measure growth, and sketch what they observe each week.

Young child and adult exploring worms together in a garden bed.

Worm Watching: Nature’s Garden Helpers

Introduce kids to worms and the magic they do underground! Worms help aerate the soil and break down organic matter to create rich, fertile dirt.

Activity Idea: After a rainy day, go on a “worm walk” to find worms in the garden. Discuss their important role in helping plants grow.

Colorful kid-friendly fruit and veggie snacks displayed in fun shapes like rainbows, caterpillars, and flowers.

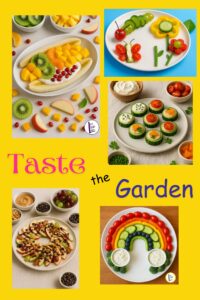
Taste the Garden: Healthy Eating Fun

Kids are more likely to try new fruits and vegetables when they’ve grown them themselves! Create simple, healthy recipes using their harvest.

Snack Ideas:

  • Rainbow Veggie Skewers: Thread colorful veggies onto skewers and serve with a tasty dip.
  • Healthy Banana Splits: Use bananas, yogurt, and an assortment of fresh fruits like kiwi, pineapple, and apples.
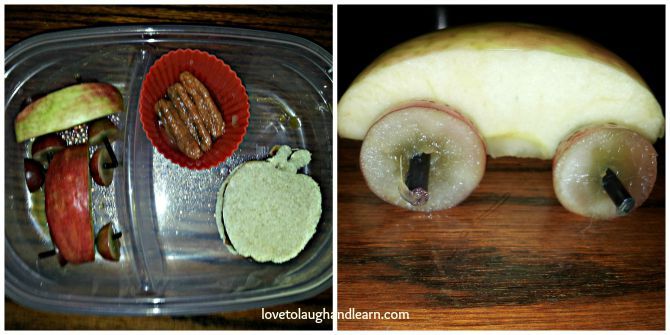
  • Apple Nachos: Thinly slice apples and top with nut butter, grapes, and mini chocolate chips.
  • Cucumber Sandwich Bites: Use cucumber slices with cream cheese or hummus, topped with cherry tomatoes or peppers.

Activity Idea: Host a “garden picnic” where kids pick, prepare, and eat their homegrown snacks.

Story Time (affiliate links)

“Container Gardening for Kids” by Ellen Talmage, featuring colorful illustrations of vegetables, flowers, and creative plant containers, designed to teach kids about growing plants in small spaces.

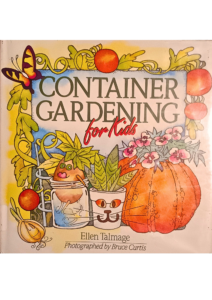
Container Gardening for Kids by Ellen Talmage

Reading Level: Ages 7 to 12 yrs old This book is bursting with creative and unique ideas for turning all kinds of containers into mini gardens—some you can even make yourself! From boots to buckets, it encourages kids to think outside the (plant) box.

Not only does it inspire creativity, it also teaches important plant care tips. Your young gardener will learn why it’s important to avoid overcrowding, how to divide plants into new containers, and—even cooler—how trimming the roots can actually help a plant stay healthy and stress-free. (Yes, I even learned something new too!)

This book is a great guide for kids who want to get their hands dirty and show off their green thumbs in fun, personal ways. Let the container garden adventures begin!

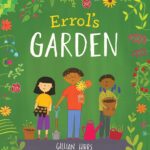
Errol’s Garden by Gillian Hibbs

Reading Level: Birth to 8 yrs old Errol’s Garden is a charming picture book that celebrates the love of gardening—even in unexpected places. Errol dreams of growing plants, but living in an apartment doesn’t offer many options. That is, until he discovers the rooftop! Follow along as Errol and his neighbors come together to create a beautiful rooftop garden, proving that community and creativity can help gardens grow anywhere.

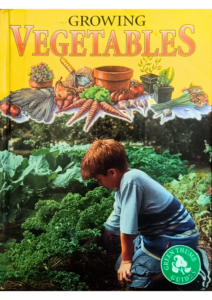
Growing Vegetables by Tracy Nelson Mauer

Reading Level: Ages 7 to 12 I discovered this gem at my local library. It’s perfect for young gardeners! This book is packed with practical, age-appropriate information on how to plan, plant, and harvest your very own vegetable garden. It covers everything from choosing the right location and tools to understanding when to water, weed, and pick your produce. While I wasn’t able to find this book on Amazon at the time of writing, I highly recommend checking your local library or school collection. It’s a fantastic resource to pair with garden activities and outdoor science lessons!

Cover of the children’s book “Ready, Set, Grow!” by DK Books, featuring a smiling sunflower face and subtitle “Quick and Easy Gardening Projects,” designed to teach kids simple, hands-on gardening activities.

Ready, Set, Grow! – Quick and Easy Gardening Projects by Deborah Lock (DK Books)

Reading Level: Ages 7 to 11 DK Books never disappoint—and Ready, Set, Grow! is no exception! This colorful, photo-packed gem is perfect for young gardeners who are ready to dig in. Before planting a single seed, kids will learn to think like a garden pro: How much space do you have? Is it sunny or shady? The book covers it all!

From clever ideas for quirky containers to super cute DIY garden decorations, this book makes gardening both practical and playful. Kids will also discover which insects are garden heroes (hello, ladybugs!) and which ones might cause trouble. There’s a garden full of information inside these pages—and it’s all presented in a way that’s fun, easy to understand, and sure to grow confidence.

Whether you have a backyard plot or just a sunny windowsill, this book will help your young gardener bloom! 

“Secrets of the Vegetable Garden: A Shine-a-Light Book” by Carron Brown and Giordano Poloni, featuring colorful illustrations of garden plants, animals, and a watering can, with a flashlight icon showing how to reveal hidden images through light.

Secrets of the Vegetable Garden (A Shine-A-Light Book) by Carron Brown & Giordano Poloni

Reading Level: Ages 2 to 8 Secrets of the Vegetable Garden is part of the delightful Shine-A-Light series, and it’s both magically entertaining and educational. I own this one along with Secrets of the Seashore, and my grandchildren absolutely love them!

In this interactive book, young readers are asked engaging questions like, “What three things does a seed need to grow?” and “What’s growing in the pods?” The fun twist? To reveal the hidden answers, you shine a flashlight behind the page in a dim room—it’s like discovering secret worlds hidden in the illustrations!

This book teaches real facts about gardening and the wildlife you might encounter, all through a hands-on, visually exciting experience. It’s a wonderful way to spark curiosity and learning through play.

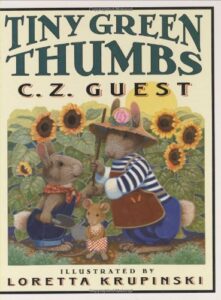
Tiny Green Thumbs by C.Z. Guest

Reading Level: Ages 3 to 9 Tiny Green Thumbs is a sweet and educational story about a little bunny with a big dream—growing his own garden. With the loving guidance of his wise grandmother, Granny Bun, Tiny Bun learns all the steps it takes to grow something from the ground up. The book blends a heartwarming storyline with practical gardening tips, making it both entertaining and informative. Join Tiny Bun and Granny Bun as they dig, plant, and grow their way to a garden full of joy and learning!

Free Printables to Grow and Learn

Don’t forget to grab your free Garden Observation Sheets and Rainbow Garden Worksheet! These tools help make your garden adventure even more educational and fun.

Wrap-Up: Grow, Learn, and Laugh Together

Gardening with kids builds skills, sparks curiosity, and promotes healthy living. It’s a fun way to connect with nature—and each other! Whether you’re growing a few pots of herbs or a full backyard farm, these gardening activities for kids will plant seeds of wonder that last a lifetime.

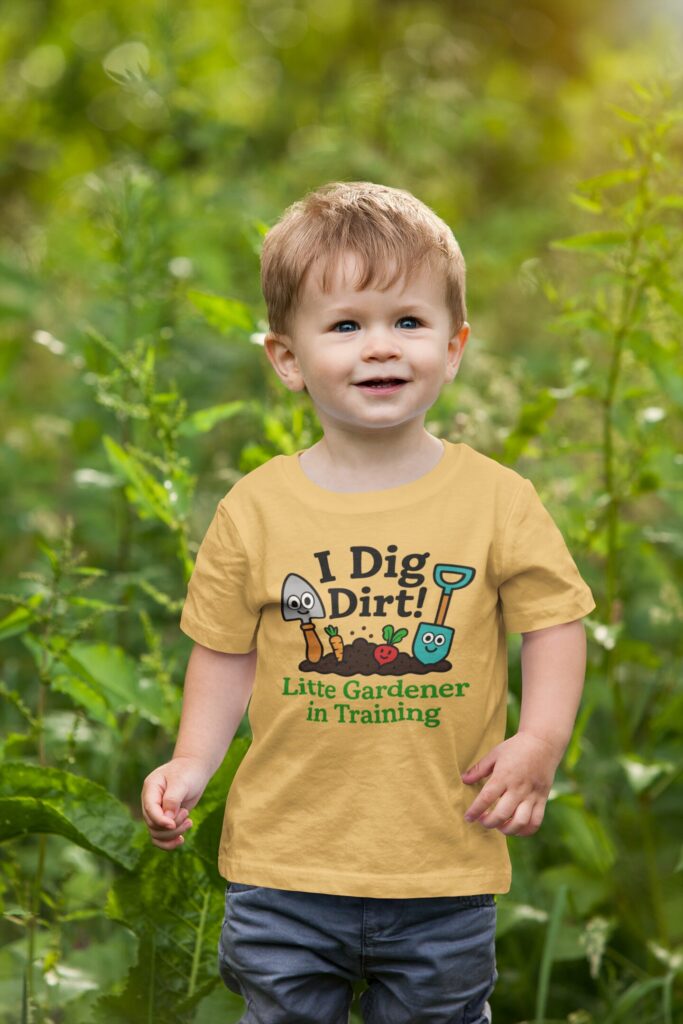
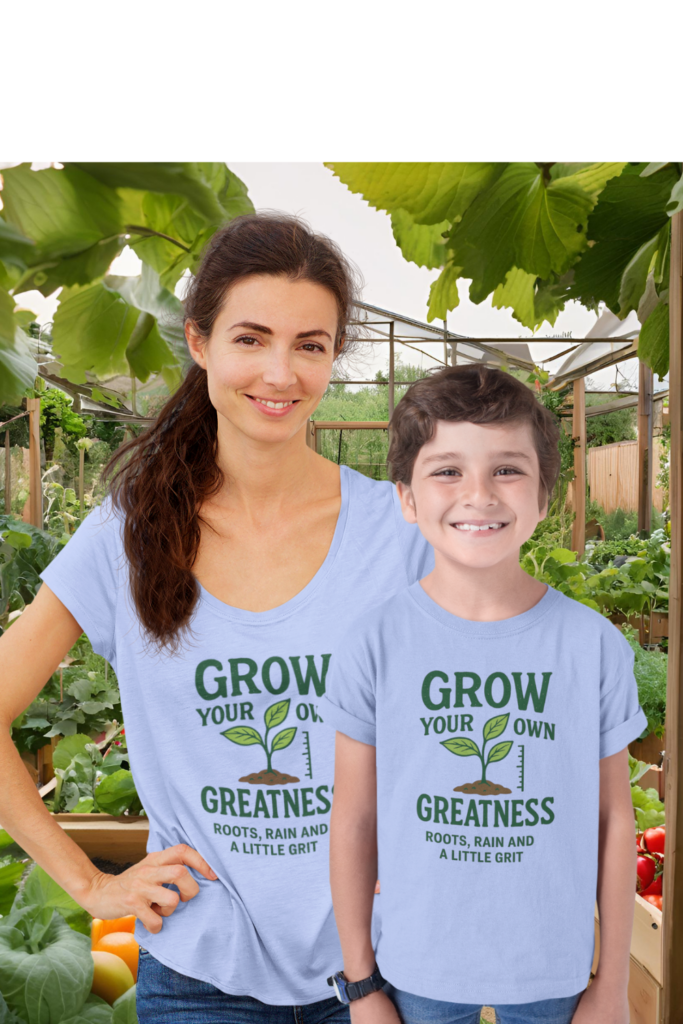
Show Off Your Green Thumb in Style!

I’ve created two fun gardening-themed T-shirt designs that are perfect for kids, families, and anyone who loves to dig in the dirt! You can find them in my storefront, Mama Carmody’s Corner Store, available on TeePublic, TeeSpring, and RedBubble.

Each platform offers different items and runs unique sales, so be sure to check them all out for the best deals and product options!

Shop Now:

Look for my designs “I Dig Dirt – Little Gardener in Training” and “Grow Your Own Greatness – Roots, Rain and a Little Grit” — great for garden-loving kiddos and grownups alike.

This cute kids gardening shirt is perfect for little ones who love outdoor play, planting vegetables, and learning in nature.
“Grow Your Own Greatness – Roots, Rain and a Little Grit.” Perfect for garden lovers of all ages.

Filed Under: Gardening Tagged With: educational activities, family friendly, family friendly activities, free printable, fun learning, gardening, gardening with children, gardening with kids, love to laugh and learn, Mama Carmody, vegetable gardening with kids

Zombie Zapper Brain Boost Smoothie

October 15, 2023 by Mama Carmody Leave a Comment

Zombie Zapper Brain Boost Smoothie

Zombie Zapper Brain Boost Smoothie: A Grandkids’ Creation for Zombie-Proof Brains!

Hey there, fellow smoothie enthusiasts! Today, I have a special treat for you – a delicious concoction that not only tantalizes your taste buds but also promises to fortify your brain against a zombie invasion. Yes, you read that right! Introducing the “Zombie Zapper Brain Boost Smoothie” – a wholesome creation dreamed up by my grandkids and me.

With its vibrant colors and a taste that screams “healthy indulgence,” the Zombie Zapper Brain Boost Smoothie is the perfect way to start your day. Whether you’re a kid or just a kid at heart, this brain-boosting blend will tickle your taste buds and get your mental gears turning.

Our Inspiration

Whipping up this Zombie Zapper Brain Boost Smoothie was an adventure inspired by my grandkids’ homeschool curriculum. Thanks to “Nutrition 101: Choose Life!“* (paid link), a book that taught them the best foods for extra brainpower, we’ve concocted a smoothie that not only nourishes your noggin but also fortifies it against any zombie invasion. Remember, a strong brain is your best defense against the undead – sip up and stay sharp, my friends!

Let’s dive into the secret recipe that will make you zombie-proof!

Click the photo to get a pdf of the Zombie Zapper Brain Boost Smoothie recipe.
Click the photo to get your
pdf copy of the recipe.

Ingredients:

The Green Defender – Spinach (1 cup)

Our first line of defense comes from this leafy green powerhouse. Spinach is packed with essential nutrients, like iron, vitamin K, and folate, which will help you stay sharp and focused.

 Powerful Pineapple – Fresh or Frozen (1 cup)

These sweet chunks are like little bursts of sunshine in your smoothie. They’re your trusty pineapple grenades, exploding with tropical flavor to keep those zombies at bay.

Raw Locally Sourced Energy Boosting Honey (2 tablespoons)

The natural sugars in honey provide a quick energy boost to aid in the defeat of zombies.

Bone Strengthening Vanilla Greek Yogurt (½ cup)

Greek yogurt contains calcium, which is essential for maintaining strong bones and is essential for proper nerve cell communication. This is particularly important when battling zombies.

The Zesty Zing – One Whole Juice Orange

With a citrusy punch, the orange adds a burst of vitamin C to our smoothie. It’s like a shield against the zombie’s toxins! Don’t worry if you get a seed or two, they are nutritious too.

 Lively Lime Juice (1 tablespoon)

The lime juice is your trusty sidekick, adding extra Vitamin C and a dash of zesty zing that’s like a swift kick to the undead taste buds. It’s the secret weapon to keep your smoothie sharp and zesty, just like your survival skills.

Avenging Avocado (¼ of small, soft one)

It’s a must to add this sheath building ingredient to strengthen the protective layer around the nerves in your brain. The avocado provides the smoothie with its creamy texture. It’s the green guardian of your blend, ensuring your smoothie is thick and satisfying, just like your triumph over the zombie menace.

A sprinkle of Zombie-Freezing Ice Cubes (for that chilling effect)

Instructions:

1. Load all the ingredients into a blender.

2. Blend until smooth and creamy, like a super-secret concoction for brainpower.

3. Pour your Zombie Zapper Smoothie into your favorite glass.

4. Sip, savor, and let the brain-boosting magic begin!

Have Fun

This smoothie is not just about its nutrients; it’s about the experience of creating something special with your grandkids. Together, we dreamt up this fantastic concoction, and every sip brings a smile to our faces, knowing we’ve crafted a delicious weapon against the zombie apocalypse.

So, why not give the Zombie Zapper Brain Boost Smoothie a try? Make it a fun family project, sip together, and maybe even create a game of zombie tag in the backyard. Who says staying healthy can’t be an adventure?

Remember, it’s not just about sipping a smoothie; it’s about sharing a bond with your loved ones and preparing for the unexpected, one delicious gulp at a time. Stay safe, stay healthy, and may your brains be forever zombie-proof with the Zombie Zapper Brain Boost Smoothie! 

Zombie Zapper Brain Boost Smoothie, Final Taste Test

*Disclosure: As an Amazon Associate, I earn from qualifying purchases.

Related Posts

How to Eat a Pumpkin: A Lesson From a 3 Year Old

How to Eat a Pumpkin, Part 2

Pumpkins are Orange; and Other Learning Concepts

Filed Under: Autumn/Fall, Halloween, Holidays, Uncategorized Tagged With: brain boost, brain boost smoothie, brain health, brain nutrition, educational activities, family friendly, family friendly activities, fun learning, Halloween, halloween smoothie, learning fun, love to laugh and learn, Mama Carmody, nutrition, smoothie, zombie

Christmas Angels to Laugh and Learn With

December 11, 2011 by Mama Carmody 28 Comments

Christmas Angels to Laugh and Learn With


Christmas Angels – Appeared to shepherds to announce the birth of Christ

Luke 2: 8-10 “And there were shepherds living out in the fields nearby, keeping watch over their flocks at night. An angel of the Lord appeared to them, and the glory of the Lord shone around them, and they were terrified. But the angel said to them, ‘Do not be afraid. I bring you good news that will cause great joy for all the people.’”

The Christmas Angels appeared in the sky, over the fields near Bethlehem. They announced the birth of Christ. You will usually find either an angel or a star on the top of a Christmas tree because of the importance of their appearances in the sky.

Following are some activities to do in relation to the angels. I hope you and the children in your life enjoy them.

Coloring Pages

If your child likes to color, here are a couple of free coloring pages from about.com
Angel coloring page
Cheerful Angel

Crafts:

Paper Plate Angels
I just had to share these adorable little angels I found online. They are made from paper plates. Click on Paper Plate Angels to go to the link. The one thing that I didn’t see mentioned, in the instructions, was the size of the paper plate. I used a small 6-inch sized plate. It made an adorable little angel. I was very happy with the size. If you want to put it on top of a large Christmas tree, I would use a bigger paper plate.

Christmas Angels from a paper plate.

Hand Print Angel
I have used this craft in my preschool classrooms. The parents always adore them. I love hand print crafts because they become a piece of family history. Be sure to always date the back of any special craft your child does and put their name on it. It will make a great conversation piece as you decorate for Christmas, in later years.

1) Trace the child’s hand three times. Have them keep their fingers together. Don’t spread them out like a fan.
2) Cut out the hand prints.
3) Use one hand print as the body of the angel and the other two as the wings. The wings will look the best if you be sure to place the hand prints so that the thumbs are facing down. (Refer to picture)

Christmas Angels made from hand prints

4) You can either cut out a circle to use for the head or you can use a picture of your child’s head. They both make nice looking angels.
5) As a final touch, (which I forgot to add to one of my samples) you can make a halo out of a silver or gold pipe cleaner or make one out of a piece of aluminum foil. To make the halo out of aluminum foil, cut off an 8 inch by 1 inch piece of aluminum foil. Gently squish and twist it. Then form it into a circle and tape it to the back of the angel’s head.

Christmas Angels from Handprint

Story Time

  “The Christmas Angel” by Hans Wilhelm
Reading Level: Ages 3 – 8
Your child will fall in love with this adorable little angel. All he wants to do is to travel from heaven down to earth; so he can sing his special song to the Son of God. But his wings are too small and he is not allowed to make the trip. Find out what happens to the scared little angel after his accidental fall off of a cloud.

“An Angel Came to Nazareth” by Anthony Knott
Reading Level: Ages 5 and up
This is a very interesting poem of an angel who came to a stable in Nazareth. The angel asks a camel, a donkey, a horse and an ox to pick which one of the four travelers they would carry. One of them would end up carrying “the greatest of them all.” Can you guess, before ever reading the poem, which animal carried “the greatest of them all”?

Please take the time to stop by my Facebook page, Love to Laugh and Learn, and tell me about any of the crafts or books that you shared with your children. I would love to see pictures too.

Related Posts:

The Santa Claus Debate
The True Meaning of Christmas
The Christmas Star
Love to Learn the Meaning of Candy Canes for Christmas
Review – Christmas on Monument Circle, Indianapolis

Save

Filed Under: Christmas, Holidays Tagged With: angels, christian, christmas, Christmas angels, Christmas symbols, December, family friendly, family friendly activities, fun learning, God, holiday, holidays, Jesus, love to laugh and learn, spiritual

The Christmas Star

December 14, 2011 by Mama Carmody 13 Comments

The Christmas Star


Christmas Star

The Christmas Star: A heavenly sign that the wise men were able to follow to find the birth place of Jesus

“Teach the children that the star is the heavenly sign of promise,” he said. “God sent a Savior to the world and the star was the sign of that promise being fulfilled. The countless shining stars in the heavens, one star for each person on earth, represents the hope of all mankind.” (A quote from the story, Teach the Children the True Meaning of Christmas)

Matthew 2:2b “We saw His star when it rose and have come
to worship Him.”

Matthew 2:9 “After they had heard the king, they went on their way,
and the star they had seen when it rose went ahead of them
until it stopped over the place where the child was.”

The Christmas Star and the Christmas Angel would take turns setting on the top of our Christmas tree. To me, both are important because each one announced the birth of God’s Son. Here are some different activities to use during this blessed holiday season as you remember the real reason for the season.

Finger Play

A Shining Star
(Action Rhyme)

On the very first Christmas night,
(Put hands together; lay head on hands as if sleeping.)
A wondrous star shone big and bright.
(Hold hands above head; move fingers like stars shining.)
It marked the spot where the baby lay,
(Pretend to rock baby.)
So kings and shepherds could come to pray.
(Fold hands and kneel.)
– Original Author Unknown

Crafts

Cinnamon Ornaments
Cinnamon ornaments were something that I made with my children when they were younger. Between Thanksgiving and Christmas we would make ornaments to give to family and friends as presents. They were always a big hit. This is a wonderful gift that also makes your house smell delicious. I am using the recipe from allrecipes.com because I have no idea where my recipe has gone.

Ingredients
1 cup ground cinnamon
1 tablespoon ground cloves
1 tablespoon ground nutmeg
3/4 cup applesauce
2 tablespoons glue

Directions
1. In a medium bowl, stir together the cinnamon, cloves, and nutmeg. Mix in the applesauce and glue. Work the mixture with your hands 2 to 3 minutes to form a ball. If mixture is too wet, add more cinnamon. If mixture is too dry, add more applesauce.
2. Lightly dust a clean surface with cinnamon. Roll out the dough to 1/4 inch thickness. Cut out shapes with cookie cutters, and use a toothpick or straw to make a hole at the top for hanging with a ribbon.
3. Dry in a slow oven 200 degrees F (100 degrees C) for several hours, or air dry in a sunny spot for 4 or 5 days. When dry, decorate with gingham and/ or ribbon.

Popsicle Star
I have created a lot of popsicle crafts in my time and enjoyed every one. This would be a good one if you have children of different ages. The older ones can create the stars and the younger ones can paint them and add sparkles or buttons to give it a little extra “shine”. Although I’m sure that some of the older children will want to add their own artistic touches to the stars. (This craft came from kaboose.com)

Materials Needed:
• 10 Popsicle sticks, coloured or plain
• Hot glue gun or ordinary glue
• Length of fishing line
• Paint or markers, glitter, etc.

Instructions:
1. Draw up a template of a star using craft sticks.
2. Place one stick inside one line then add some glue to the top. Position second stick on this.
3. Continue step 2 until all 10 sticks are in place.
4. Attach some fishing line to one point for hanging.
5. Decorate as desired. Using the colors yellow, gold, red and green make for a great Christmas star. Try different colors for theme parties, or use glow-in-the-dark paint for a magical bedroom at night.

Homemade Paper Stars
I recently found this ornament on the Family Fun website. I have never done this craft before but I can’t wait until my great-niece, nephews and grandkids are old enough to do this with them. It looks like it could get messy but sometimes messy is half the fun.

Materials Needed:
• 3 (9- by 12-inch) sheets of construction paper
• Blender
• Very hot water
• Folded cloth towel
• Plate
• 3-inch star-shaped cookie cutter
• Sieve
• Glitter
• Rag
• Baking sheet
• Ribbon loops

Instructions:
1. Tear 3 (9- by 12-inch) sheets of construction paper into small pieces, about the size of a domino, and place them in a blender. Pour in about 1 1/2 cups of very hot water and let it sit for 5 minutes. Meanwhile put a folded cloth towel on a plate, add a paper towel and top with a 3-inch star-shaped cookie cutter.
2. Heat the oven to 200 degrees. Pulse the blender until the mix is pulpy, about 30 seconds. Ina sieve set over the sink, drain the pulp, then spoon some into the cookie cutter to the top, taking care to fill the points. Sprinkle with glitter. Use a rag to press the pulp down into the cookie cutter until most of the water is gone, then gently push the star out onto a baking sheet. Repeat to make two more stars.
3. Bake them for 2 hours or until the moisture has evaporated (they should be firm and lightweight). Let the stars cool, the glue ribbon loops to the backs for hanging. Makes 3 stars.

Snacks

Here are a couple of healthier alternatives to cookies, as you are making crafts and reading books together.

Crispy Cheese Stars from FamilyFun.com
I love cheese so these look extra yummy to me.

Ingredients
• Flour tortillas
• Sliced cheese (cheddar, provolone, or mozzarella)
• Chili powder or paprika

Instructions:
1. Heat the oven to 350º. Use the larger cookie cutter to cut out stars from flour tortillas (about 5 per 10-inch tortilla). It’s easy for kids to do if you use a rolling pin to roll back and forth over the cutter. Bake the stars on a foil-covered cookie sheet for 5 minutes.
2. Use the smaller cookie cutter to cut out an equal number of cheese stars from the sliced cheese and place them atop the tortilla ones. Bake the stars for 2 more minutes or so until the cheese melts.
3. Sprinkle the stars with chili powder or paprika and let them cool before serving.

Star Fruit – A little fruit with your cheese is always a good thing.

Story Time

The Christmas Star Book & Advent Calendar by Marcus Pfister
Reading Level: Ages 4 – 8
Here is another great book from the author of “The Rainbow Fish”. The sparkling silver stars add so much to the illustrations. A wonderful story of how the shepherds, the Wise Men and even the animals followed the star to Bethlehem, where they welcomed the Holy Child.

Small Camel Follows the Star by Rachel W.N. Brown
Reading Level: Ages 3 to 8 yrs old
This is a sweet story of Small Camel’s first trip across the desert. It is a special trip to follow the, much sought after, star that leads the wise men to Bethlehem. Under the star they find the young King, in a very simple house. I love that this story in Biblically correct, in the fact that the wise men find the baby King, a few months later, in a house. (Matthew 2: 1- 12)

Song of the Stars: A Christmas Story
by Sally Lloyd-Jones
Reading Level: Ages 4 – 8
I love the way this story describes how all of creation was anticipating the arrival of our Savior. It talks of how the trees, the flowers and the animals were crying out, “It’s time. It’s time,” as the birth of Jesus drew near. This was a very different way to look at the Nativity scene. No shepherd, no wise men but all of creation celebrating: “Heaven’s Son sleeping under the stars that He made.”

Related Posts:

The Santa Claus Debate
The True Meaning of Christmas
Christmas Angels to Laugh and Learn With
Love to Learn About the Nativity
Love to Learn the Meaning of Candy Canes for Christmas
Review – Christmas on Monument Circle, Indianapolis

Filed Under: Christmas, Learning Activities Tagged With: christian, christmas, Christmas star, Christmas symbols, December, family friendly, family friendly activities, God, holiday, holidays, Jesus, love to laugh and learn, making learning fun, spiritual, star

Love to Laugh and Learn at the Apple Orchard

September 23, 2013 by Mama Carmody 24 Comments

Love to Laugh and Learn at the Apple Orchard


Learning experiences at the apple orchard can be so much fun. I like to incorporate a little learning in everything I do but I don’t want it to be heavy handed. I don’t want the kids to actually realize they are learning. All I want them to experience is fun.

There is so much learning that can happen at an apple orchard. The lessons can be complex, such as learning about how bees pollinate or the growing cycle of an apple. Or the lesson can be very simple, like learning that the apples in the grocery store actually grow on trees.

Today, we go for the simple. We are headed to the apple orchard with our 2 year old, great-nephew. I like to start learning opportunities with a book so we began by reading, “Picking Apples” by Gail Saunders-Smith. It was a great book for a young child; lots of pictures and a small amount of descriptive text. It describes picking apples from the tree to storing them in large wooden crates and finally trucking them everywhere. We were able to see the big wooden crates at the apple orchard; just like in the book!

We decided to head to Stuckey’s Farm today because they grow my husband’s favorite apples; McIntosh. When we arrive a gentleman gives us a basket and a bag to gather our apples in. Jeremiah wanted to carry the basket.

Love to Laugh and Learn at the Apple Orchard – Carrying the basket

We climbed onto a wagon behind a big tractor, to get a ride out to the area that the McIntosh apples were at.

Love to Laugh and Learn at the Apple Orchard – Riding on the Wagon

The first apple Jeremiah picked came right off the tree with no problem…

Love to Laugh and Learn at the Apple Orchard – Picking Apples

…but the next one wouldn’t let go so Uncle Pat stepped in to explain if you just turn the apple a couple of times, it will come right off the tree.

Love to Laugh and Learn at the Apple Orchard – Picking Apples with Uncle Pat

This only had to be explained once and then Jeremiah became an expert apple picker.

Love to Learn and Learn at the Apple Orchard – Picking Apples Collage

We finished our day up with a frozen apple cider slushie…

Love to Laugh and Learn at the Apple Orchard – Frozen Apple Cider Slushie

…and a special apple Bento meal. Bento meals come from Japan and are in divided boxes. They do some pretty creative things with food and I find them fun for kids. Jeremiah’s apple themed meal consisted of a peanut butter and apple butter sandwich, cut with an apple shaped cookie cutter. There were a couple of apple cars, made from apple slices and grapes, and some cooked carrots.

Love to Laugh and Learn at the Apple Orchard – Apple Bento Meal

We spent a little time at the playground before we left.

Love to Laugh and Learn at the Apple Orchard – Playing

Stuckey’s Farm is opening a new fun area called Adventure Acres. It consists of a 20′ tall tube slide, a barrel train pulled by a real tractor, pedals cars and more. We are going to have to go back and check that out, once it opens.

Learning Opportunities Jeremiah had at the Apple Orchard

1. That apples in the grocery store come from apple trees.

2. He got to see the big wooden crates the apples are stored in; just like we read about in the book.

3. He was able to watch a machine wash the apples then some workers sorted them and put them in bags.

4. He got the experience of receiving and following directions on how to get stubborn apples off the tree.

5. He was able to experience nature and enjoy climbing around and under the trees.

Future Learning Opportunities at the Apple Orchard

1. We can learn about bees because there is a beehive that you can safely observe from inside the orchard store.

Love to Laugh and Learn at the Apple Orchard – Bee Hive at Stuckey’s

2. We can learn about the life cycle of an apple tree; from seed to apple.

3. We can see how apple cider is made. They make their own apple cider. You can watch the machines make it and fill the bottles but they weren’t manufacturing any the day we were there.

4. We can take apples home and make applesauce and other recipes. Cooking has so many learning opportunities and it’s fun.

We had so much fun at the apple orchard. I can’t wait to go again. Have you been to an apple orchard? What did you like about your trip? Maybe you live in an area where you go to orange groves instead of apple orchards. I would love to hear about your experiences.

You can find more fun activities with apples on an earlier post called, “A is for Apple: You Can Learn More Than Your ABC’s from Apples”.

More Books about the Apple Orchard:

Out and About at the Apple Orchard by Diane Mayr
Reading Level: Ages 5 to 8 yrs old
This is a very good book that describes the activities that go on at an apple orchard. The book explains how the apples start as flowers and how the bees help the flowers change into fruit. Your child will learn about the many things the orchard workers need to do to help the apples grow. It is a fun little book. The pictures in this book are brightly drawn illustrations. Although, I prefer photo illustrations in books I am using for learning purposes, the drawings are quite adorable.

Related Posts:

Pumpkins are Orange; and Other Learning Concepts
A is for Apple: You Can Learn More Than Your ABC’s from Apples
Colors – Overview
Shapes – Overview
Fun with Music – Overview


Related Posts Plugin for WordPress, Blogger...

Filed Under: Attractions and Events, Learning Activities Tagged With: apple orchard, apples, family friendly, family friendly activities, family friendly events, fun learning, laugh, learning, learning fun, learning opportunities, love to laugh, love to laugh and learn, making learning fun, picking apples

  • 1
  • 2
  • 3
  • …
  • 10
  • Next Page »

Subscribe

  • Facebook
  • Pinterest
  • Twitter
  • Instagram

Don’t Miss This Great Book

Categories

  • Articles
  • Attractions and Events
  • Autumn/Fall
  • Children's Books
  • Christmas
  • Coloring Pages
  • Colors
  • Community Helpers
  • Contest
  • Cooking with Kids
  • eBundles
  • Gardening
  • Halloween
  • Holidays
  • Learning Activities
  • Music
  • Reviews
  • Sensory Bins
  • Shapes
  • Thanksgiving
  • Uncategorized

Follow Me on Bloglovin

Follow on Bloglovin
Subscribe via RSS

Recent Posts

  • Mother’s Day Memory Jar and Free Printable Card
  • Favorite Mother’s Day Handprint and Footprint Crafts
  • Dig into Gardening: Fun Activities, Science Projects, and Healthy Eating Tips
  • “Someone I Love Has Gone to Heaven”
  • Love to Learn about the Nativity
  • The Lame Valentine Sensory Bin
  • Hearts: Learning Activities for Shapes
  • Martin Luther King, Jr. Day Activities

Check This Out

Holiday Toy List – STEM Toys

Books

US Family Guide

USFamilyGuide.com

Recent Comments

  • Mama Carmody on Your Favorite Childhood Book
  • Lisa Smiley on Your Favorite Childhood Book
  • Harlow's Harvest on Eggs in a Nest: Cooking with Kids

Copyright © 2025 · Lifestyle Pro Theme on Genesis Framework · WordPress · Log in