Love to Laugh and Learn

Fun and interesting learning activities to do with the children in your life

  • Home
  • About Me
  • Attractions
  • Recipes
  • Privacy Policy

Love to Learn the Meaning of Candy Canes for Christmas

December 17, 2012 by Mama Carmody 5 Comments

Print Friendly, PDF & Email

Love to Learn the Meaning of Candy Canes for Christmas


Candy Canes: Although there may not have been any spiritual meaning to the candy cane when it was first introduced, Christians can find many symbols pointing us to Jesus from this simple Christmas treat. Some things to observe (taken, in part, from The History of the Candy Cane):

  1. Shaped like a Shepherd’s staff, which attended Jesus’ birth and Jesus is referred to as the Great Shepherd
  2. Turned upside-down it looks like the letter J for Jesus
  3. The candy is hard like the Solid Rock (Jesus) who is the foundation of the church
  4. The white of the candy represents the purity of Jesus
  5. The red represents His blood that was shed (for more on the candy cane be sure to go to The History of the Candy Cane)

“Teach the children that the cane represents The Shepherd’s staff. The crook on the staff helps bring back sheep that have strayed away from the fold. The candy cane represents the sweetness of giving not only at Christmas time, but also throughout the entire year. The spiral design is a symbol that we are, our brother’s keepers.” (A quote from the story, “Teach the Children the True Meaning of Christmas”)


Crafts
Poem
Snacks
Story Time
Related Posts

Crafts

Candy Canes with Beads and Pipe Cleaners

There are actually a couple of easy crafts to do with pipe cleaners. Have fun making them and decorating your Christmas tree or hanging them around the house. They also make great presents for kids to create and give to grandparents, aunts, uncles or other family and friends.

Materials Needed:  
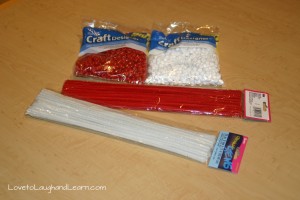
Materials for Pipe Cleaner Candy Cane Craft


White pipe cleaners
Red pipe cleaners
Red pony beads
White pony beads

Instructions:

1) Choose a pipe cleaner. It doesn’t matter if its red or white.
2) Pick a red bead and put it on the pipe cleaner. Loop the end of the pipe cleaner around this first bead to secure it so it won’t fall off.
3) Now take a white bead and slide it down on top of the red bead. Keep changing colors; next a red then a white, continuing the pattern.
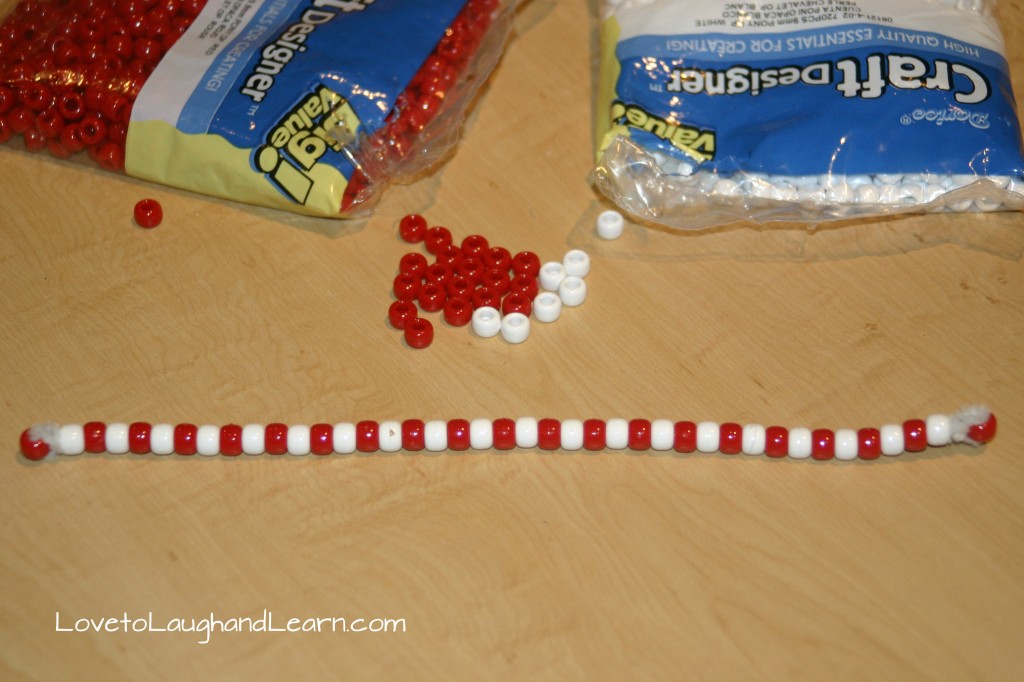
Candy Cane Craft

4) Once you have the pipe cleaner filled, be sure sure to wrap the end of the pipe cleaner around the last bead so it doesn’t fall off.
5) Then bend the top of the pipe cleaner over to make the hook part of the candy cane.
There you go…a beautiful candy cane to decorate with or give as a present.
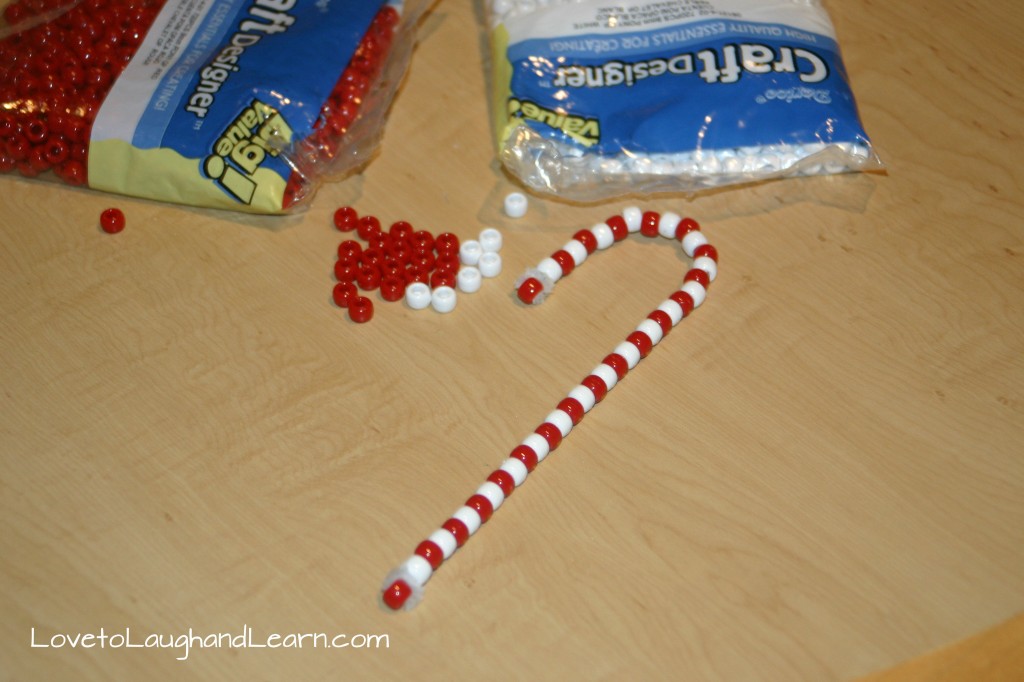
Finished Candy Cane Craft

Another simple candy cane craft:

1) Take one white and one red pipe cleaner.
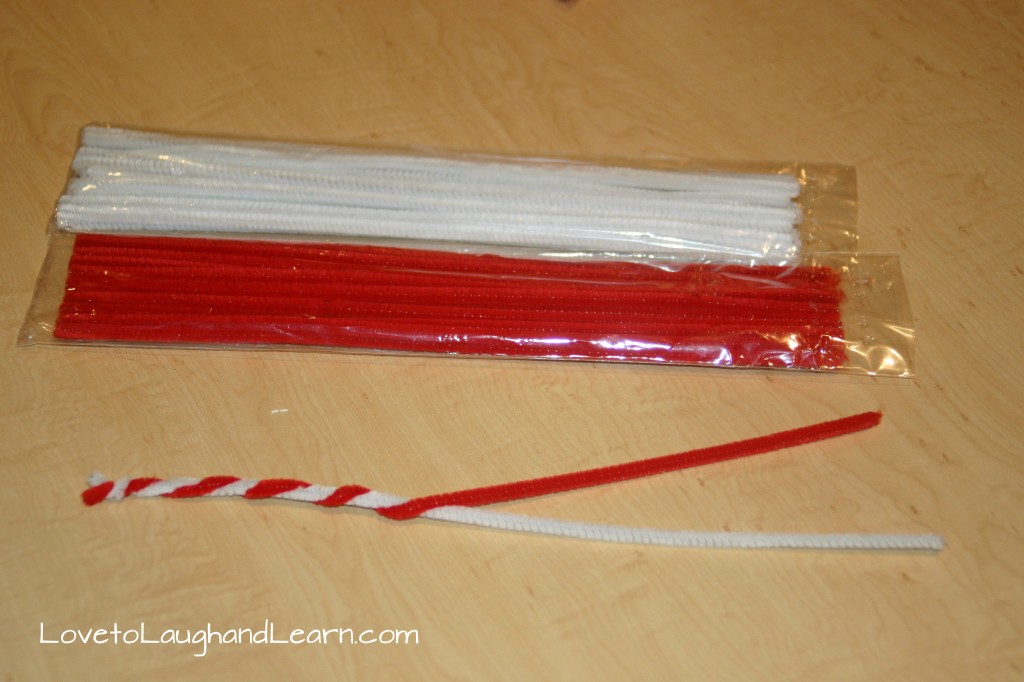
Candy Cane Craft with Pipe Cleaners

2) Simply twist them together.

3) Then bend the top of the pipe cleaners over to make the hook part of the candy cane.
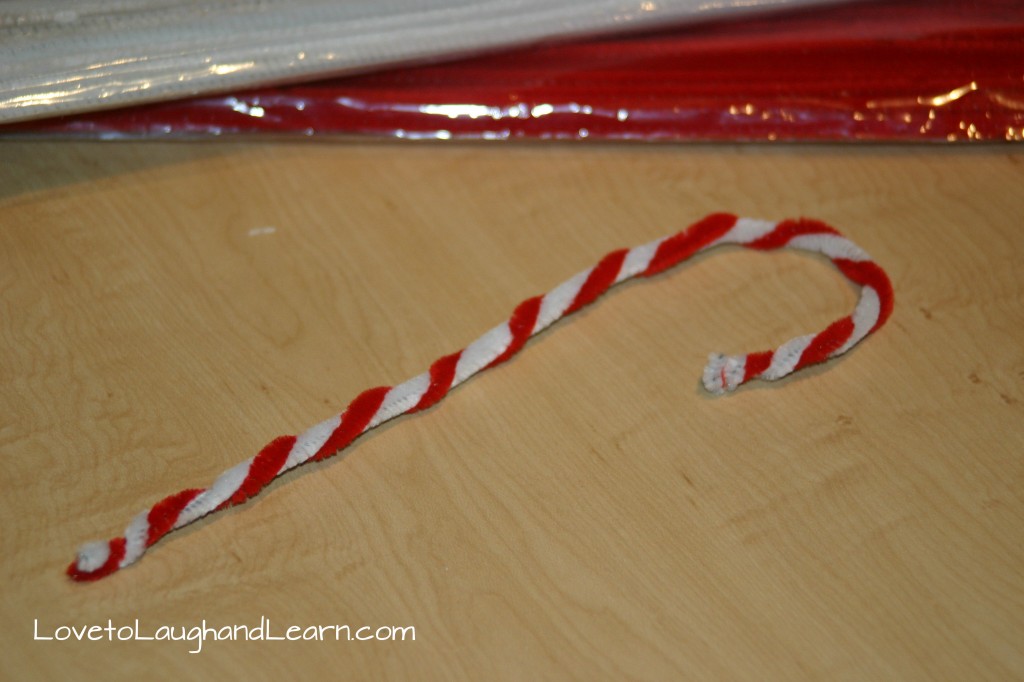
Candy Cane Craft with Pipe Cleaners
Candy Cane Pipe Cleaner Craft

(top)

Poem

I suggest giving each child a candy cane or use the pipe cleaner/bead candy cane as you recite the poem below.

Christmas Candy Cane Poem about Jesus

Look at the Candy Cane
What do you see?
Stripes that are red
Like the blood shed for me
White is for my Savior
Who’s sinless and pure!
“J” is for Jesus My Lord, that’s for sure!
Turn it around
And a staff you will see
Jesus my shepherd
Was born for Me!

(Poem found on ministry-to-children.com)

(top)

Foods for snack or meal time

I usually have a list of foods that would be great for snacks or meals but this topic makes for a rather limited variety of foods BUT I did find a great post, by Barbara Shelby. She has several ideas of things you can do with candy canes other than just eat them. For example, use them as stir sticks or smash them into pieces and use them in your favorite recipes. She even suggests crushing them into a fine powder and using them as a flavored sugar. For more detailed ideas go to her post, “Candy Canes and Peppermint Candy Ideas”.

Another fun way to incorporate candy canes into your meal time would be to make your child a Bento lunch. Bento meals are something new to me (thanks Pinterest). They are common in Japanese cuisine. One style of Bento meal is decorated to look like people, animals, buildings and monuments, or items like plants (or candy canes). Here are a few links to blogs that have candy cane bento meals. Maybe they will inspire you:

Candy Cane Bento by Glory’s Mischief
Candy Cane by Bento-logy
Bento Lunch: Candy Cane Cheese by Bento School Lunches

(top)

Story Time

  The Legend of the Candy Cane by Lori Walburg
Reading Level: 6 and up
This is a sweet story about a stranger that comes to a small town to open a store. The mayor hoped it was a doctor. The ladies hoped it was a tailor that would make beautiful dresses. The farmers hoped the man was a trader that would exchange their grain for goods. Can you guess what the children were hoping the store was? Yes, they were wishing for a candy store and their wish came true. The man had a strange candy that they hadn’t seen before. It had red and white stripes and it hooked on the end. Do you know what kind of candy it was? Read the story to find out more about this wonderful candy and its special meaning for Christmas.
**I put the reading level at 6 years old and above because one of the things the story talks about is Jesus dying on the cross and the red blood that He shed. I believe it is appropriate but I wanted to make sure you were aware of this part of the story. I read the story to my 4 and 5 year old preschool class but I was teaching at a Christian preschool.

(top)

Related Posts

The Santa Claus Debate
The True Meaning of Christmas
The Christmas Star
Christmas Angels to Laugh and Learn With
Love to Learn About the Nativity
Review – Christmas on Monument Circle, Indianapolis

(top)


Save

Save

Save

Filed Under: Christmas, Holidays Tagged With: Candy Cane, Candy Canes, christmas, Christmas symbols, December, educational activities, fun learning, holiday, holidays, laugh, learn, love, love to laugh, love to laugh and learn, love to learn, making learning fun

Christmas Angels to Laugh and Learn With

December 11, 2011 by Mama Carmody 28 Comments

Print Friendly, PDF & Email

Christmas Angels to Laugh and Learn With


Christmas Angels – Appeared to shepherds to announce the birth of Christ

Luke 2: 8-10 “And there were shepherds living out in the fields nearby, keeping watch over their flocks at night. An angel of the Lord appeared to them, and the glory of the Lord shone around them, and they were terrified. But the angel said to them, ‘Do not be afraid. I bring you good news that will cause great joy for all the people.’”

The Christmas Angels appeared in the sky, over the fields near Bethlehem. They announced the birth of Christ. You will usually find either an angel or a star on the top of a Christmas tree because of the importance of their appearances in the sky.

Following are some activities to do in relation to the angels. I hope you and the children in your life enjoy them.

Coloring Pages

If your child likes to color, here are a couple of free coloring pages from about.com
Angel coloring page
Cheerful Angel

Crafts:

Paper Plate Angels
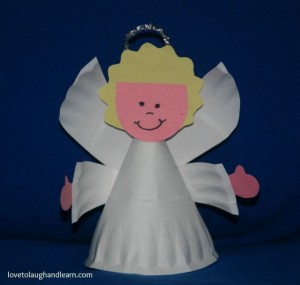
I just had to share these adorable little angels I found online. They are made from paper plates. Click on Paper Plate Angels to go to the link. The one thing that I didn’t see mentioned, in the instructions, was the size of the paper plate. I used a small 6-inch sized plate. It made an adorable little angel. I was very happy with the size. If you want to put it on top of a large Christmas tree, I would use a bigger paper plate.

Christmas Angels from a paper plate.

Hand Print Angel
I have used this craft in my preschool classrooms. The parents always adore them. I love hand print crafts because they become a piece of family history. Be sure to always date the back of any special craft your child does and put their name on it. It will make a great conversation piece as you decorate for Christmas, in later years.

1) Trace the child’s hand three times. Have them keep their fingers together. Don’t spread them out like a fan.
2) Cut out the hand prints.
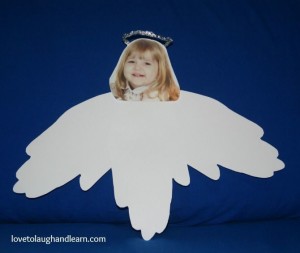
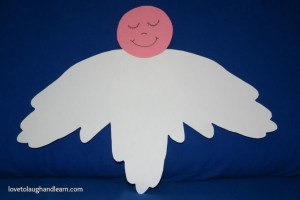
3) Use one hand print as the body of the angel and the other two as the wings. The wings will look the best if you be sure to place the hand prints so that the thumbs are facing down. (Refer to picture)

Christmas Angels made from hand prints

4) You can either cut out a circle to use for the head or you can use a picture of your child’s head. They both make nice looking angels.
5) As a final touch, (which I forgot to add to one of my samples) you can make a halo out of a silver or gold pipe cleaner or make one out of a piece of aluminum foil. To make the halo out of aluminum foil, cut off an 8 inch by 1 inch piece of aluminum foil. Gently squish and twist it. Then form it into a circle and tape it to the back of the angel’s head.

Christmas Angels from Handprint

Story Time

  “The Christmas Angel” by Hans Wilhelm
Reading Level: Ages 3 – 8
Your child will fall in love with this adorable little angel. All he wants to do is to travel from heaven down to earth; so he can sing his special song to the Son of God. But his wings are too small and he is not allowed to make the trip. Find out what happens to the scared little angel after his accidental fall off of a cloud.

“An Angel Came to Nazareth” by Anthony Knott
Reading Level: Ages 5 and up
This is a very interesting poem of an angel who came to a stable in Nazareth. The angel asks a camel, a donkey, a horse and an ox to pick which one of the four travelers they would carry. One of them would end up carrying “the greatest of them all.” Can you guess, before ever reading the poem, which animal carried “the greatest of them all”?

Please take the time to stop by my Facebook page, Love to Laugh and Learn, and tell me about any of the crafts or books that you shared with your children. I would love to see pictures too.

Related Posts:

The Santa Claus Debate
The True Meaning of Christmas
The Christmas Star
Love to Learn the Meaning of Candy Canes for Christmas
Review – Christmas on Monument Circle, Indianapolis

Save

Filed Under: Christmas, Holidays Tagged With: angels, christian, christmas, Christmas angels, Christmas symbols, December, family friendly, family friendly activities, fun learning, God, holiday, holidays, Jesus, love to laugh and learn, spiritual

Earth Day: Gardening with Children

April 14, 2015 by Mama Carmody 47 Comments

Print Friendly, PDF & Email

Earth Day: Gardening with Children

As Earth Day approaches, I want to share, with you, the joys of gardening with children. My love of gardening came from my father. He was raised on a farm in West Virginia, and although he married and became an electrical engineer, his love of the land never faded. As I was growing up, Dad and Mom always planted a garden. Sometimes it was small and other times it was huge. Digging in the dirt, playing with worms and watching the plants, start as small seedlings and grow large enough to produce the food for our table, was a treat. I will admit that the weeding and breaking bushel after bushel of green beans got a bit tedious at times; but the vegetables we grew in our garden were better than anything we bought at the store.

I don’t have the green thumb that my Dad and Mom have but I continue to try. A few years ago, because of several health issues my husband has, we decided to try our hand at organic gardening. We chose the Square Foot Gardening method, as taught by Mel Bartholomew. It can be a little expensive in the beginning but I love it because I don’t need a rototiller to break up the ground. It is always soft, loose and easy to work in. And since it’s so easy to work with, it makes gardening with children a breeze.

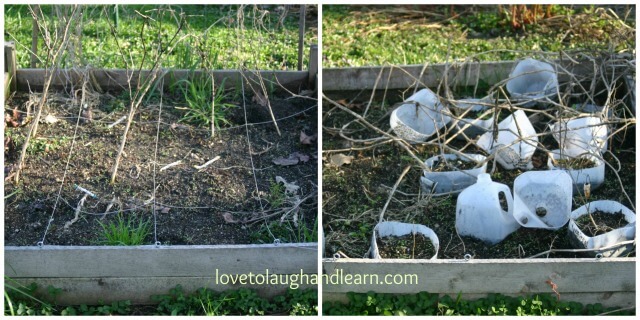
One of the areas I fail miserably at is having the time to take care of my garden the way it needs to be. I work full time and I live far enough from my workplace that I don’t have a lot of time to dedicate to gardening. It’s mid-April and this is what my garden currently looks like:

Gardening with Children: Garden Needs Work

I know, I was taught better than that. I should all ready have my onions and radishes in the ground. I was hoping to have my little helper (my great-nephew) last weekend but he and his mom were busy. Even though he wasn’t able to help me this past weekend, I can share the fun we had getting the garden ready two years ago.

Jeremiah was 21 months old, so as you can see, you can start gardening with your children when they are quite young. Here is one of the reasons that the Square Foot Gardening method works well when gardening with children; the dirt was so soft and loose that he was easily able to help me pull out weeds and old plants. He also helped me loosen the dirt by digging and raking. At first, he wasn’t too sure about getting dirt on his hands but the longer we worked the more he got into it. And I really mean he got INTO it! LOL!

Gardening with Children: Digging in the Garden

There is so much learning that can happen while gardening. Realizing that vegetables grow on plants before they get to the store can be a lesson in itself. You can discuss how worms and certain bugs help the garden while other bugs hurt it. Learning about weather, and how the garden needs rain and sunshine to grow, are other lessons. You might find that your child is willing to try different vegetables when they have had a hand in growing and caring for them. One unexpected thing you might find growing, while working in the garden with your child, is the bond between the two of you. So put on some old clothes, grab some rakes and shovels and start growing your own memories.

Gardening with Children: Lessons to learn and memories to make.

Filed Under: Articles, Holidays, Learning Activities Tagged With: Earth Day, gardening, gardening with children, gardening with kids, planting, plants

Thanksgiving Learning Activities

November 19, 2011 by Mama Carmody 42 Comments

Print Friendly, PDF & Email

Thanksgiving Learning Activities


“Give thanks to the Lord for He is good.
His loves endures forever.”
Psalm 118:1

Thanksgiving learning activities include a little history. There are several fun learning activities listed below to do while you are gathered together to celebrate this special holiday. I would really enjoy hearing about the fun you had creating pilgrims hats or reading any of the recommended books, so please leave a comment below. If you have pictures to share please post them on the Love to Laugh and Learn Facebook page.

Content:

Crafts
Hand and Foot Turkey Craft
Native American Indian Headband
Native American Indian Vest
Pilgrim Hat for Boys
Pilgrim Hat for Girls
Music
Reading
Toys

Toys

I love using “special” toys to get across a lesson. I had toys that were only gotten out occasionally for a specific lesson or time of year. These toys were not just left in the toy box or in the classroom. I kept them put up in special containers and only got them out at certain times and then they were put back up again. Following is a list of things that I used, in the classroom or at home, for the children to use to learn about the first Thanksgiving.

Horse Costume – I probably wouldn’t have called it a costume but that is what it is called on Amazon.com. It is a plush style horse. The child steps through the center and pulls straps, like suspenders, up over their shoulders. They used the horses when pretending to be Native American Indians. A stick horse would work well too.

Playmobil Native American Indians – Playmobil is made up of a lot of tiny parts, which is another reason why I kept them in a special container and only got them out for specific lessons. The children loved the Playmobil pieces and they promote fine motor skills.

Teepee Tent – A teepee tent adds a lot of fun to the children’s make-believe play. I purchased a big black plastic “cauldron” after Halloween to go with the teepee.

Dress-up Clothes Box – Both boys and girls love playing with dress up clothes. After Halloween is a great time to get items for your dress-up box. You can purchase costumes at very low prices. Be sure to pick up some Pilgrim and Native American Indian costumes to use at Thanksgiving time. There are some great dress-up items that you and your child can make together to add to the dress-up box. I will cover some of those in the craft section.

(top)

Crafts

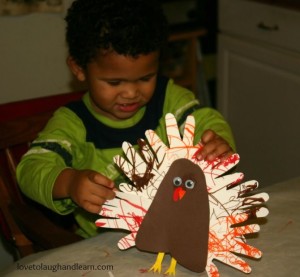
Thanksgiving Learning Activities: Have fun making turkeys from your child’s hands and feet.

Hand and Foot Turkey Craft

Materials Needed:
Construction Paper; brown, red, orange and yellow
Pencil
Scissors
Glue stick
Wiggly eyes (optional)

This is a fun craft that I got from enchantedlearning.com. This would be a good craft to first do with your child when they are two or three years old. You can then make a new “hand and foot turkey” each year and see how much your child has grown. They will make cute decorations for each Thanksgiving. Be sure to put your child’s name and the date on the back of the turkey. I would take it and have it laminated to help preserve it.

Native American Indian Vest

Materials Needed:
Large brown paper grocery bag
Scissors
Crayons or markers

These vests are very simple and a lot of fun. Cut the bag up the middle of one of the wide sides. Cut a neck hole out of the bottom of the bag and arm holes out of the narrow sides of the bag. Now set your child loose with some crayons or markers to decorate their vest. For older children, show them some Native American symbols. They might enjoy drawing them on their vest.

Native American Indian Headband

Materials Needed:
Brown poster board or cardstock
Construction paper; brown, orange, yellow, red
Feathers (optional)
Scissors
Glue stick
Tape or stapler

I use poster board or cardstock for the headband but I have also heard of people using a paper bag. You will want to cut a 2 inch wide strip that is long enough to wrap around the child’s head. Make sure to cut it an inch or two longer than the width of the child’s head so that you can overlap the ends and staple or tape them together. (Hint: If you staple the ends together, staple from the inside out; so that the folded part of the staple is on the outside. This will keep the staple from getting caught in the child’s hair.) Cut feather shapes out of some colored construction paper or purchase feathers at the craft store and attach them to the band.

Pilgrim Hat For Girls

Materials Needed:
12” x 18” white construction paper
White Ribbon or yarn
Scissors
Stapler and/or glue stick

This hat is enjoyed by little girls of all ages but there isn’t a whole lot for a real young child to do in helping make the hat. Once your child is old enough to use scissors and a stapler they will be able to contribute a little more in the making of this project. If you are doing this craft for a younger child I would add a step and let them use a glue stick and apply some glue to the flaps that will overlap on the back of the hat. I would still staple the flaps to give them extra holding power. As I stated earlier, staple from the inside out; so that the folded part of the staple is on the outside. This will keep the staple from getting caught in the child’s hair.

About.com has great instructions for the girl’s pilgrim hat along with a pattern so I’m going to give you their link to access the directions: Pilgrim Hat for Girls

Pilgrim Hat for Boys

Materials Needed:
black poster board or cardstock
Construction paper: black, white and yellow or gold

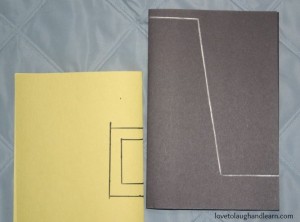
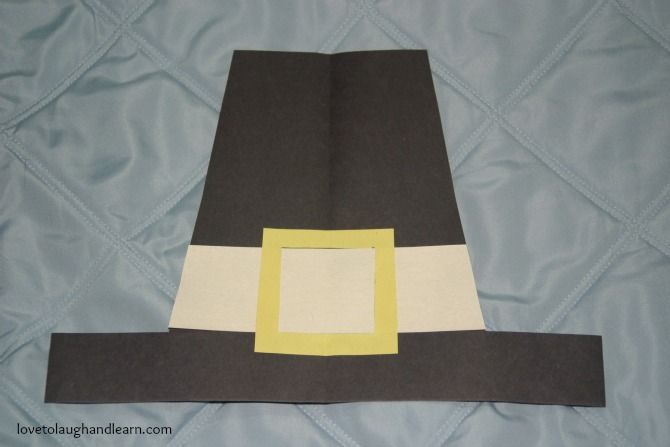
Thanksgiving Learning Activities: Creating Boy’s Pilgrim Hat

1) Cut a 2” wide headband, out of black poster board or cardstock, that is slightly larger than your child’s head.
2) Fold a 12″x 9″ piece of black construction paper in half. Draw half of a hat on the folded edge of the paper. I used a ruler to help me make straight lines. Make the brim 2″ wide.
3) Cut a 2” wide strip from a piece of white construction paper. Glue it just above the brim of the hat.
4) Cut 2 ½” x 2 ½” square from a yellow piece of construction paper. Cut a 2” by 2” square out of the center of the square. I again cut the square on a fold to make it easier to cut the center out.
5) Glue of staple the finished hat to the headband.
6) Tape or staple the headband to fit around your child’s head. Cut off any excess poster board.

Thanksgiving Learning Activities: Pilgrim’s Hat

(top)

Music

10 Little Indians

One little, two little, three little Indians
Four little, five little, six little Indians
Seven little, eight little, nine little Indians
Ten little Indian boys.

Ten little, nine little, eight little Indians
Seven little, six little, five little Indians
Four little, three little, two little Indians
One little Indian boy.

Gobble, Gobble
(Sung to “If you’re Happy & You Know It”)

“Gobble, gobble, gobble, gobble”, says the bird.
Mr. Turkey gobble-gobbles
And his head goes wobble-wobble
“Gobble, gobble, gobble, gobble”, says the bird.

Give Thanks to the Lord – Hide ‘em in Your Heart, Vol. 2 by Steve Green

(top)

Story Time

If You Were At The First Thanksgiving by Anne Kamma
Reading Level: Ages 7 and up
This is one of my favorite Thanksgiving books for teaching the history of the holiday. This book contains a whole lot of interesting information about the first Thanksgiving. It is well written. Although it is recommended for ages 7 and up, I read sections of it to my pre-kindergarten classes. It is written in a question/answer format which helps break up all the information into small “bite sized” pieces. This format makes it easy to cover a couple questions at a time or several if your child is really interested.

The Night Before Thanksgiving by Natasha Wing
Reading Level: Ages 4 and up
As the title might suggest, this book is written in the same style as Twas the Night Before Christmas. It is written in as amusing fashion of a family’s Thanksgiving Day from a child’s point of view. Lots of smile will ensue when sharing this book with your child.

‘Twas the Night Before Thanksgiving by Dav Pilkey
Reading Level: (officially) Ages 3 and up (but my recommendation would be 5 and up)
This is a quirky little story about a classroom of children that take a field trip to a turkey farm, the night before Thanksgiving. All is well until someone finds an axe and asks what it’s for. As you can imagine there were many tears over the realization of what was going to happen to their feathery friends. When the teacher and Farmer Mack Nuggett return from getting some water, to hopefully calm the children, they find “the children were calmer (and mysteriously fatter)”. You will need to read the story to find out what transpires but I will tell you that it is a happy ending. I wouldn’t recommend this for really young children, but once they start getting old enough to understand where their food comes from, it would be appropriate. Although this sounds like a dark tale, it is very light hearted. It is written in rhyme and the same style as “‘Twas the Night Before Christmas” It is one of my favorite fun Thanksgiving books. Each year I read it to my pre-kindergarten classes. I never had any bad reactions from the children (or the parents) just smiles and giggles.

(top)

Related Posts:

Thanksgiving Fun with Turkeys
A is for Apple: You Can Learn More Than Your ABC’s from Apples
Pumpkins are Orange; and Other Learning Concepts

Filed Under: Holidays, Thanksgiving Tagged With: educational activities, family friendly activities, fun learning, learn, learning, learning concepts, learning fun, learning opportunities, lessons, making learning fun, Thanksgiving, Thanksgiving learning activities

Review – Christmas on Monument Circle Indianapolis

December 10, 2012 by Mama Carmody 11 Comments

Print Friendly, PDF & Email

It has been several years since we headed downtown to check out the huge “Christmas tree” and decorations on Monument Circle, Indianapolis. We usually just drive around the circle, take in the sights and then move on. I am not a fan of the one way streets, the crowds and the parking situations so driving through is enough for me. But since it was 60 degrees outside, on this December 1st, and I wanted to gather information for my readers I grabbed my camera and we headed downtown for an adventure.

We did have trouble finding a parking spot and the closer you got to the Circle the worse the traffic was but we finally found an empty parking meter. Since it was after 9:00 p.m. we didn’t have to pay so that was nice.

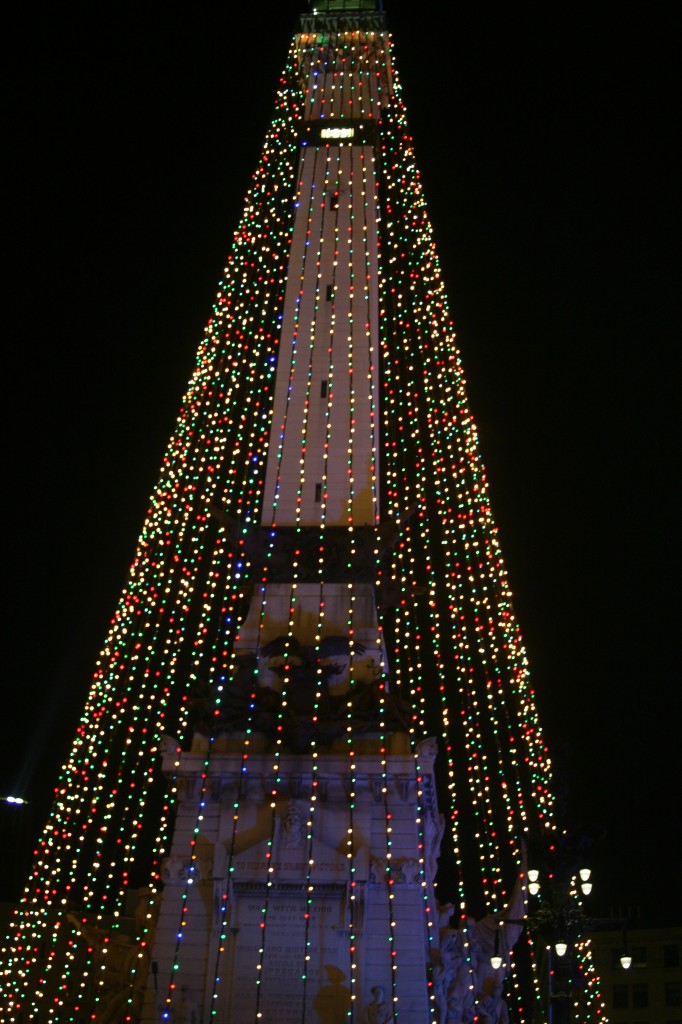
The “tree” was just as wonderful as I remembered it but I don’t know that it was worth parking and walking around the monument. There really wasn’t a lot there. Of course there was the tree, the large toy soldiers and sailors that stood along the edge of the monument and the beautiful Nativity scene in front of Christ Church Cathedral. I believe I would have enjoyed it just as much from my car window.

Christmas Tree at Monument Circle Indianapolis

I did find two reasons that you might want to get out of the car and walk around the Circle: The Rocket Fizz Soda Pop and Candy Shop and The Chocolate Café – The South Bend Chocolate Company. Both shops were open late on Saturday evening and had plenty of tasty treats to offer.

Since I like to include a little fun learning in my activities I wanted to share a few interesting facts I found in an article by Julie Sickel, a writer with the Indianapolis Star. The title of the article is “Here are 50 Facts Relating to the Long-Running Holiday Tradition”. I am going to list a few of my favorite facts but you should read the article to find the rest of them.

1. More than six miles of electrical wire and more than two miles of garland are used for the Circle of Lights.

2. There are 52 strands with 4,784 colored lights strung from the top of the monument to its base.

3. The colors of the bulbs represent different branches of the U.S. military: green for the Army, clear for the Air Force, blue for the Navy, yellow for the Coast Guard and red for the Marines.

4. There are 26 12-foot-tall toy soldiers and sailors and 26 10-foot-tall peppermint sticks surrounding the Circle. (This would be a great counting opportunity for your kids)

5. The ceremony’s most revered annual guest is Santa Claus, who arrives after the lights are switched on.

6. The switch to light the Monument is flipped by a child 12 or younger.

7. For more than two decades, the lucky child has been chosen through a coloring contest.

8. At 284 feet tall, the Soldiers and Sailors Monument is about 21 feet shorter than the Statue of Liberty and 16 feet short of a football field.

9. The Soldiers and Sailors Monument is the largest in the nation to be dedicated to the common soldier.

10. The 38-foot-tall bronze figure atop the statue is named “Victory” but also is called “Miss Indiana” by Hoosiers. She faces south to welcome soldiers returning from battle.

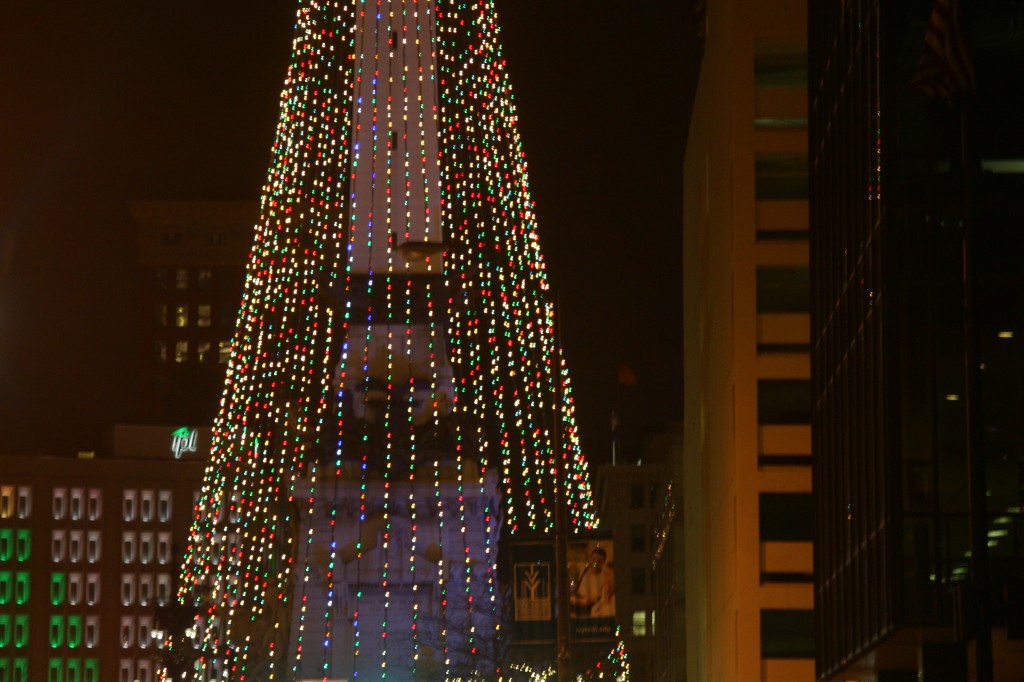
Here is a fun observation my daughter made when she was about 10 years old and I still see it every time we go to see the Christmas lights. (I’m going to give you some hints before I tell you what we actually saw. I want to give you a chance to see if you see the same thing we did.)

  • As we drove towards the Circle my daughter kept saying that she saw a certain character from the Rudolph the Red-Nosed Reindeer television special created by Rankin/Bass. I looked all around and couldn’t find it. I thought it was a character at the foot of the tree or in a store window. As it turns out, it was an illusion created by looking at the monument through the lights. Take a look at the picture below and see if you can figure out what character we see. Leave a comment as to who you think it is. Once you have made your guess you can click on the picture to see who the character is that we see.
Do you see a character from Rudolph the Red-Nosed Reindeer?

If you don’t see what we saw, then click on the picture below. I have created an overlay of the character on the portion of the monument that we saw it. See if that helps you see it when you look back at the Monument picture.

Do you see a character from Rudolph the Red-Nosed Reindeer?

So can you see him too or do my daughter and I just have vivid imaginations? If you take a drive downtown to look at the lights please leave a comment and let me know if you saw him. We usually see him as we are driving towards the Circle not once we are really close to it. Have fun enjoying the sights, lights and fun this holiday season.

You might also like:

Review: Christmas at the Indianapolis Zoo

Filed Under: Christmas, Holidays, Reviews Tagged With: christmas, December, family friendly, family friendly activities, family friendly events, holiday, holidays, Indiana, Indianapolis, laugh, learn, love, love to laugh, love to laugh and learn, love to learn, Monument Circle, santa, santa claus, tree of lights

  • « Previous Page
  • 1
  • 2
  • 3
  • 4
  • 5
  • Next Page »

Subscribe

  • Facebook
  • Pinterest
  • Twitter
  • Instagram

Don’t Miss This Great Book

Categories

  • Articles
  • Attractions and Events
  • Autumn/Fall
  • Children's Books
  • Christmas
  • Coloring Pages
  • Colors
  • Community Helpers
  • Contest
  • Cooking with Kids
  • eBundles
  • Gardening
  • Halloween
  • Holidays
  • Learning Activities
  • Music
  • Reviews
  • Sensory Bins
  • Shapes
  • Thanksgiving
  • Uncategorized

Follow Me on Bloglovin

Follow on Bloglovin
Subscribe via RSS

Recent Posts

  • The American Flag and Its Hidden Message
  • Celebrating Flag Day
  • Celebrating the 4th of July with Children
  • “Someone I Love Has Gone to Heaven”
  • Memorial Day for Kids: Fun Activities That Teach Honor and Respect
  • Memorial Day Learning Activities
  • Dig into Gardening: Fun Activities, Science Projects, and Healthy Eating Tips
  • Police Officers: Love to Learn About Community Helpers

Check This Out

Holiday Toy List – STEM Toys

Books

US Family Guide

USFamilyGuide.com

Recent Comments

  • Mama Carmody on Your Favorite Childhood Book
  • Lisa Smiley on Your Favorite Childhood Book
  • Harlow's Harvest on Eggs in a Nest: Cooking with Kids

Copyright © 2025 · Lifestyle Pro Theme on Genesis Framework · WordPress · Log in