Love to Laugh and Learn

Fun and interesting learning activities to do with the children in your life

  • Home
  • About Me
  • Attractions
  • Recipes
  • Privacy Policy

Thanksgiving Fun with Turkeys

November 23, 2013 by Mama Carmody 7 Comments

Thanksgiving Fun with Turkeys

Let’s have some fun with turkeys. Why is it that the turkey has become a symbol of Thanksgiving? The turkey probably was part of the first Thanksgiving meal along with deer, several types of seafood and many fruits and vegetables. Wild turkeys are found in 49 of the 50 United States. Alaska is the only state where they are not found. The fact that they are so wide spread across our nation is probably why they are a common symbol to our Thanksgiving.

Below are some fun activities to do with turkeys during this Thanksgiving holiday.

Fun Time
Fun with Food
Craft
Story Time
Related Posts

Fun Time

Since it’s almost Thanksgiving, I thought it would be fun to have a turkey themed day with my 2 year old great-nephew. We started out with a movie. The movie was Free Birds. It’s a story of turkeys that travel back in time, to the first Thanksgiving, to try to get turkeys off the menu. Although it is currently in movie theaters (November 2013), it might be on DVD by the time you are reading this. I would recommend watching it. It was a fun addition to our turkey themed day.

Right before naptime we read Turkey Trouble by Wendi Silvano. I love including books in our fun time. This turkey was also trying to find ways to not be included in the Thanksgiving festivities. I loved some of his disguises. I have more suggestions of fun turkey books below in my Story Time section.

(top)

Fun with Food

You can find all kinds of fun turkey themed bento meals on Pinterest. If you aren’t familiar with Bento meals, they are artistically crafted foods that are popular in Japan. If you are on Pinterest, you can find several fun ideas by clicking here. I was especially inspired by the one I found on Creative Food. I adapted their idea to get this:
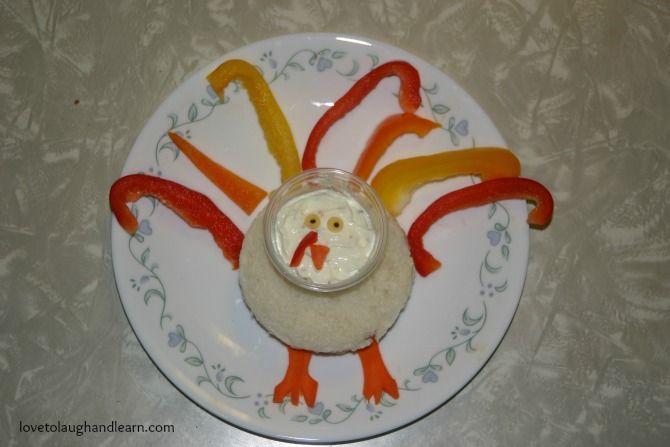
Fun with Turkeys: Bento style Turkey Sandwich with colored pepper tail and ranch dip

1. For the body, I made a turkey sandwich and cut it out with a circle cookie cutter.

2. I had purchased a package of 2 oz. portion cups (like the ones you might get butter or single servings of dressing in with your take-out food) at Costco. I used one of those for the head. I put some ranch dip in it.

3. We then cut eyes from a piece of American cheese with a straw. I used edible food markers to make the pupils in the eyes.

4. I cut the beak and feet out of carrot pieces.

5. I used a small piece of red pepper for the snood. (The snood is the fleshy piece that grows from a turkey’s forehead and hangs over it’s beak)

6. For the turkey’s tail feathers I cut thin slices of red, orange and yellow peppers.

The meal was a hit! Everyone gobbled it down (pun intended).
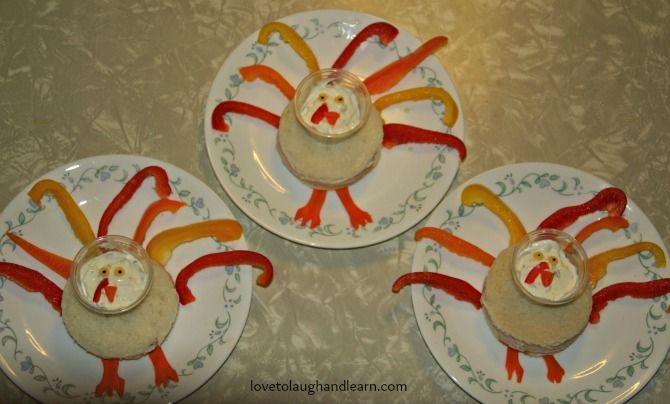
Fun with Turkeys: Turkey Bento Meals

(top)

Craft

When I taught preschool, I would do this craft with my classes. I originally found it on Enchanted Learning. You use the child’s hands and feet to make the turkey. The original instructions say to use colored construction paper for the parts but my daughter inspired me to do something different. Read the instructions below to find out how to make this special Thanksgiving turkey and a fun memory of little hands and feet.

Hands & Feet Turkey
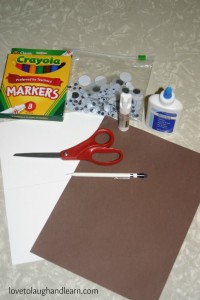
Fun with Turkeys: Materials Needed for Hands and Feet Turkey

Materials Needed:

Markers, crayons or paint
White cardstock
Brown construction paper
Wiggly eyes
Pencil
Glue
Scissors


Instructions:

1. Trace the child’s feet on the brown construction paper. Yes, both feet.

2. Cut out the feet. (I got my great-nephew started on the next part before I cut out the feet so he had something to do.)

3. Trace the child’s hands on the white cardstock. You will need 3 sets of hands (Since my great-nephew’s hands are small I was able to get a set of hands on a half piece of paper.)

4. I chose fall colors for the feathers (the fingers become the feathers). We used orange, red and brown. At first I gave Jeremiah the half sheet of paper, without cutting out his hands, for him to color. Since he is only 2 yrs old, I figured he would scribble more than actually color.
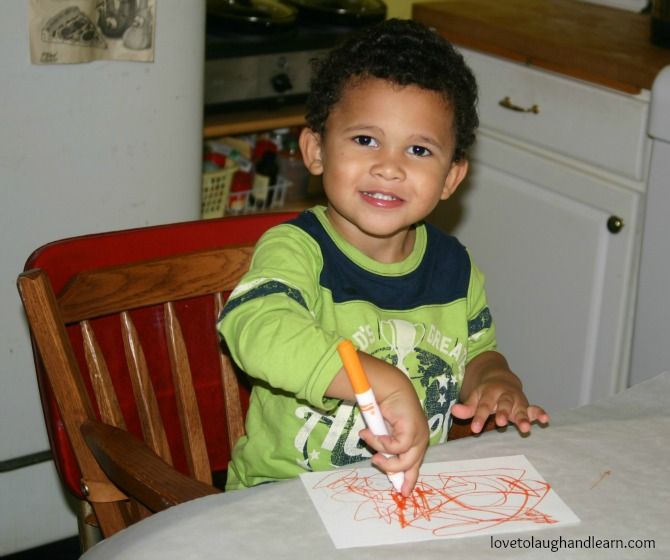
Fun with Turkeys: Hands and Feet Turkey Craft

Then he started coloring real intently on one corner.
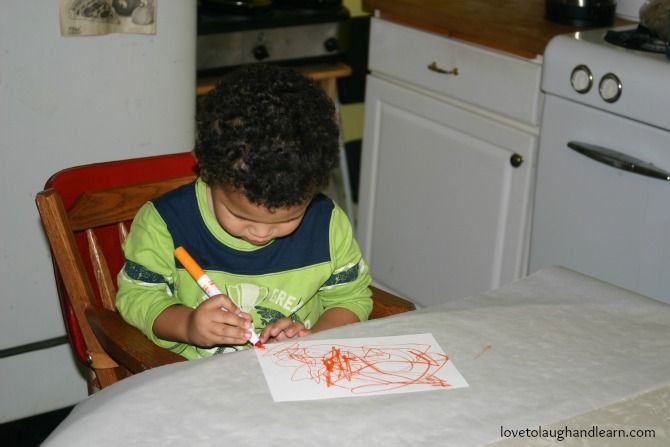
Fun with Turkeys: Coloring

I decided to cut the hands out so he didn’t waste time working so hard on a piece that would get cut off and thrown away. Here he is working on one of the fingers.
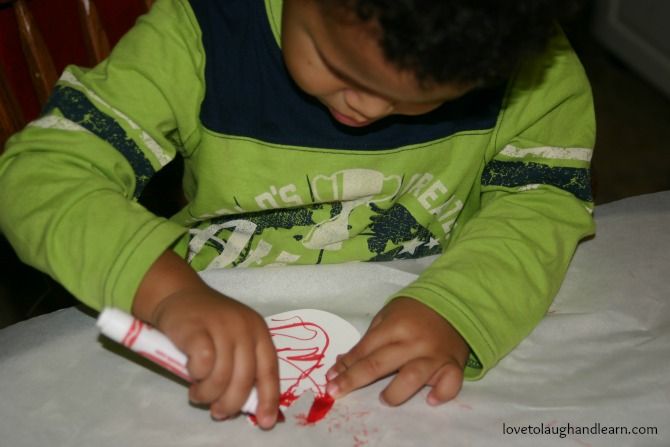
Fun with Turkeys: Hands and Feet Turkeys

I would give him one color for each set of hands.
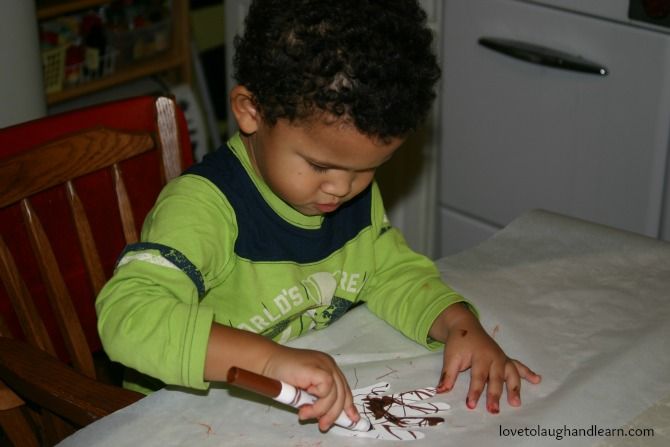
Fun with Turkeys: Hands and Feet Turkey Craft

5. Jeremiah helped me glue the feet together to make the body and then we arranged the hands to make the tail feathers.

6. Finally, we glued on the eyes.

7. I would recommend putting the child’s name and date on the back of the turkey. We took ours and had it laminated. I had to take the eyes off so we could laminate it but then we glued them right back on.

Here is Jeremiah and his prize turkey. I would recommend doing this activity every Thanksgiving, while they are little, just to see how much they grow from year to year.
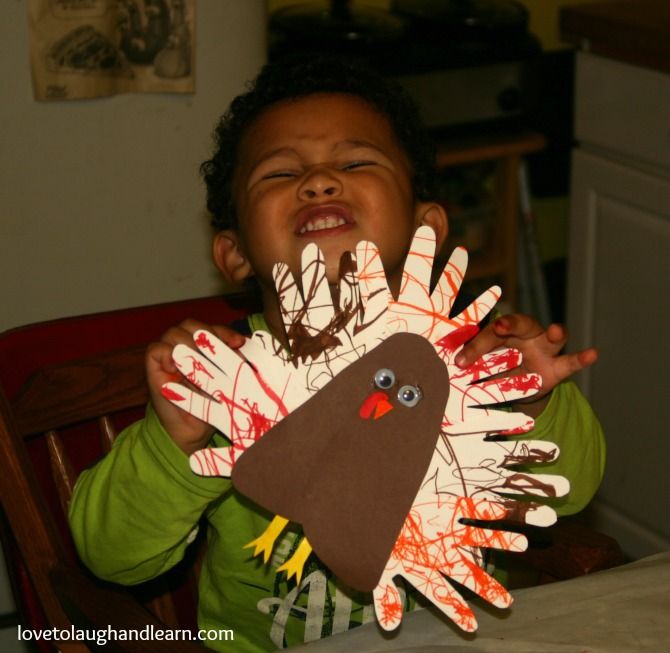
Fun with Turkeys: Hands and Feet Turkey Craft

(top)

Story Time

10 Fat Turkeys by Tony Johnston
Reading Level: 3 to 5 yrs old
This book doesn’t have anything to do with Thanksgiving but since turkeys are closely associated with Thanksgiving I thought this would be a fun book to include. The story starts out with 10 fat turkeys “fooling” on a fence. There are lots of funny words such as, “Gobble, Gobble, Wibble, Wobble” and lot of silly antics out of the turkeys. This will be smiles and giggles to your little one..and a few from you too.

Gus, the Pilgrim Turkey by Teresa Bateman
Reading Level: Ages 4 to 8 yrs old
Gus loved being a turkey and loved living on the farm until one day his friends told him some sad news. Gus was looking forward to playing in the snow and celebrating the New Year until his friends told him that turkeys usually don’t make it to the New Year. When his friends shared with him that turkey is one of the main items to eat for Thanksgiving he decided it was time to leave the farm. He travels far and wide to find a safe place to live. As he finds a new safe place to live he comes to the realization that he is now a Pilgrim. Pick up this fun little book for a light spirited look at Thanksgiving and the deeper definition of a pilgrim.

A Plump And Perky Turkey by Teresa Bateman
Reading Level: Ages 4 to 8 yrs old
The people of Squawk Valley really wanted turkey for their Thanksgiving dinner but they couldn’t find one anywhere. The turkeys around Squawk Valley had become quite smart and learned to hide when Thanksgiving was near. The townspeople decided to trick the turkeys by having a special art event that featured turkeys. They posted signs all over the forest saying they were looking for a plump and perky turkey to be their model for the different art projects. Pete the turkey saw the poster and believed he could help out so he went to model for the special event. So Pete posed while the townsfolk created their turkey art. Everyone was excited because now they were going to be able to catch Pete and have him for their Thanksgiving dinner. Pick up this fun little book to see if the townspeople get to eat turkey for dinner or if Pete gets away.

Run, Turkey, Run! by Diane Mayr
Reading Level: Ages 3 to 7 yrs old
If you aren’t ready for your child to understand that the turkey we eat at Thanksgiving is a live animal, before we get it, then avoid this story. It is not a morbid, overly detailed, story but the fact that the other farm animals keep telling the turkey to run and the farmer is chasing him through the whole story means you will probably have to have the discussion. It’s actually a cute little story. The turkey tries to roll in the mud with the pigs and swim in the lake with the ducks in order to hide from the farmer. In the end, the farmer and his family eat grilled cheese sandwiches with peas and mashed potatoes. Have fun with the story of the turkey who got away.

Too Many Turkeys by Linda White
Reading Level: Ages 5 yrs old and up
This is not a Thanksgiving story but it is a cute turkey story. Fred and Belle have a tiny farm that they take very good care of. One day a baby turkey, which is called a poult, wanders onto their farm. Belle is not very excited about the idea but Fred says he will take care of the little turkey. The turkey ends up being a great benefit to the little farm until too many of his friends show up. Pick up this book and find out how having a turkey on the farm was helpful although a little stressful at times.

A Turkey for Thanksgiving by Eve Bunting
Reading Level: Ages 5 to 8 yrs old
Mr. & Mrs. Moose are getting the table set for Thanksgiving. They are very excited to have all of their friends over but there is one thing that is making Mrs. Moose sad; there is no turkey for Thanksgiving. Mr. Moose wants to do what he can to make this a special Thanksgiving so he heads out to find a turkey. Pick this book up to find out what happens when Mr. Moose finally finds a turkey, it might surprise you.

Turkey Trouble by Wendi Silvano
Reading Level: Ages 3 to 7 yrs old
If you aren’t ready for your child to learn that the meat on the table comes from live animals, it would probably be best to skip this book. Other than possibly needing to have that conversation, this book is adorable. Turkey is in trouble because Thanksgiving is almost here and he is the main course. He tries several disguises to hide from the farmer. In the end, he comes up with a fantastic substitution for turkey. Pick up this book and share it with your child to find out what the farmer’s family has to eat this Thanksgiving.

  Turkeys on the Family Farm (Animals on the Family Farm) by Chana Stiefel
Reading Level: Ages 5 to 8 yrs old
This is a wonderfully informative book about turkeys. Your child will get to see actual pictures of turkeys. They will learn how turkeys are raised and cared for, on an organic farm. They will learn the different terms used when referring to turkeys such as tom, hen, jake or poult. This is a great book to get some basic information about turkeys.

Turkeys That Fly and Turkeys That Don’t (Rookie Read-About Science) by Allan Fowler
Reading Level: Ages 3 to 7 yrs old
Your child will learn a lot of fun facts about turkeys. Even I found it interesting as to why some turkeys fly and some don’t. There are lots of pictures of wild turkeys and domestic turkeys so your child can see the difference. I enjoyed learning about the similarities and differences between wild and domestic birds, I’m sure your child will too.

(top)

Related Posts

Thanksgiving Learning Activities
Pumpkins are Orange; and Other Learning Concepts

(top)

Filed Under: Holidays, Learning Activities, Thanksgiving Tagged With: educational activities, fun learning, fun with turkeys, holiday, holidays, learn, learning, learning fun, learning opportunities, love to laugh, love to laugh and learn, love to learn, making learning fun, Thanksgiving, turkey, turkeys

Love to Learn the Meaning of Candy Canes for Christmas

December 17, 2012 by Mama Carmody 5 Comments

Love to Learn the Meaning of Candy Canes for Christmas


Candy Canes: Although there may not have been any spiritual meaning to the candy cane when it was first introduced, Christians can find many symbols pointing us to Jesus from this simple Christmas treat. Some things to observe (taken, in part, from The History of the Candy Cane):

  1. Shaped like a Shepherd’s staff, which attended Jesus’ birth and Jesus is referred to as the Great Shepherd
  2. Turned upside-down it looks like the letter J for Jesus
  3. The candy is hard like the Solid Rock (Jesus) who is the foundation of the church
  4. The white of the candy represents the purity of Jesus
  5. The red represents His blood that was shed (for more on the candy cane be sure to go to The History of the Candy Cane)

“Teach the children that the cane represents The Shepherd’s staff. The crook on the staff helps bring back sheep that have strayed away from the fold. The candy cane represents the sweetness of giving not only at Christmas time, but also throughout the entire year. The spiral design is a symbol that we are, our brother’s keepers.” (A quote from the story, “Teach the Children the True Meaning of Christmas”)


Crafts
Poem
Snacks
Story Time
Related Posts

Crafts

Candy Canes with Beads and Pipe Cleaners

There are actually a couple of easy crafts to do with pipe cleaners. Have fun making them and decorating your Christmas tree or hanging them around the house. They also make great presents for kids to create and give to grandparents, aunts, uncles or other family and friends.

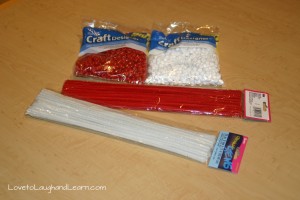
Materials Needed:  

Materials for Pipe Cleaner Candy Cane Craft


White pipe cleaners
Red pipe cleaners
Red pony beads
White pony beads

Instructions:

1) Choose a pipe cleaner. It doesn’t matter if its red or white.
2) Pick a red bead and put it on the pipe cleaner. Loop the end of the pipe cleaner around this first bead to secure it so it won’t fall off.
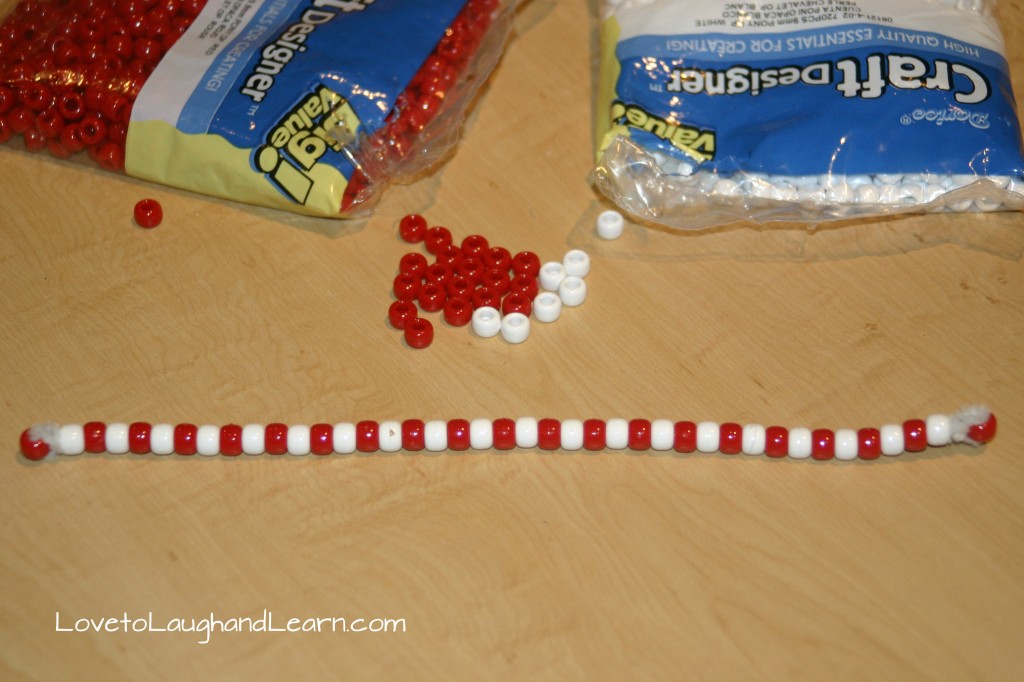
3) Now take a white bead and slide it down on top of the red bead. Keep changing colors; next a red then a white, continuing the pattern.

Candy Cane Craft

4) Once you have the pipe cleaner filled, be sure sure to wrap the end of the pipe cleaner around the last bead so it doesn’t fall off.
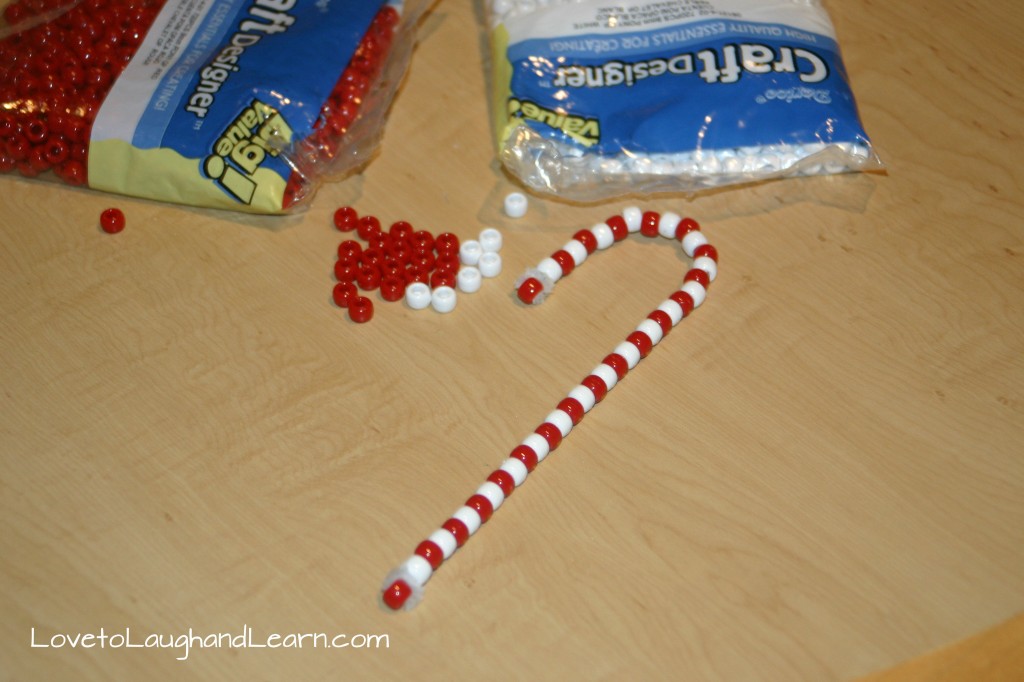
5) Then bend the top of the pipe cleaner over to make the hook part of the candy cane.
There you go…a beautiful candy cane to decorate with or give as a present.

Finished Candy Cane Craft

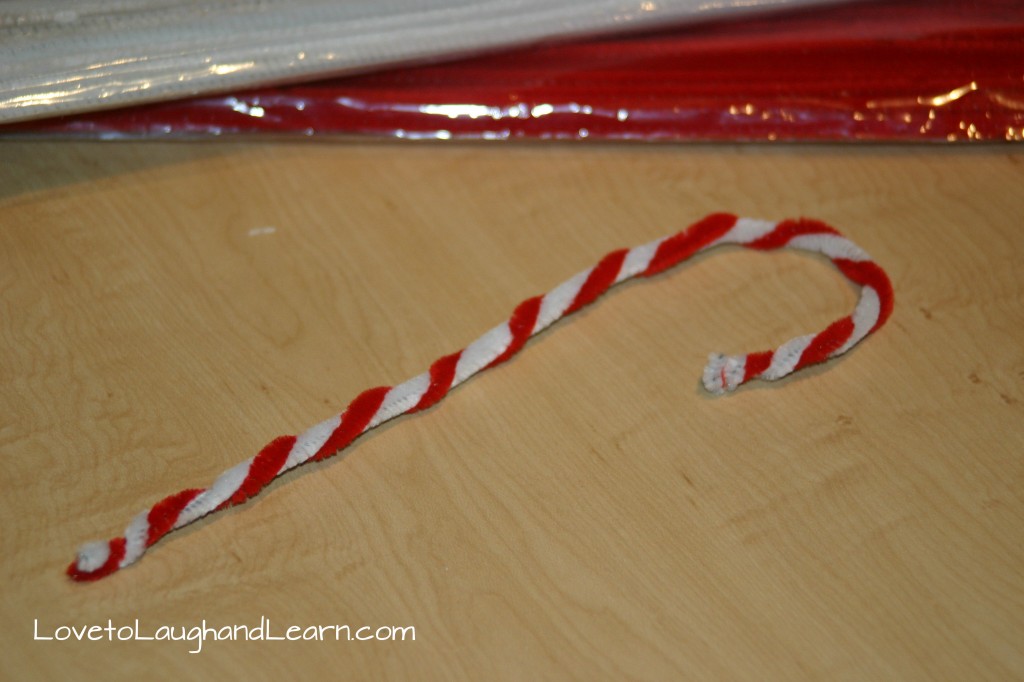
Another simple candy cane craft:

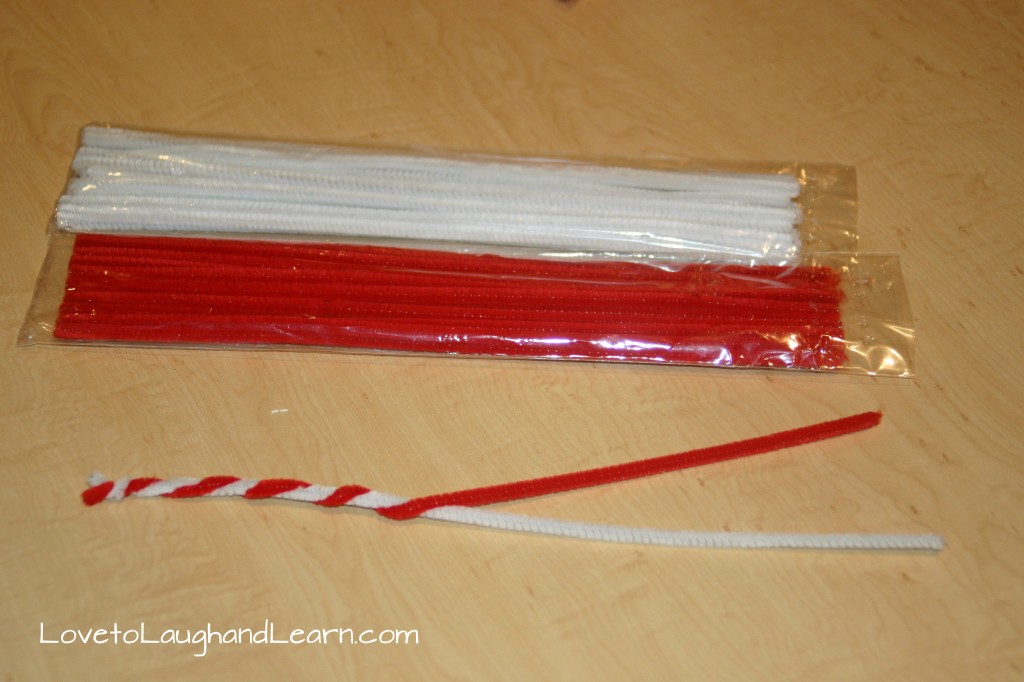
1) Take one white and one red pipe cleaner.

Candy Cane Craft with Pipe Cleaners

2) Simply twist them together.

3) Then bend the top of the pipe cleaners over to make the hook part of the candy cane.

Candy Cane Craft with Pipe Cleaners
Candy Cane Pipe Cleaner Craft

(top)

Poem

I suggest giving each child a candy cane or use the pipe cleaner/bead candy cane as you recite the poem below.

Christmas Candy Cane Poem about Jesus

Look at the Candy Cane
What do you see?
Stripes that are red
Like the blood shed for me
White is for my Savior
Who’s sinless and pure!
“J” is for Jesus My Lord, that’s for sure!
Turn it around
And a staff you will see
Jesus my shepherd
Was born for Me!

(Poem found on ministry-to-children.com)

(top)

Foods for snack or meal time

I usually have a list of foods that would be great for snacks or meals but this topic makes for a rather limited variety of foods BUT I did find a great post, by Barbara Shelby. She has several ideas of things you can do with candy canes other than just eat them. For example, use them as stir sticks or smash them into pieces and use them in your favorite recipes. She even suggests crushing them into a fine powder and using them as a flavored sugar. For more detailed ideas go to her post, “Candy Canes and Peppermint Candy Ideas”.

Another fun way to incorporate candy canes into your meal time would be to make your child a Bento lunch. Bento meals are something new to me (thanks Pinterest). They are common in Japanese cuisine. One style of Bento meal is decorated to look like people, animals, buildings and monuments, or items like plants (or candy canes). Here are a few links to blogs that have candy cane bento meals. Maybe they will inspire you:

Candy Cane Bento by Glory’s Mischief
Candy Cane by Bento-logy
Bento Lunch: Candy Cane Cheese by Bento School Lunches

(top)

Story Time

  The Legend of the Candy Cane by Lori Walburg
Reading Level: 6 and up
This is a sweet story about a stranger that comes to a small town to open a store. The mayor hoped it was a doctor. The ladies hoped it was a tailor that would make beautiful dresses. The farmers hoped the man was a trader that would exchange their grain for goods. Can you guess what the children were hoping the store was? Yes, they were wishing for a candy store and their wish came true. The man had a strange candy that they hadn’t seen before. It had red and white stripes and it hooked on the end. Do you know what kind of candy it was? Read the story to find out more about this wonderful candy and its special meaning for Christmas.
**I put the reading level at 6 years old and above because one of the things the story talks about is Jesus dying on the cross and the red blood that He shed. I believe it is appropriate but I wanted to make sure you were aware of this part of the story. I read the story to my 4 and 5 year old preschool class but I was teaching at a Christian preschool.

(top)

Related Posts

The Santa Claus Debate
The True Meaning of Christmas
The Christmas Star
Christmas Angels to Laugh and Learn With
Love to Learn About the Nativity
Review – Christmas on Monument Circle, Indianapolis

(top)


Save

Save

Save

Filed Under: Christmas, Holidays Tagged With: Candy Cane, Candy Canes, christmas, Christmas symbols, December, educational activities, fun learning, holiday, holidays, laugh, learn, love, love to laugh, love to laugh and learn, love to learn, making learning fun

Christmas Angels to Laugh and Learn With

December 11, 2011 by Mama Carmody 28 Comments

Christmas Angels to Laugh and Learn With


Christmas Angels – Appeared to shepherds to announce the birth of Christ

Luke 2: 8-10 “And there were shepherds living out in the fields nearby, keeping watch over their flocks at night. An angel of the Lord appeared to them, and the glory of the Lord shone around them, and they were terrified. But the angel said to them, ‘Do not be afraid. I bring you good news that will cause great joy for all the people.’”

The Christmas Angels appeared in the sky, over the fields near Bethlehem. They announced the birth of Christ. You will usually find either an angel or a star on the top of a Christmas tree because of the importance of their appearances in the sky.

Following are some activities to do in relation to the angels. I hope you and the children in your life enjoy them.

Coloring Pages

If your child likes to color, here are a couple of free coloring pages from about.com
Angel coloring page
Cheerful Angel

Crafts:

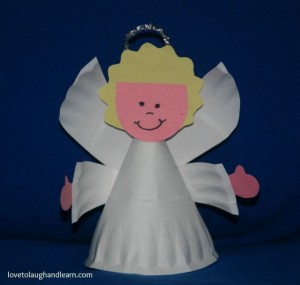
Paper Plate Angels
I just had to share these adorable little angels I found online. They are made from paper plates. Click on Paper Plate Angels to go to the link. The one thing that I didn’t see mentioned, in the instructions, was the size of the paper plate. I used a small 6-inch sized plate. It made an adorable little angel. I was very happy with the size. If you want to put it on top of a large Christmas tree, I would use a bigger paper plate.

Christmas Angels from a paper plate.

Hand Print Angel
I have used this craft in my preschool classrooms. The parents always adore them. I love hand print crafts because they become a piece of family history. Be sure to always date the back of any special craft your child does and put their name on it. It will make a great conversation piece as you decorate for Christmas, in later years.

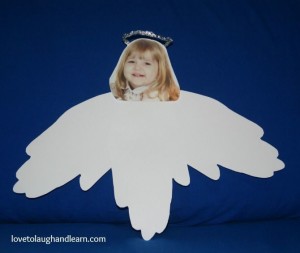
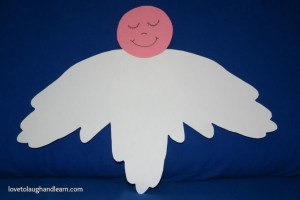
1) Trace the child’s hand three times. Have them keep their fingers together. Don’t spread them out like a fan.
2) Cut out the hand prints.
3) Use one hand print as the body of the angel and the other two as the wings. The wings will look the best if you be sure to place the hand prints so that the thumbs are facing down. (Refer to picture)

Christmas Angels made from hand prints

4) You can either cut out a circle to use for the head or you can use a picture of your child’s head. They both make nice looking angels.
5) As a final touch, (which I forgot to add to one of my samples) you can make a halo out of a silver or gold pipe cleaner or make one out of a piece of aluminum foil. To make the halo out of aluminum foil, cut off an 8 inch by 1 inch piece of aluminum foil. Gently squish and twist it. Then form it into a circle and tape it to the back of the angel’s head.

Christmas Angels from Handprint

Story Time

  “The Christmas Angel” by Hans Wilhelm
Reading Level: Ages 3 – 8
Your child will fall in love with this adorable little angel. All he wants to do is to travel from heaven down to earth; so he can sing his special song to the Son of God. But his wings are too small and he is not allowed to make the trip. Find out what happens to the scared little angel after his accidental fall off of a cloud.

“An Angel Came to Nazareth” by Anthony Knott
Reading Level: Ages 5 and up
This is a very interesting poem of an angel who came to a stable in Nazareth. The angel asks a camel, a donkey, a horse and an ox to pick which one of the four travelers they would carry. One of them would end up carrying “the greatest of them all.” Can you guess, before ever reading the poem, which animal carried “the greatest of them all”?

Please take the time to stop by my Facebook page, Love to Laugh and Learn, and tell me about any of the crafts or books that you shared with your children. I would love to see pictures too.

Related Posts:

The Santa Claus Debate
The True Meaning of Christmas
The Christmas Star
Love to Learn the Meaning of Candy Canes for Christmas
Review – Christmas on Monument Circle, Indianapolis

Save

Filed Under: Christmas, Holidays Tagged With: angels, christian, christmas, Christmas angels, Christmas symbols, December, family friendly, family friendly activities, fun learning, God, holiday, holidays, Jesus, love to laugh and learn, spiritual

The Christmas Star

December 14, 2011 by Mama Carmody 13 Comments

The Christmas Star


Christmas Star

The Christmas Star: A heavenly sign that the wise men were able to follow to find the birth place of Jesus

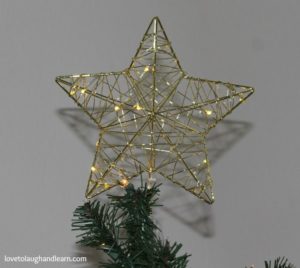
“Teach the children that the star is the heavenly sign of promise,” he said. “God sent a Savior to the world and the star was the sign of that promise being fulfilled. The countless shining stars in the heavens, one star for each person on earth, represents the hope of all mankind.” (A quote from the story, Teach the Children the True Meaning of Christmas)

Matthew 2:2b “We saw His star when it rose and have come
to worship Him.”

Matthew 2:9 “After they had heard the king, they went on their way,
and the star they had seen when it rose went ahead of them
until it stopped over the place where the child was.”

The Christmas Star and the Christmas Angel would take turns setting on the top of our Christmas tree. To me, both are important because each one announced the birth of God’s Son. Here are some different activities to use during this blessed holiday season as you remember the real reason for the season.

Finger Play

A Shining Star
(Action Rhyme)

On the very first Christmas night,
(Put hands together; lay head on hands as if sleeping.)
A wondrous star shone big and bright.
(Hold hands above head; move fingers like stars shining.)
It marked the spot where the baby lay,
(Pretend to rock baby.)
So kings and shepherds could come to pray.
(Fold hands and kneel.)
– Original Author Unknown

Crafts

Cinnamon Ornaments
Cinnamon ornaments were something that I made with my children when they were younger. Between Thanksgiving and Christmas we would make ornaments to give to family and friends as presents. They were always a big hit. This is a wonderful gift that also makes your house smell delicious. I am using the recipe from allrecipes.com because I have no idea where my recipe has gone.

Ingredients
1 cup ground cinnamon
1 tablespoon ground cloves
1 tablespoon ground nutmeg
3/4 cup applesauce
2 tablespoons glue

Directions
1. In a medium bowl, stir together the cinnamon, cloves, and nutmeg. Mix in the applesauce and glue. Work the mixture with your hands 2 to 3 minutes to form a ball. If mixture is too wet, add more cinnamon. If mixture is too dry, add more applesauce.
2. Lightly dust a clean surface with cinnamon. Roll out the dough to 1/4 inch thickness. Cut out shapes with cookie cutters, and use a toothpick or straw to make a hole at the top for hanging with a ribbon.
3. Dry in a slow oven 200 degrees F (100 degrees C) for several hours, or air dry in a sunny spot for 4 or 5 days. When dry, decorate with gingham and/ or ribbon.

Popsicle Star
I have created a lot of popsicle crafts in my time and enjoyed every one. This would be a good one if you have children of different ages. The older ones can create the stars and the younger ones can paint them and add sparkles or buttons to give it a little extra “shine”. Although I’m sure that some of the older children will want to add their own artistic touches to the stars. (This craft came from kaboose.com)

Materials Needed:
• 10 Popsicle sticks, coloured or plain
• Hot glue gun or ordinary glue
• Length of fishing line
• Paint or markers, glitter, etc.

Instructions:
1. Draw up a template of a star using craft sticks.
2. Place one stick inside one line then add some glue to the top. Position second stick on this.
3. Continue step 2 until all 10 sticks are in place.
4. Attach some fishing line to one point for hanging.
5. Decorate as desired. Using the colors yellow, gold, red and green make for a great Christmas star. Try different colors for theme parties, or use glow-in-the-dark paint for a magical bedroom at night.

Homemade Paper Stars
I recently found this ornament on the Family Fun website. I have never done this craft before but I can’t wait until my great-niece, nephews and grandkids are old enough to do this with them. It looks like it could get messy but sometimes messy is half the fun.

Materials Needed:
• 3 (9- by 12-inch) sheets of construction paper
• Blender
• Very hot water
• Folded cloth towel
• Plate
• 3-inch star-shaped cookie cutter
• Sieve
• Glitter
• Rag
• Baking sheet
• Ribbon loops

Instructions:
1. Tear 3 (9- by 12-inch) sheets of construction paper into small pieces, about the size of a domino, and place them in a blender. Pour in about 1 1/2 cups of very hot water and let it sit for 5 minutes. Meanwhile put a folded cloth towel on a plate, add a paper towel and top with a 3-inch star-shaped cookie cutter.
2. Heat the oven to 200 degrees. Pulse the blender until the mix is pulpy, about 30 seconds. Ina sieve set over the sink, drain the pulp, then spoon some into the cookie cutter to the top, taking care to fill the points. Sprinkle with glitter. Use a rag to press the pulp down into the cookie cutter until most of the water is gone, then gently push the star out onto a baking sheet. Repeat to make two more stars.
3. Bake them for 2 hours or until the moisture has evaporated (they should be firm and lightweight). Let the stars cool, the glue ribbon loops to the backs for hanging. Makes 3 stars.

Snacks

Here are a couple of healthier alternatives to cookies, as you are making crafts and reading books together.

Crispy Cheese Stars from FamilyFun.com
I love cheese so these look extra yummy to me.

Ingredients
• Flour tortillas
• Sliced cheese (cheddar, provolone, or mozzarella)
• Chili powder or paprika

Instructions:
1. Heat the oven to 350º. Use the larger cookie cutter to cut out stars from flour tortillas (about 5 per 10-inch tortilla). It’s easy for kids to do if you use a rolling pin to roll back and forth over the cutter. Bake the stars on a foil-covered cookie sheet for 5 minutes.
2. Use the smaller cookie cutter to cut out an equal number of cheese stars from the sliced cheese and place them atop the tortilla ones. Bake the stars for 2 more minutes or so until the cheese melts.
3. Sprinkle the stars with chili powder or paprika and let them cool before serving.

Star Fruit – A little fruit with your cheese is always a good thing.

Story Time

The Christmas Star Book & Advent Calendar by Marcus Pfister
Reading Level: Ages 4 – 8
Here is another great book from the author of “The Rainbow Fish”. The sparkling silver stars add so much to the illustrations. A wonderful story of how the shepherds, the Wise Men and even the animals followed the star to Bethlehem, where they welcomed the Holy Child.

Small Camel Follows the Star by Rachel W.N. Brown
Reading Level: Ages 3 to 8 yrs old
This is a sweet story of Small Camel’s first trip across the desert. It is a special trip to follow the, much sought after, star that leads the wise men to Bethlehem. Under the star they find the young King, in a very simple house. I love that this story in Biblically correct, in the fact that the wise men find the baby King, a few months later, in a house. (Matthew 2: 1- 12)

Song of the Stars: A Christmas Story
by Sally Lloyd-Jones
Reading Level: Ages 4 – 8
I love the way this story describes how all of creation was anticipating the arrival of our Savior. It talks of how the trees, the flowers and the animals were crying out, “It’s time. It’s time,” as the birth of Jesus drew near. This was a very different way to look at the Nativity scene. No shepherd, no wise men but all of creation celebrating: “Heaven’s Son sleeping under the stars that He made.”

Related Posts:

The Santa Claus Debate
The True Meaning of Christmas
Christmas Angels to Laugh and Learn With
Love to Learn About the Nativity
Love to Learn the Meaning of Candy Canes for Christmas
Review – Christmas on Monument Circle, Indianapolis

Filed Under: Christmas, Learning Activities Tagged With: christian, christmas, Christmas star, Christmas symbols, December, family friendly, family friendly activities, God, holiday, holidays, Jesus, love to laugh and learn, making learning fun, spiritual, star

Learning Activities for the Color Green

March 11, 2012 by Mama Carmody 12 Comments

Learning Activities for the Color Green
with free printable


Spring is almost here and Saint Patrick’s Day is just around the corner so it’s time to pull out the green clothing. What a great time for learning activities with the color green.

Content:

Clothing
Toys
Crafts:
Shimmery Shamrock
Caterpillar
Snacks
Story Time
Related Posts


Clothing

What green clothing do you and your child have? Do you have any shirts with shamrocks or clover on them? Does your child have some bright green socks? Pull them out and put them on today.

(top)


Toys

What kind of green toys can your child find? Do they have any green stuffed toys, like a frog or a dinosaur? Have your child dig into the bottom of their toy box for any little green toys or cars that might be hiding down there. Get out some green play dough and make some snakes and bushes. I’m not very artistic so that’s about all I can create with play dough. (Oh yes, I can make pancakes and pizza too!)

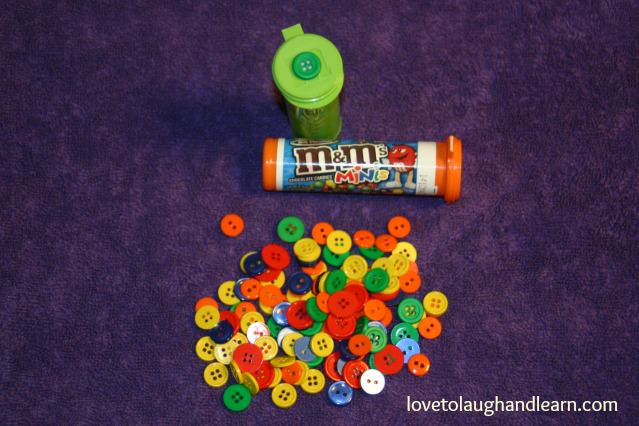
You can make your own color sorter with mini M&M containers. I made these and used them with my children and in my preschool classes. Collect several different color containers.

Color Sorting Buttons

Gather any loose buttons you have around the house. I was able to purchase a big tub of buttons at Wal-Mart several years ago, when they had a better craft section. You may still be able to find something like that at a craft and hobby store. Remove the label and glue a button that is the same color as the container to the lid. Let your child sort through the buttons and put them in the appropriate container. Just be sure to use this sorter with children that are old enough that they won’t be putting the buttons in their mouths.

(top)


Craft

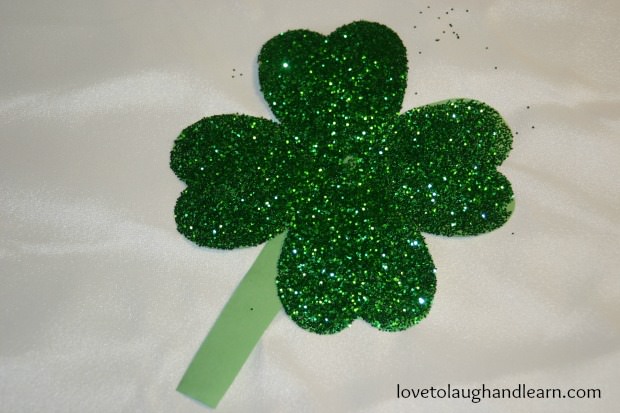
Have fun learning about the color green with this Shimmery Shamrock craft.

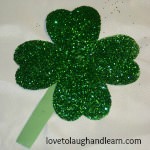
Shimmery Shamrocks

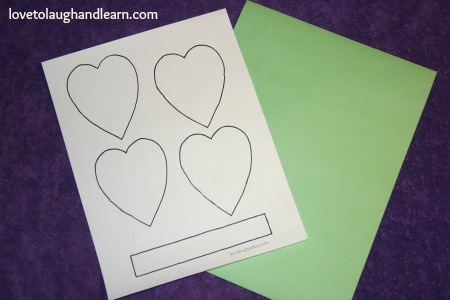
These shimmery shamrocks are a great craft for Saint Patrick’s Day as well as a learning activity for the color green. It is also a good activity for discussing shapes because the shamrock is made up of a rectangle and four hearts. This craft works well for children as young as 2 years old as well as for older children. For younger children, you can cut out the shapes and simply let them spread glue and sprinkle glitter. Older children will be able to cut the shapes out themselves. You could also vary this craft by letting your child color or paint the craft sheet rather than using it as a template to cut the shapes from construction paper.

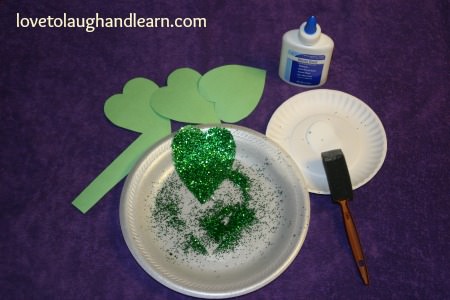
Materials Needed:
Shamrock craft sheet
Green construction paper
Glue
Foam applicator
Plate for glue
Green glitter

Materials Needed for Shamrock Craft

1) Print off the Shamrock craft sheet

Learning Activities for the Color Green: Shamrock Craft Sheet

2) Cut hearts and rectangle stem out of green construction paper.
3) Pour glue out onto a plate.
4) Use a sponge applicator to spread the glue on the heart shapes.
5) Sprinkle green glitter all over the heart shapes.
6) Glue the tips of the hearts together and let dry.
7) Glue stem to back of hearts.
8) Now you have a beautiful shimmery shamrock to decorate with.

Have fun learning about the color green with this Shimmery Shamrock craft.

(top)

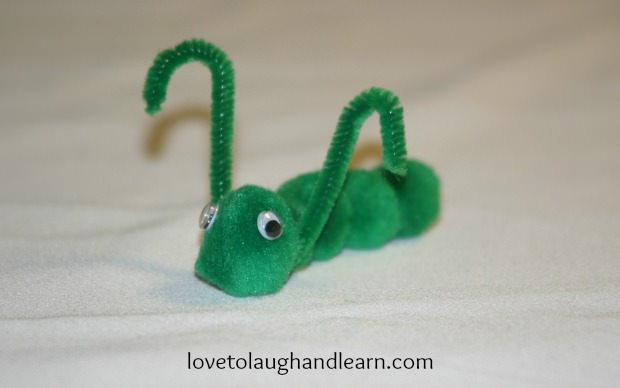
Have fun learning about the color green with this adorable little caterpillar.

Caterpillar

Here is a green craft, just in case you are working on the color green and it’s not Saint Patrick’s Day. This would be a great springtime craft or when learning about caterpillars and butterflies. A big plus to this craft is that it is very easy. Even a very young child will be able to create this cute caterpillar.

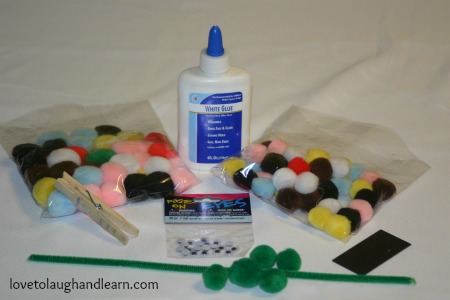
Materials Needed for Green Caterpillar Craft

Materials Needed:

Green pompoms – two sizes (I used a 1 inch pom for the head and four .75 inch
poms for the body)
Wiggly eyes
Green pipe cleaner
Glue
Optional: magnet or spring-type wooden clothespin

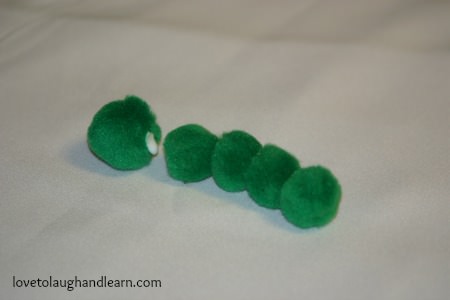
1) Glue the small pompoms together.

Learning Activities for the Color Green: Gluing together Green Caterpillar

2) Cut the pipe cleaner in half then bend it into a U shape. Put glue on both sides of the bottom of the U.
3) Add glue to the larger pompom and press the head onto the caterpillar’s body securing the antennas between the head and the body. Let the caterpillar set for at least an hour to let the glue dry.
4) Then add wiggly eyes and there you have it, an adorable caterpillar.

Have fun learning about the color green with this adorable little caterpillar.

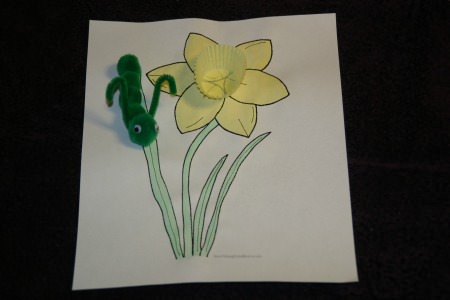
Here I added the caterpillar to the Daffodil craft from Learning Activities for the Color Yellow:

Green Caterpillar used with yellow daffodil craft activity.

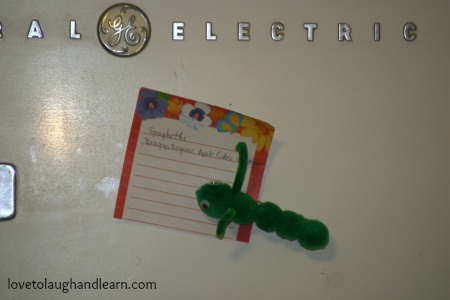
Here I added a spring-loaded clothes pin and a magnet to make a memo holder for the refrigerator:

Green Caterpillar as a memo holder.

(top)


Green Foods for snack or meal time

Green apples, kiwi, broccoli, green grapes, lettuce, guacamole, green beans, celery, peas, green peppers

(top)


Story Time

“Good Luck!: A St. Patrick’s Day Story (Ant Hill)“ by Joan Holub
Reading Level: Ages 2 to 7
This is an adorable little book for a young child or an early reader. There are a lot of rhyming words which are fun to listen to and easier for beginning readers: bike – Mike, hat – Matt, ant – Grant It’s a story of a town of ants that are trying to catch the green ant for good luck. A fun adventure and a special prize at the end of the rainbow.

“The Big Green Pocketbook” by Candice Ransom
Reading Level: Ages 4 to 8
A wonderful story about a little girl, her big green pocketbook and a good deed. A little girl takes her empty pocketbook with her on a trip to town with her mother. She collects all kinds of interesting things along the way. She puts her treasures in her big green pocketbook but what happens when she forgets and leaves it on the bus. Read this adorable book and find out.

“The Yippy, Yappy Yorkie in the Green Doggy Sweater (Blossom Street Kids)” by Debbie Macomber &
Mary Lou Carney
Reading Level: Ages 4 and up
The story of a young girl, named Ellen, and her Yorkie puppy. Her family has to move to a new town. Ellen doesn’t think she is going to like this move but her mother assures her that it will be fine. Follow Ellen as she and her mother walk through their new town in search of her yippy yappy yorkie that escaped through a hole in the fence. She finds that the new town isn’t as different from her home town as she thought. She also makes a new friend in the process.

(top)


Related Posts

The Lessons – Overview
Colors – Overview
A is for Apple: You Can Learn More Than Your ABC’s from Apples
Pumpkins are Orange; and Other Learning Concepts
Learning Activities for the Color Red
Learning Activities for the Color Blue
Learning Activities for the Color Yellow
Learning Activities for the Color Purple
Learning Activities for the Color Orange

(top)

Filed Under: Colors, Learning Activities Tagged With: color, coloring page, coloring pages, coloring pages for kids, colors, educational activities, fun learning, green, holiday, holidays, learn, learning, learning colors, learning concepts, learning fun, learning opportunities, lessons, love to laugh and learn, making learning fun, preschool, preschool lessons, Saint Patrick's Day, shamrock, shamrocks, St. Patrick's Day, St. Patty's Day

  • « Previous Page
  • 1
  • 2
  • 3
  • Next Page »

Subscribe

  • Facebook
  • Pinterest
  • Twitter
  • Instagram

Don’t Miss This Great Book

Categories

  • Articles
  • Attractions and Events
  • Autumn/Fall
  • Children's Books
  • Christmas
  • Coloring Pages
  • Colors
  • Community Helpers
  • Contest
  • Cooking with Kids
  • eBundles
  • Gardening
  • Halloween
  • Holidays
  • Learning Activities
  • Music
  • Reviews
  • Sensory Bins
  • Shapes
  • Thanksgiving
  • Uncategorized

Follow Me on Bloglovin

Follow on Bloglovin
Subscribe via RSS

Recent Posts

  • The American Flag and Its Hidden Message
  • Celebrating Flag Day
  • Celebrating the 4th of July with Children
  • “Someone I Love Has Gone to Heaven”
  • Memorial Day for Kids: Fun Activities That Teach Honor and Respect
  • Memorial Day Learning Activities
  • Dig into Gardening: Fun Activities, Science Projects, and Healthy Eating Tips
  • Police Officers: Love to Learn About Community Helpers

Check This Out

Holiday Toy List – STEM Toys

Books

US Family Guide

USFamilyGuide.com

Recent Comments

  • Mama Carmody on Your Favorite Childhood Book
  • Lisa Smiley on Your Favorite Childhood Book
  • Harlow's Harvest on Eggs in a Nest: Cooking with Kids

Copyright © 2025 · Lifestyle Pro Theme on Genesis Framework · WordPress · Log in