Love to Laugh and Learn

Fun and interesting learning activities to do with the children in your life

  • Home
  • About Me
  • Attractions
  • Recipes
  • Privacy Policy

Christmas Angels to Laugh and Learn With

December 11, 2011 by Mama Carmody 28 Comments

Christmas Angels to Laugh and Learn With


Christmas Angels – Appeared to shepherds to announce the birth of Christ

Luke 2: 8-10 “And there were shepherds living out in the fields nearby, keeping watch over their flocks at night. An angel of the Lord appeared to them, and the glory of the Lord shone around them, and they were terrified. But the angel said to them, ‘Do not be afraid. I bring you good news that will cause great joy for all the people.’”

The Christmas Angels appeared in the sky, over the fields near Bethlehem. They announced the birth of Christ. You will usually find either an angel or a star on the top of a Christmas tree because of the importance of their appearances in the sky.

Following are some activities to do in relation to the angels. I hope you and the children in your life enjoy them.

Coloring Pages

If your child likes to color, here are a couple of free coloring pages from about.com
Angel coloring page
Cheerful Angel

Crafts:

Paper Plate Angels
I just had to share these adorable little angels I found online. They are made from paper plates. Click on Paper Plate Angels to go to the link. The one thing that I didn’t see mentioned, in the instructions, was the size of the paper plate. I used a small 6-inch sized plate. It made an adorable little angel. I was very happy with the size. If you want to put it on top of a large Christmas tree, I would use a bigger paper plate.
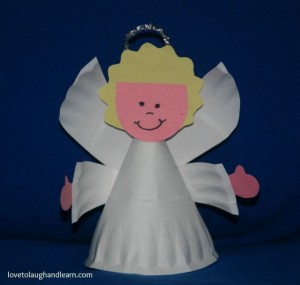
Christmas Angels from a paper plate.

Hand Print Angel
I have used this craft in my preschool classrooms. The parents always adore them. I love hand print crafts because they become a piece of family history. Be sure to always date the back of any special craft your child does and put their name on it. It will make a great conversation piece as you decorate for Christmas, in later years.

1) Trace the child’s hand three times. Have them keep their fingers together. Don’t spread them out like a fan.
2) Cut out the hand prints.
3) Use one hand print as the body of the angel and the other two as the wings. The wings will look the best if you be sure to place the hand prints so that the thumbs are facing down. (Refer to picture)
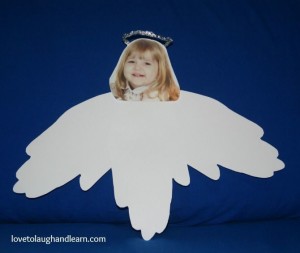
Christmas Angels made from hand prints

4) You can either cut out a circle to use for the head or you can use a picture of your child’s head. They both make nice looking angels.
5) As a final touch, (which I forgot to add to one of my samples) you can make a halo out of a silver or gold pipe cleaner or make one out of a piece of aluminum foil. To make the halo out of aluminum foil, cut off an 8 inch by 1 inch piece of aluminum foil. Gently squish and twist it. Then form it into a circle and tape it to the back of the angel’s head.
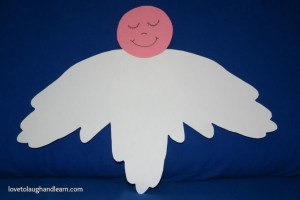
Christmas Angels from Handprint

Story Time

  “The Christmas Angel” by Hans Wilhelm
Reading Level: Ages 3 – 8
Your child will fall in love with this adorable little angel. All he wants to do is to travel from heaven down to earth; so he can sing his special song to the Son of God. But his wings are too small and he is not allowed to make the trip. Find out what happens to the scared little angel after his accidental fall off of a cloud.

“An Angel Came to Nazareth” by Anthony Knott
Reading Level: Ages 5 and up
This is a very interesting poem of an angel who came to a stable in Nazareth. The angel asks a camel, a donkey, a horse and an ox to pick which one of the four travelers they would carry. One of them would end up carrying “the greatest of them all.” Can you guess, before ever reading the poem, which animal carried “the greatest of them all”?

Please take the time to stop by my Facebook page, Love to Laugh and Learn, and tell me about any of the crafts or books that you shared with your children. I would love to see pictures too.

Related Posts:

The Santa Claus Debate
The True Meaning of Christmas
The Christmas Star
Love to Learn the Meaning of Candy Canes for Christmas
Review – Christmas on Monument Circle, Indianapolis

Save

Filed Under: Christmas, Holidays Tagged With: angels, christian, christmas, Christmas angels, Christmas symbols, December, family friendly, family friendly activities, fun learning, God, holiday, holidays, Jesus, love to laugh and learn, spiritual

The Christmas Star

December 14, 2011 by Mama Carmody 13 Comments

The Christmas Star


Christmas Star

The Christmas Star: A heavenly sign that the wise men were able to follow to find the birth place of Jesus

“Teach the children that the star is the heavenly sign of promise,” he said. “God sent a Savior to the world and the star was the sign of that promise being fulfilled. The countless shining stars in the heavens, one star for each person on earth, represents the hope of all mankind.” (A quote from the story, Teach the Children the True Meaning of Christmas)

Matthew 2:2b “We saw His star when it rose and have come
to worship Him.”

Matthew 2:9 “After they had heard the king, they went on their way,
and the star they had seen when it rose went ahead of them
until it stopped over the place where the child was.”

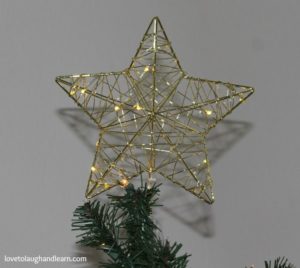
The Christmas Star and the Christmas Angel would take turns setting on the top of our Christmas tree. To me, both are important because each one announced the birth of God’s Son. Here are some different activities to use during this blessed holiday season as you remember the real reason for the season.

Finger Play

A Shining Star
(Action Rhyme)

On the very first Christmas night,
(Put hands together; lay head on hands as if sleeping.)
A wondrous star shone big and bright.
(Hold hands above head; move fingers like stars shining.)
It marked the spot where the baby lay,
(Pretend to rock baby.)
So kings and shepherds could come to pray.
(Fold hands and kneel.)
– Original Author Unknown

Crafts

Cinnamon Ornaments
Cinnamon ornaments were something that I made with my children when they were younger. Between Thanksgiving and Christmas we would make ornaments to give to family and friends as presents. They were always a big hit. This is a wonderful gift that also makes your house smell delicious. I am using the recipe from allrecipes.com because I have no idea where my recipe has gone.

Ingredients
1 cup ground cinnamon
1 tablespoon ground cloves
1 tablespoon ground nutmeg
3/4 cup applesauce
2 tablespoons glue

Directions
1. In a medium bowl, stir together the cinnamon, cloves, and nutmeg. Mix in the applesauce and glue. Work the mixture with your hands 2 to 3 minutes to form a ball. If mixture is too wet, add more cinnamon. If mixture is too dry, add more applesauce.
2. Lightly dust a clean surface with cinnamon. Roll out the dough to 1/4 inch thickness. Cut out shapes with cookie cutters, and use a toothpick or straw to make a hole at the top for hanging with a ribbon.
3. Dry in a slow oven 200 degrees F (100 degrees C) for several hours, or air dry in a sunny spot for 4 or 5 days. When dry, decorate with gingham and/ or ribbon.

Popsicle Star
I have created a lot of popsicle crafts in my time and enjoyed every one. This would be a good one if you have children of different ages. The older ones can create the stars and the younger ones can paint them and add sparkles or buttons to give it a little extra “shine”. Although I’m sure that some of the older children will want to add their own artistic touches to the stars. (This craft came from kaboose.com)

Materials Needed:
• 10 Popsicle sticks, coloured or plain
• Hot glue gun or ordinary glue
• Length of fishing line
• Paint or markers, glitter, etc.

Instructions:
1. Draw up a template of a star using craft sticks.
2. Place one stick inside one line then add some glue to the top. Position second stick on this.
3. Continue step 2 until all 10 sticks are in place.
4. Attach some fishing line to one point for hanging.
5. Decorate as desired. Using the colors yellow, gold, red and green make for a great Christmas star. Try different colors for theme parties, or use glow-in-the-dark paint for a magical bedroom at night.

Homemade Paper Stars
I recently found this ornament on the Family Fun website. I have never done this craft before but I can’t wait until my great-niece, nephews and grandkids are old enough to do this with them. It looks like it could get messy but sometimes messy is half the fun.

Materials Needed:
• 3 (9- by 12-inch) sheets of construction paper
• Blender
• Very hot water
• Folded cloth towel
• Plate
• 3-inch star-shaped cookie cutter
• Sieve
• Glitter
• Rag
• Baking sheet
• Ribbon loops

Instructions:
1. Tear 3 (9- by 12-inch) sheets of construction paper into small pieces, about the size of a domino, and place them in a blender. Pour in about 1 1/2 cups of very hot water and let it sit for 5 minutes. Meanwhile put a folded cloth towel on a plate, add a paper towel and top with a 3-inch star-shaped cookie cutter.
2. Heat the oven to 200 degrees. Pulse the blender until the mix is pulpy, about 30 seconds. Ina sieve set over the sink, drain the pulp, then spoon some into the cookie cutter to the top, taking care to fill the points. Sprinkle with glitter. Use a rag to press the pulp down into the cookie cutter until most of the water is gone, then gently push the star out onto a baking sheet. Repeat to make two more stars.
3. Bake them for 2 hours or until the moisture has evaporated (they should be firm and lightweight). Let the stars cool, the glue ribbon loops to the backs for hanging. Makes 3 stars.

Snacks

Here are a couple of healthier alternatives to cookies, as you are making crafts and reading books together.

Crispy Cheese Stars from FamilyFun.com
I love cheese so these look extra yummy to me.

Ingredients
• Flour tortillas
• Sliced cheese (cheddar, provolone, or mozzarella)
• Chili powder or paprika

Instructions:
1. Heat the oven to 350º. Use the larger cookie cutter to cut out stars from flour tortillas (about 5 per 10-inch tortilla). It’s easy for kids to do if you use a rolling pin to roll back and forth over the cutter. Bake the stars on a foil-covered cookie sheet for 5 minutes.
2. Use the smaller cookie cutter to cut out an equal number of cheese stars from the sliced cheese and place them atop the tortilla ones. Bake the stars for 2 more minutes or so until the cheese melts.
3. Sprinkle the stars with chili powder or paprika and let them cool before serving.

Star Fruit – A little fruit with your cheese is always a good thing.

Story Time

The Christmas Star Book & Advent Calendar by Marcus Pfister
Reading Level: Ages 4 – 8
Here is another great book from the author of “The Rainbow Fish”. The sparkling silver stars add so much to the illustrations. A wonderful story of how the shepherds, the Wise Men and even the animals followed the star to Bethlehem, where they welcomed the Holy Child.

Small Camel Follows the Star by Rachel W.N. Brown
Reading Level: Ages 3 to 8 yrs old
This is a sweet story of Small Camel’s first trip across the desert. It is a special trip to follow the, much sought after, star that leads the wise men to Bethlehem. Under the star they find the young King, in a very simple house. I love that this story in Biblically correct, in the fact that the wise men find the baby King, a few months later, in a house. (Matthew 2: 1- 12)

Song of the Stars: A Christmas Story
by Sally Lloyd-Jones
Reading Level: Ages 4 – 8
I love the way this story describes how all of creation was anticipating the arrival of our Savior. It talks of how the trees, the flowers and the animals were crying out, “It’s time. It’s time,” as the birth of Jesus drew near. This was a very different way to look at the Nativity scene. No shepherd, no wise men but all of creation celebrating: “Heaven’s Son sleeping under the stars that He made.”

Related Posts:

The Santa Claus Debate
The True Meaning of Christmas
Christmas Angels to Laugh and Learn With
Love to Learn About the Nativity
Love to Learn the Meaning of Candy Canes for Christmas
Review – Christmas on Monument Circle, Indianapolis
Filed Under: Christmas, Learning Activities Tagged With: christian, christmas, Christmas star, Christmas symbols, December, family friendly, family friendly activities, God, holiday, holidays, Jesus, love to laugh and learn, making learning fun, spiritual, star

Learning Activities for the Color Green

March 11, 2012 by Mama Carmody 12 Comments

Learning Activities for the Color Green
with free printable


Spring is almost here and Saint Patrick’s Day is just around the corner so it’s time to pull out the green clothing. What a great time for learning activities with the color green.

Content:

Clothing
Toys
Crafts:
Shimmery Shamrock
Caterpillar
Snacks
Story Time
Related Posts


Clothing

What green clothing do you and your child have? Do you have any shirts with shamrocks or clover on them? Does your child have some bright green socks? Pull them out and put them on today.

(top)


Toys

What kind of green toys can your child find? Do they have any green stuffed toys, like a frog or a dinosaur? Have your child dig into the bottom of their toy box for any little green toys or cars that might be hiding down there. Get out some green play dough and make some snakes and bushes. I’m not very artistic so that’s about all I can create with play dough. (Oh yes, I can make pancakes and pizza too!)

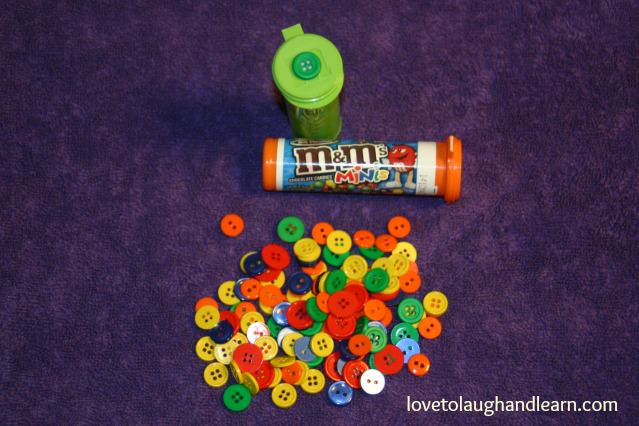
You can make your own color sorter with mini M&M containers. I made these and used them with my children and in my preschool classes. Collect several different color containers.

Color Sorting Buttons

Gather any loose buttons you have around the house. I was able to purchase a big tub of buttons at Wal-Mart several years ago, when they had a better craft section. You may still be able to find something like that at a craft and hobby store. Remove the label and glue a button that is the same color as the container to the lid. Let your child sort through the buttons and put them in the appropriate container. Just be sure to use this sorter with children that are old enough that they won’t be putting the buttons in their mouths.

(top)


Craft

Have fun learning about the color green with this Shimmery Shamrock craft.

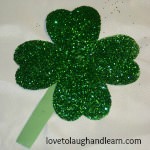
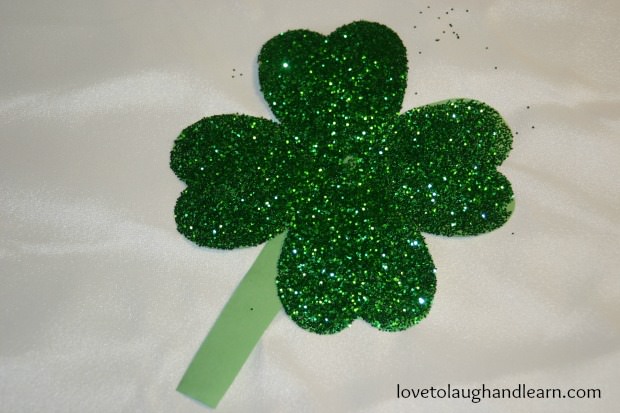
Shimmery Shamrocks

These shimmery shamrocks are a great craft for Saint Patrick’s Day as well as a learning activity for the color green. It is also a good activity for discussing shapes because the shamrock is made up of a rectangle and four hearts. This craft works well for children as young as 2 years old as well as for older children. For younger children, you can cut out the shapes and simply let them spread glue and sprinkle glitter. Older children will be able to cut the shapes out themselves. You could also vary this craft by letting your child color or paint the craft sheet rather than using it as a template to cut the shapes from construction paper.

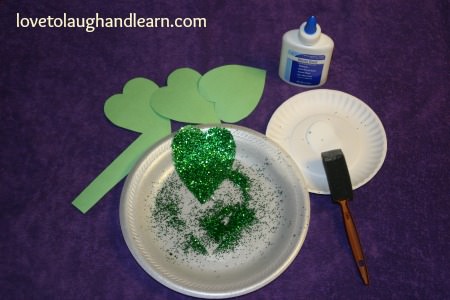
Materials Needed:
Shamrock craft sheet
Green construction paper
Glue
Foam applicator
Plate for glue
Green glitter

Materials Needed for Shamrock Craft

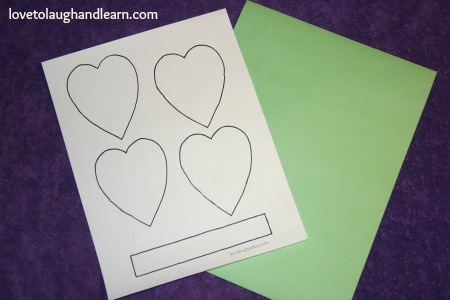
1) Print off the Shamrock craft sheet

Learning Activities for the Color Green: Shamrock Craft Sheet

2) Cut hearts and rectangle stem out of green construction paper.
3) Pour glue out onto a plate.
4) Use a sponge applicator to spread the glue on the heart shapes.
5) Sprinkle green glitter all over the heart shapes.
6) Glue the tips of the hearts together and let dry.
7) Glue stem to back of hearts.
8) Now you have a beautiful shimmery shamrock to decorate with.

Have fun learning about the color green with this Shimmery Shamrock craft.

(top)

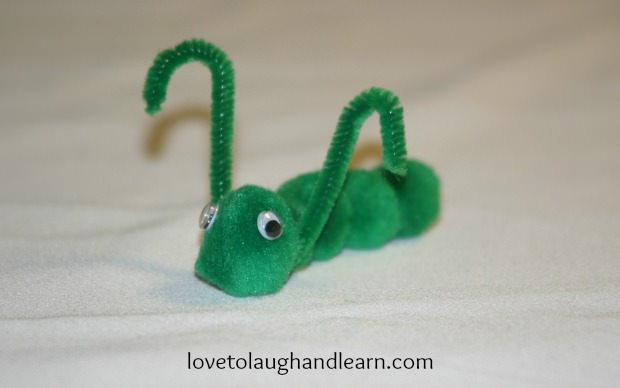
Have fun learning about the color green with this adorable little caterpillar.

Caterpillar

Here is a green craft, just in case you are working on the color green and it’s not Saint Patrick’s Day. This would be a great springtime craft or when learning about caterpillars and butterflies. A big plus to this craft is that it is very easy. Even a very young child will be able to create this cute caterpillar.

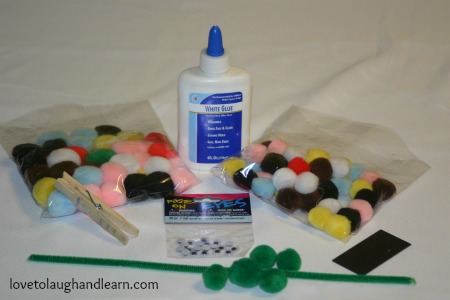
Materials Needed for Green Caterpillar Craft

Materials Needed:

Green pompoms – two sizes (I used a 1 inch pom for the head and four .75 inch
poms for the body)
Wiggly eyes
Green pipe cleaner
Glue
Optional: magnet or spring-type wooden clothespin

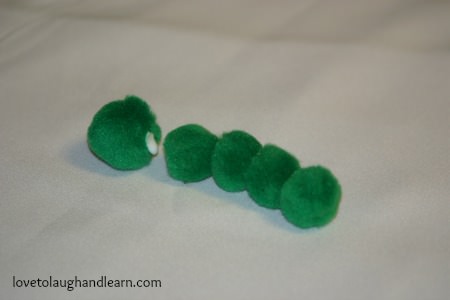
1) Glue the small pompoms together.

Learning Activities for the Color Green: Gluing together Green Caterpillar

2) Cut the pipe cleaner in half then bend it into a U shape. Put glue on both sides of the bottom of the U.
3) Add glue to the larger pompom and press the head onto the caterpillar’s body securing the antennas between the head and the body. Let the caterpillar set for at least an hour to let the glue dry.
4) Then add wiggly eyes and there you have it, an adorable caterpillar.

Have fun learning about the color green with this adorable little caterpillar.

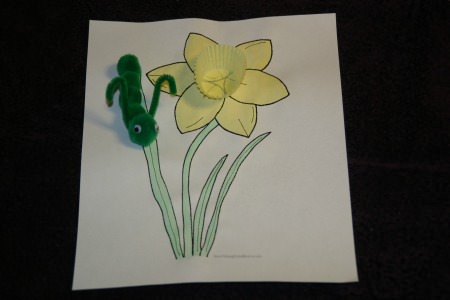
Here I added the caterpillar to the Daffodil craft from Learning Activities for the Color Yellow:

Green Caterpillar used with yellow daffodil craft activity.

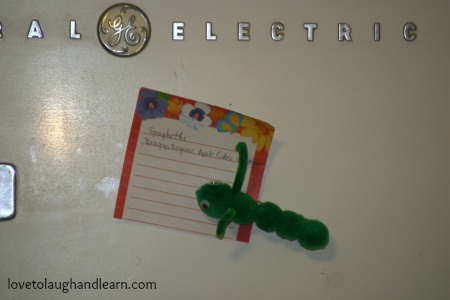
Here I added a spring-loaded clothes pin and a magnet to make a memo holder for the refrigerator:

Green Caterpillar as a memo holder.

(top)


Green Foods for snack or meal time

Green apples, kiwi, broccoli, green grapes, lettuce, guacamole, green beans, celery, peas, green peppers

(top)


Story Time

“Good Luck!: A St. Patrick’s Day Story (Ant Hill)“ by Joan Holub
Reading Level: Ages 2 to 7
This is an adorable little book for a young child or an early reader. There are a lot of rhyming words which are fun to listen to and easier for beginning readers: bike – Mike, hat – Matt, ant – Grant It’s a story of a town of ants that are trying to catch the green ant for good luck. A fun adventure and a special prize at the end of the rainbow.

“The Big Green Pocketbook” by Candice Ransom
Reading Level: Ages 4 to 8
A wonderful story about a little girl, her big green pocketbook and a good deed. A little girl takes her empty pocketbook with her on a trip to town with her mother. She collects all kinds of interesting things along the way. She puts her treasures in her big green pocketbook but what happens when she forgets and leaves it on the bus. Read this adorable book and find out.

“The Yippy, Yappy Yorkie in the Green Doggy Sweater (Blossom Street Kids)” by Debbie Macomber &
Mary Lou Carney
Reading Level: Ages 4 and up
The story of a young girl, named Ellen, and her Yorkie puppy. Her family has to move to a new town. Ellen doesn’t think she is going to like this move but her mother assures her that it will be fine. Follow Ellen as she and her mother walk through their new town in search of her yippy yappy yorkie that escaped through a hole in the fence. She finds that the new town isn’t as different from her home town as she thought. She also makes a new friend in the process.

(top)


Related Posts

The Lessons – Overview
Colors – Overview
A is for Apple: You Can Learn More Than Your ABC’s from Apples
Pumpkins are Orange; and Other Learning Concepts
Learning Activities for the Color Red
Learning Activities for the Color Blue
Learning Activities for the Color Yellow
Learning Activities for the Color Purple
Learning Activities for the Color Orange

(top)

Filed Under: Colors, Learning Activities Tagged With: color, coloring page, coloring pages, coloring pages for kids, colors, educational activities, fun learning, green, holiday, holidays, learn, learning, learning colors, learning concepts, learning fun, learning opportunities, lessons, love to laugh and learn, making learning fun, preschool, preschool lessons, Saint Patrick's Day, shamrock, shamrocks, St. Patrick's Day, St. Patty's Day

Making Memories with the Polar Express

December 13, 2014 by Mama Carmody 4 Comments

Making Memories with the Polar Express

As I mentioned in my review of Big Splash Adventure, we received a special deal on our room and the ability to purchase tickets for the Polar Express train ride. Our 3 year old, great-nephew had never seen Polar Express so we had a little pre-trip fun a few weeks earlier.

Before the Trip

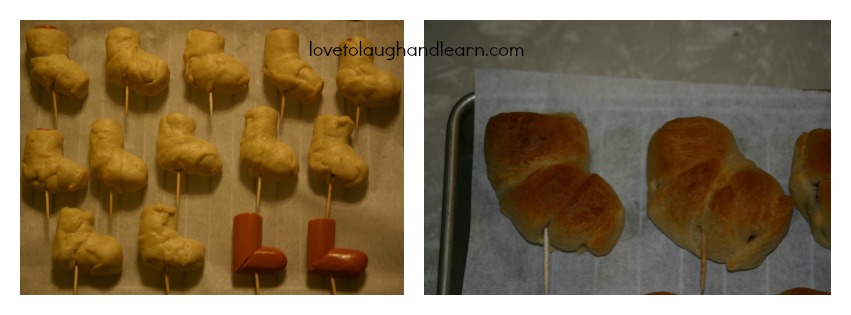
I figured the train ride wasn’t going to be special if Jeremiah didn’t know anything about the Polar Express. We scheduled an overnight visit for a special movie viewing. For dinner I made hot dog stockings. I got the idea from Cute Food for Kids. I wanted more than just plain hot dogs. I thought it might work if I wrapped crescent rolls around them; like pigs-in-a-blanket. I was wrong. They weren’t horrible but I believe I will just use the hot dogs the next time.

Making Memories with the Polar Express: hot dog stockings

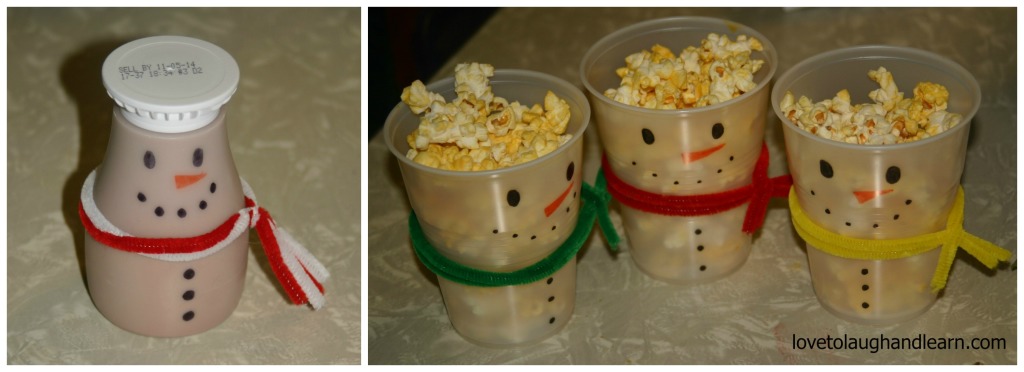
I decorated Jeremiah’s chocolate milk container and cups for our popcorn to look like snowmen. I got both of those ideas from Creative Kid Snacks: Snowman Milk Chugs & Snowman Popcorn Cups.

Making Memories with the Polar Express: snowman milk and popcorn cups
Making Memories with the Polar Express: strawberry Santas

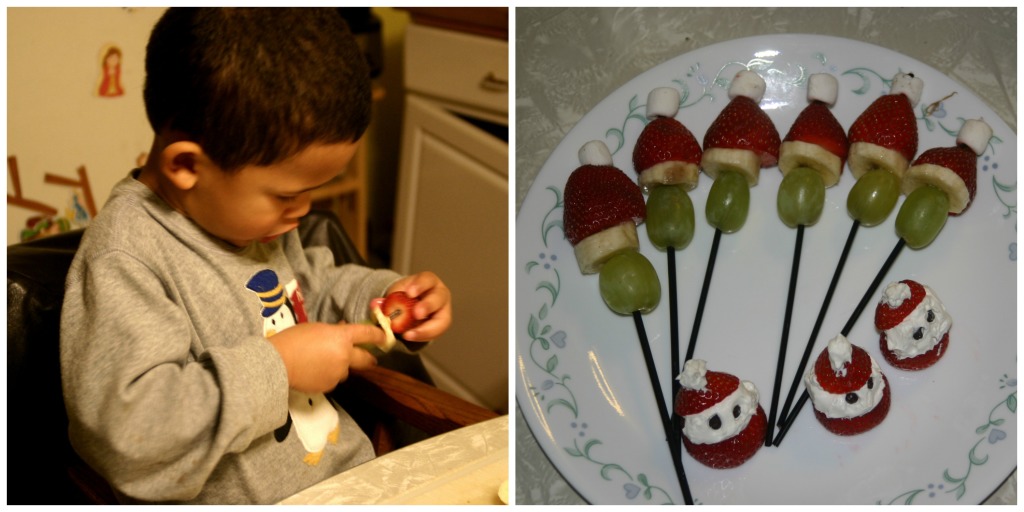
Jeremiah helped me make fruit Santas. He loves to help me cook and create in the kitchen. We made these cute little Santa Strawberries I found them on Pinterest. They came from Leanne Bakes. I tried using tiny chocolate chips for eyes but I really think they are too big. Next time I may try chocolate sprinkles.

We also made Santa-kabobs. (I renamed them) They are actually called Grinch Kabobs by Nourishing Minimalism. I changed the name because we were watching a movie about Santa not the Grinch. I use plastic, coffee stir sticks for my skewers. They seem to be safer than a sharp stick for little hands and mouths.

Making Memories with the Polar Express: creating Santa kabobs

We gathered the food, changed into our pajamas, turned off the lights and settled in to watch The Polar Express, starring Tom Hanks. If you have never seen the movie, it’s about a little boy that can’t decide if he still believes Santa is real. A mysterious train shows up in the street right outside his front door, on Christmas Eve. It’s there to pick him up, along with other children, and take him to the North Pole. I’m not very fond of the animation. It’s a little strange, to me, but I really enjoy the storyline. There are plenty of laughs and plenty of action. And something I am quite fond of, lots of music.

Jeremiah enjoyed the movie and the special food; especially the Santa kabobs. He ate at least six of them. We didn’t tell him anything about our plans for the following weekend. Since he is only 3 years old, his concept of time is a bit askew. When he knows there are plans coming up with us, he drives his mom nuts, daily, asking if we are there to pick him up.

One of the other things I did, in preparation for the trip, was purchase a MP3 of the soundtrack from the Polar Express. We love to listen to music in the car so I thought this would be another good way to expose him to the music and story of the Polar Express.

The Announcement

We were able to have an extended weekend with Jeremiah, which worked out nicely. We picked him up Friday evening and didn’t get him back home until Monday evening. Our reservations at the Big Splash Adventure and for the Polar Express train ride were for Sunday night; which meant we had several opportunities to listen to our Polar Express soundtrack. Jeremiah likes to sing along, which is absolutely adorable. Of course, I sing along with him.

We waited until Saturday morning to tell Jeremiah about our trip and the ride on the Polar Express. I wish I had taken a video of his expression when we told him. As he began to understand what we had just revealed to him, his eyes grew wide and what started out as a sweet little grin soon grew into a huge smile that brightened his whole face.

Jeremiah is a thinker. That is why we told him a little early about the ride on the Polar Express. I knew his little mind would go to work and he would probably have some questions. Sure enough, within just a couple of minutes, he asked, “Will we go on the ice?”

If you are unfamiliar with the movie, there is a scene where the train tracks are frozen under several feet of ice. The train can’t stop before it hits the ice which results in it sliding and spinning across the frozen lake. We assured Jeremiah that it was too warm for ice and we would be just fine.

Preparing for the Ride

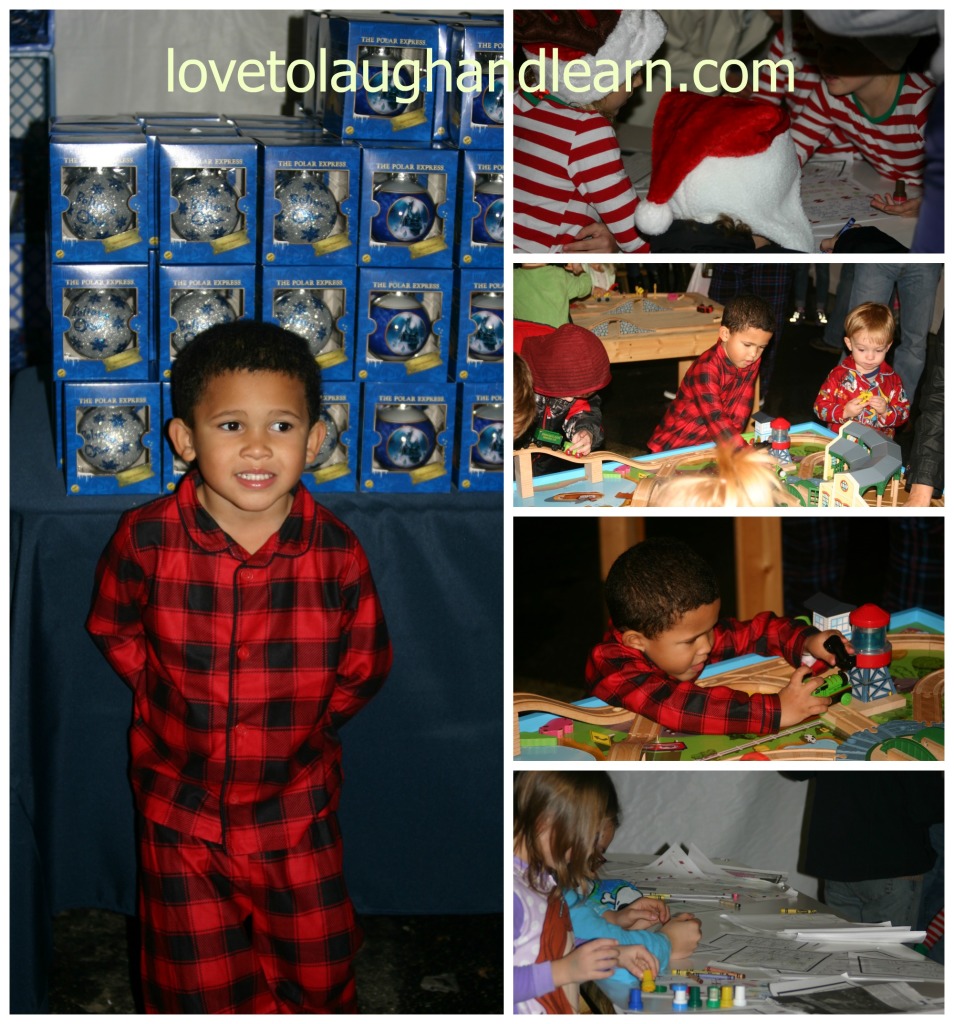
When you go to the Polar Express website, they encourage the children to wear pajamas (like the children in the video). Parents are welcome to join in the fun and wear their pajamas too. Well, I’m just a big kid so I bought us all pajamas that matched (as closely as I could get them).
We dressed in our pajamas and our slippers and got ready for our adventure.

There are a few mistakes that I made and I want to share those with you so you can be a bit more prepared than I was.

1.  This was my first visit to the French Lick Scenic Railway. I thought there would be a depot for us to wait in until it was time to board the train. That was mistake #1. There were a couple of tents set up with different activities but no actual building.

Making Memories with the Polar Express: Activity Tents
Making Memories with the Polar Express: It rained...a lot!
Making Memories with the Polar Express: It rained…a lot!

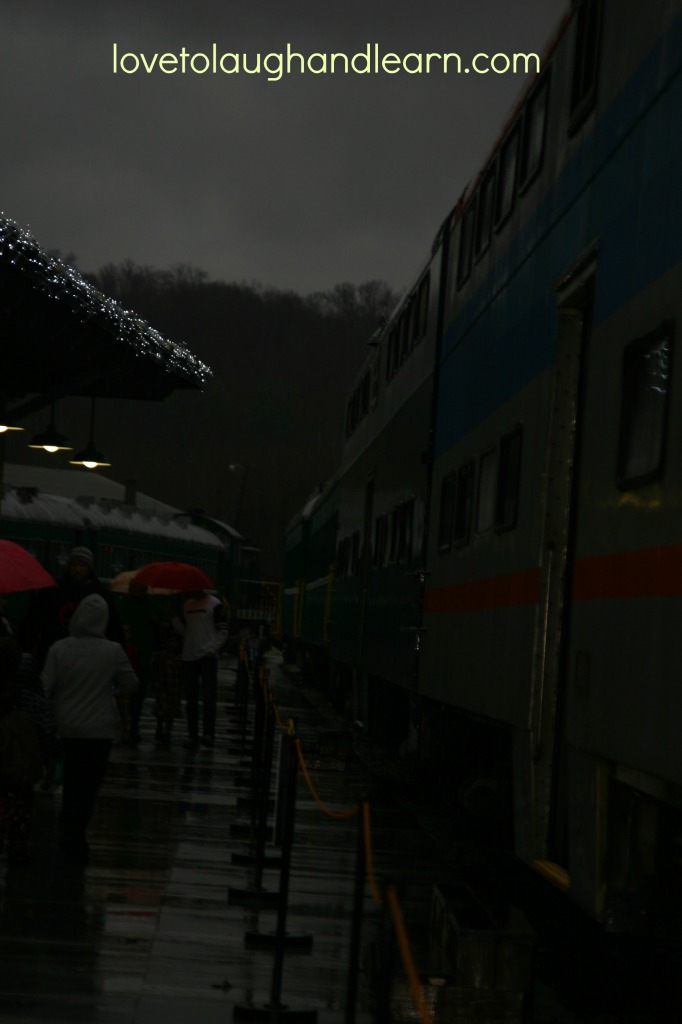
2.  Pay attention to the weather report then dress and prepare accordingly. Because of the incorrect assumption, under #1, we were not prepared for the rain…not just a little rain…a ton of rain. By the time we walked from the car to the tents, stood in water and puddles (as it ran through the tents), then walked (through the rain) to our passenger car (which of course was the last one), our slippers were soaked! To add insult to injury, we didn’t have any umbrellas. I hate umbrellas. I feel I get wetter from the water dripping off the edges than I do just walking through the rain. In this instance, I really wish I had an umbrella.

I hope I haven’t given you the idea that this ruined our experience because it didn’t! I just wanted to give you a heads up so you don’t make the same mistakes that I did.

The Train Ride

Now for the fun stuff; the ride itself. I don’t know if Jeremiah could have been anywhere nearly as excited as I was. I was excited to experience the Polar Express and I was excited to witness Jeremiah enjoying it.

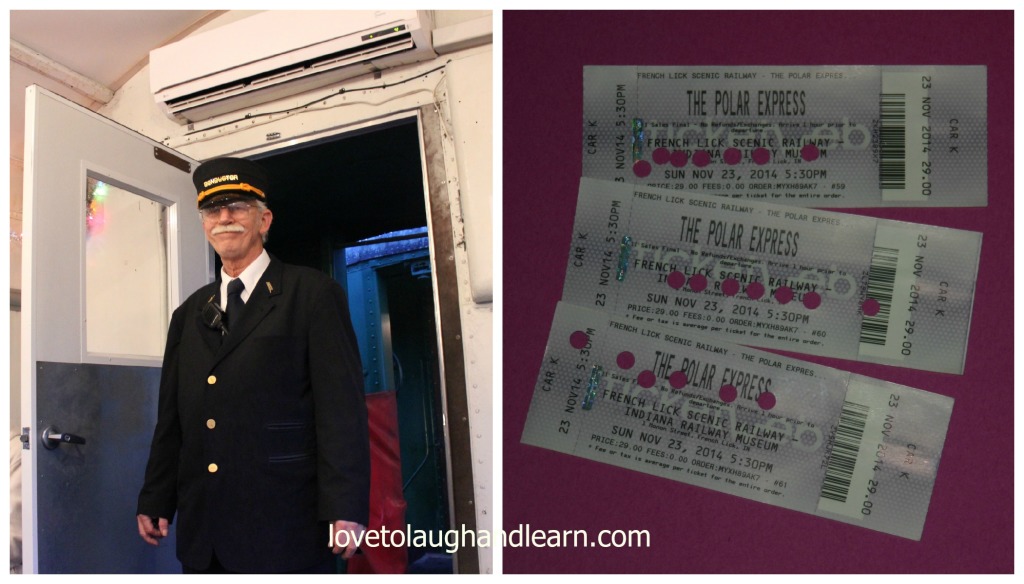
As we reached our passenger car, the conductor was standing there in the rain to greet us. We boarded and found our seats. I kept hold of the tickets until the conductor came by to punch them. Then we each handed the conductor our individual ticket. He punched it until it “snowed” little dots all over us.

Making Memories with the Polar Express: Conductor & tickets

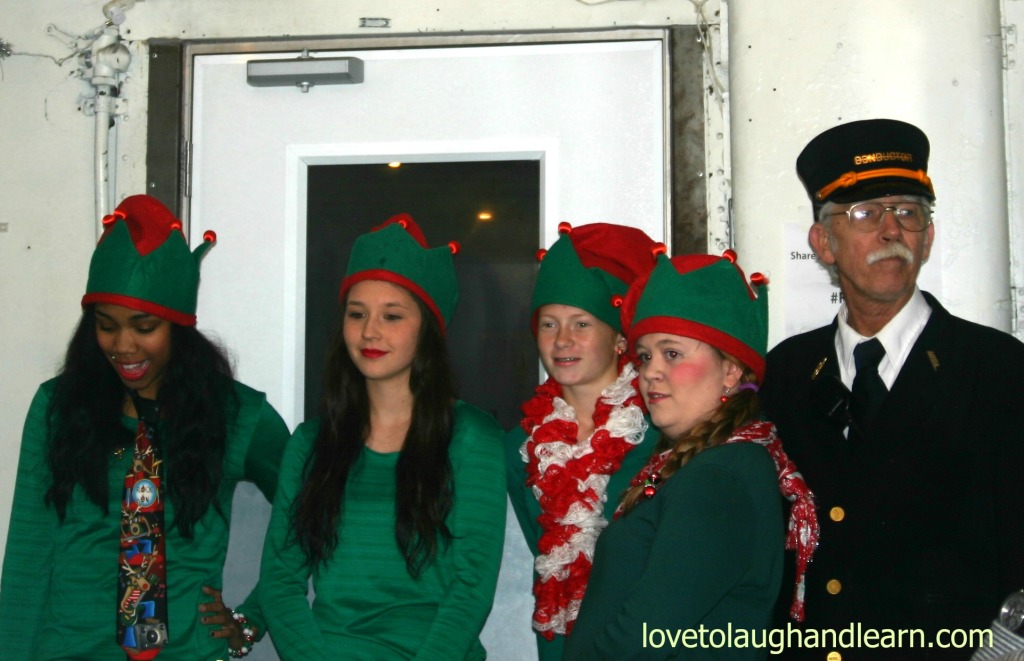
The music from the Polar Express soundtrack played over the speakers. As the train started to move out of the station, we were introduced to the elves that would be serving and entertaining us. They were so cute and bubbly.

Making Memories with the Polar Express: Our elves

During our ride to the North Pole, the Polar Express story was read. The conductor came by a couple of times to show us the pictures in the book. At the appropriate times in the story, the elves would come out and sing with us.

Making Memories with the Polar Express: Entertainment

One of my favorite songs is Hot Chocolate. I bet you will never guess what happened when they sang that one. Yes, we each got a cup of hot chocolate and then they brought us a Christmas cookie! Yum!

Making Memories with the Polar Express: Hot chocolate and cookies

Thank goodness the family sitting in front of us had been on this adventure before. If something was said to give us a hint of what was about to happen, I missed it. But the family in front of us, got up and started frantically cleaning the fog off their windows. They did tell all of us that we needed to start watching out the windows on the right side of the train. We cleaned off our windows and started watching. Before we knew it, Christmas lights appeared on several buildings and there in front of one of the building stood…..none other than Santa Claus and some elves. We had reached the North Pole! I have a confession to make here and now…I am a sentimental sap…I teared up at the sight of them (and I’m tearing up again, just writing about the experience).

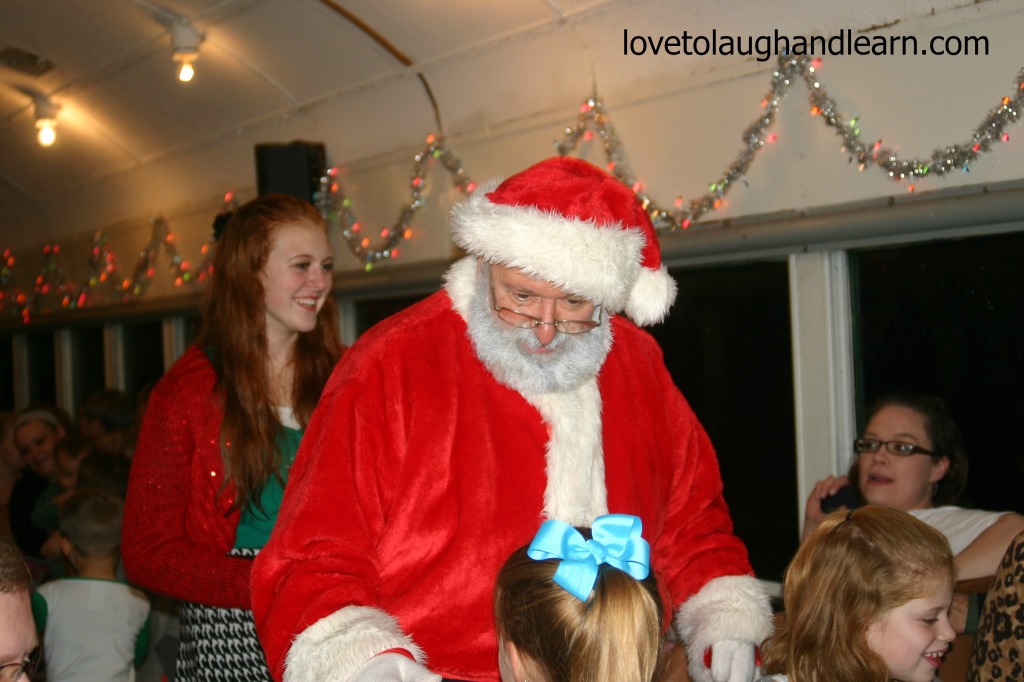
As we pull into the North Pole, the train came to a stop. We didn’t get off but someone special boarded the train. Can you guess who it was!?!

Making Memories with the Polar Express: Santa

Yes-siree! It was the jolly man, himself, Santa Claus. He entered from the back of our car so Jeremiah didn’t see him but when we said, “Jeremiah! Look who just got on the train. It’s Santa Claus!”

He scampered up onto the seat and peered to the back of the car. He was so excited. He asked, “Is Santa going to come see me?”

We told Jeremiah that he was, but Santa had to greet all the children on his way up to us. Now, I wasn’t really sure how Jeremiah was going to handle meeting Santa because he had been kind of bashful during the trip so far. We tried to get him to move to the aisle so he could see better, but we wanted to stay between window and me or between my husband and me.

He watched as Santa worked his way up the aisle. When it was Jeremiah’s turn there was no problem getting him into the aisle. He rushed out and hugged Santa’s legs. Santa picked him right up. They had their picture taken together (which I haven’t received yet but I will add it when it comes in) and Santa gave him something special.

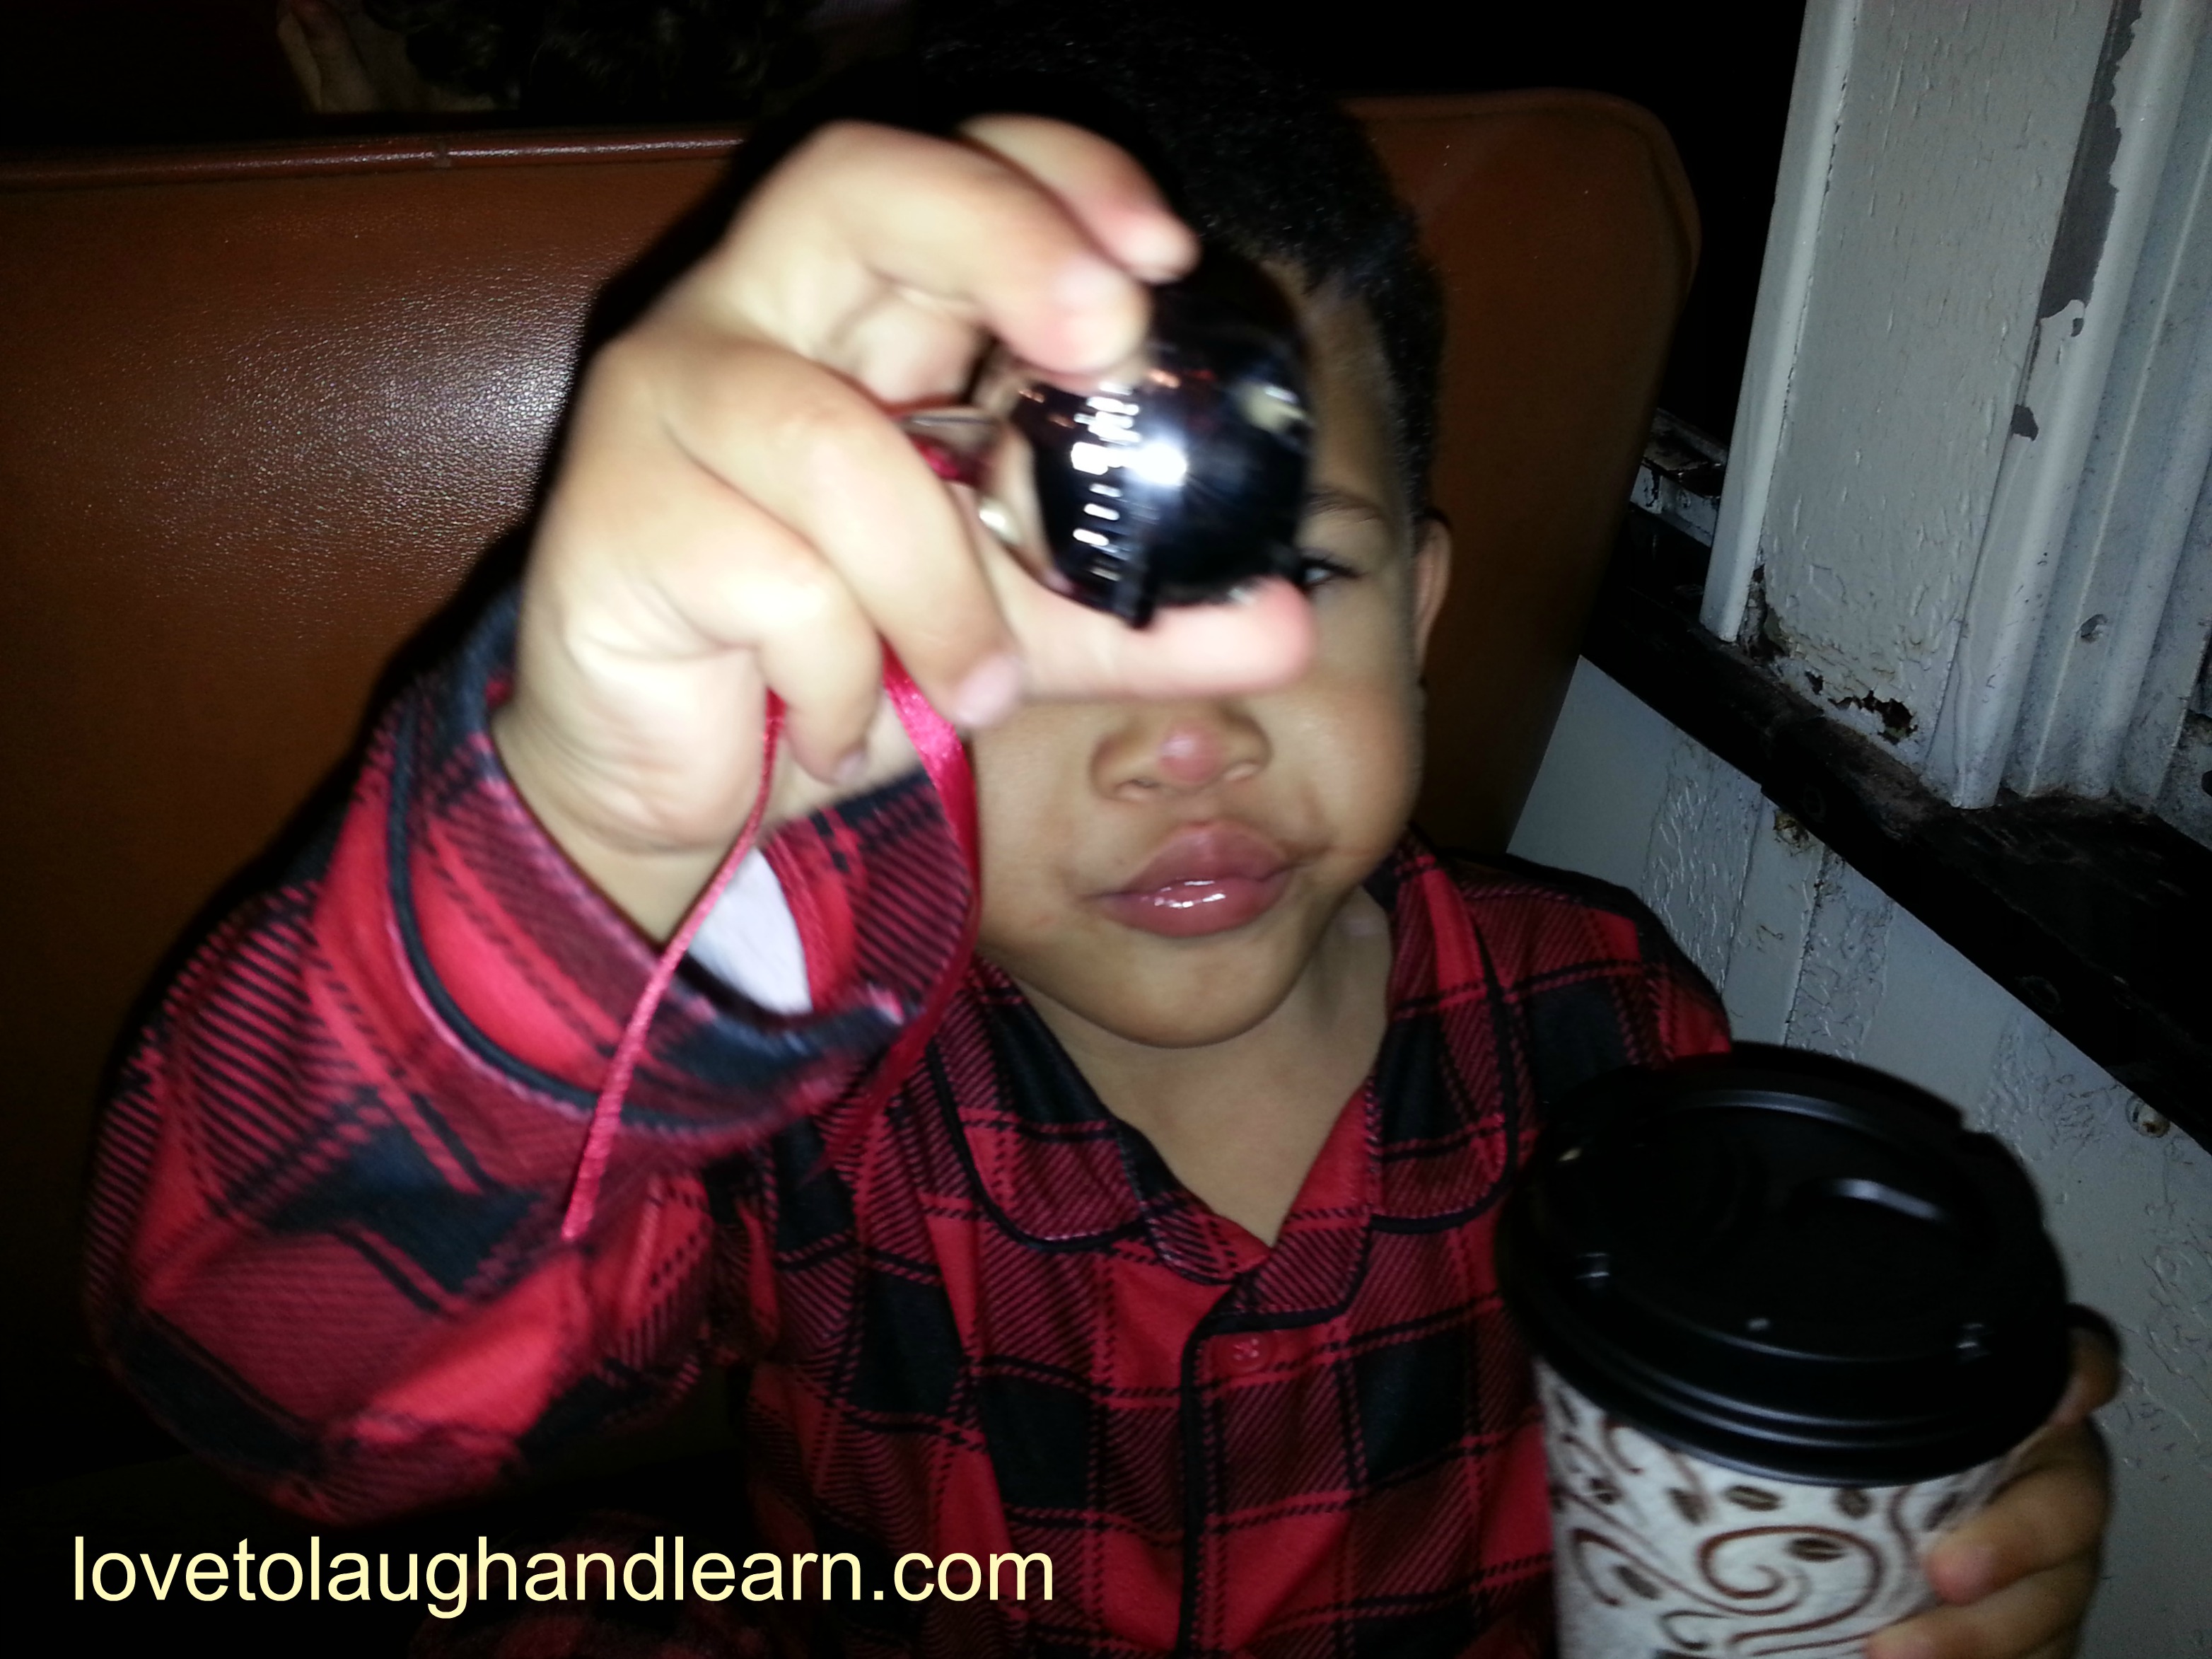
If you haven’t seen Polar Express, you might not know what the gift was so I will tell you. One of the themes of the movie is that anyone that no longer believes in Santa can’t hear the Christmas bells. So Jeremiah’s gift from Santa was a beautiful silver bell. I will tell you right here and now that all of us could hear the bell, because we believe in Santa Claus.

Making Memories with the Polar Express: jingle bell and hot chocolate

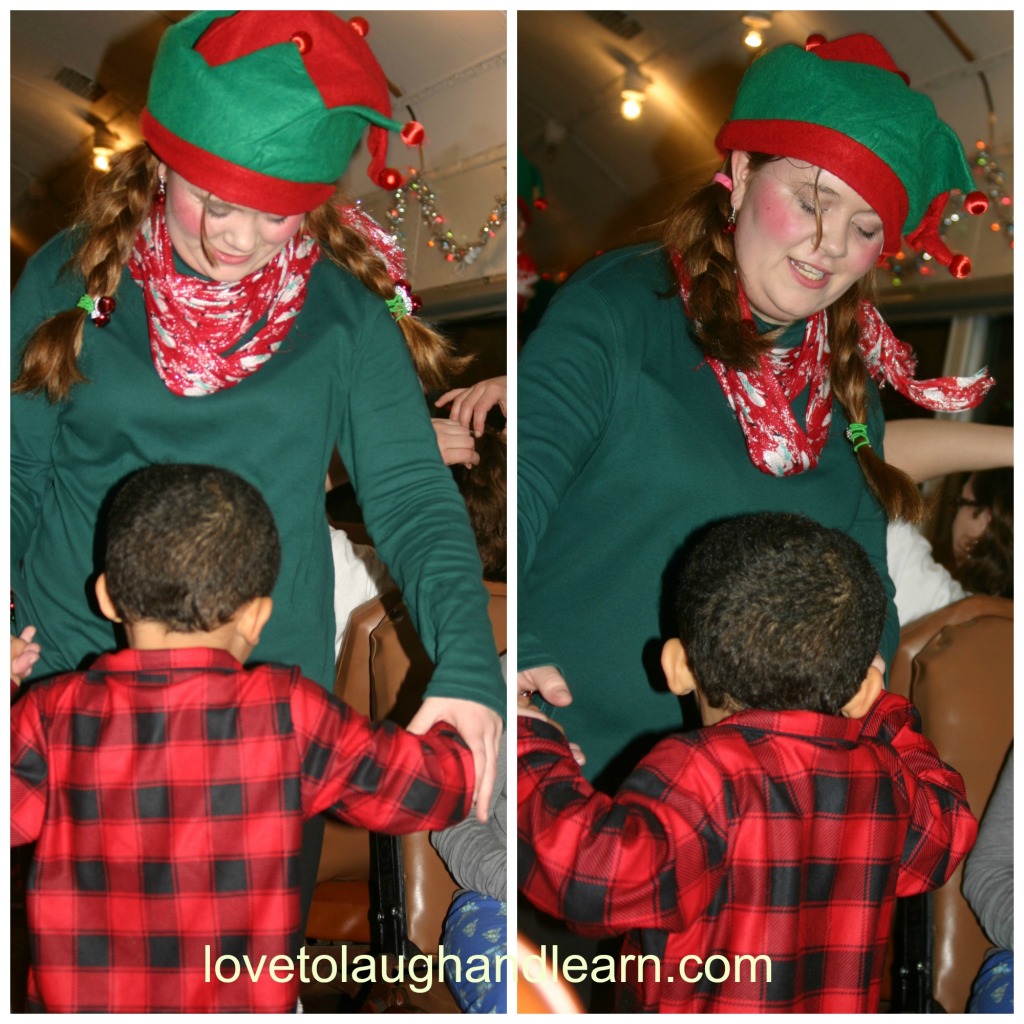
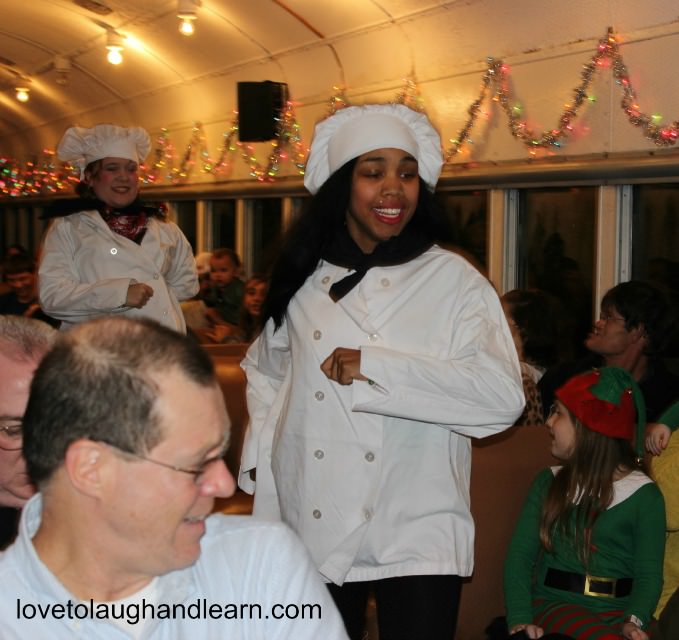
The ride from the North Pole back to French Lick was filled with singing and dancing. Jeremiah finally got comfortable enough to go out into the aisle and dance with the elves.

Making Memories with the Polar Express: Dancing with elves

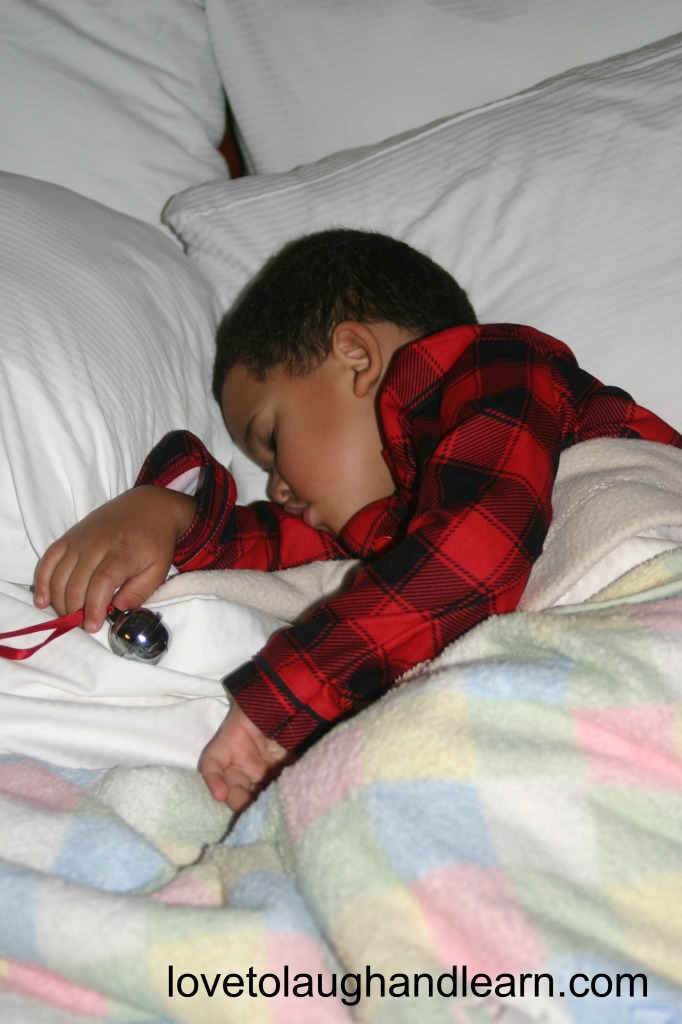
It was a magical night where memories were made. Sweet Dreams!

Making Memories with the Polar Express: sweet dreams

Has your family ever been on a Polar Express train ride? If so, I would love to hear about your adventure.

Disclaimer: I did not receive any compensation for the post. I just wanted to share the fun we had and give you some ideas as to how you could recreate it. There are a few affiliate links throughout the post.

Click on an item below to learn more about how to make or purchase it (affiliate links included):

The Polar Express
Polar Express CD & mp3
The Polar Express storybook
Plastic, coffee stir sticks
Hot dog stockings
Snowman milk chugs
Snowman popcorn cups
Santa strawberries
Grinch kabobs (or Santa kabobs)

Related Posts

Big Splash Adventure Review
Jolly Days Winter Wonderland Review
Review: Christmas at the Indianapolis Zoo
Review – Christmas on Monument Circle, Indianapolis

Filed Under: Attractions and Events, Christmas Tagged With: April family friendly events, christmas, December, family friendly, family friendly activities, holiday, Polar Express, santa, santa claus, train ride, winter

Review – Christmas on Monument Circle Indianapolis
December 10, 2012 by Mama Carmody 11 Comments

It has been several years since we headed downtown to check out the huge “Christmas tree” and decorations on Monument Circle, Indianapolis. We usually just drive around the circle, take in the sights and then move on. I am not a fan of the one way streets, the crowds and the parking situations so driving through is enough for me. But since it was 60 degrees outside, on this December 1st, and I wanted to gather information for my readers I grabbed my camera and we headed downtown for an adventure.

We did have trouble finding a parking spot and the closer you got to the Circle the worse the traffic was but we finally found an empty parking meter. Since it was after 9:00 p.m. we didn’t have to pay so that was nice.

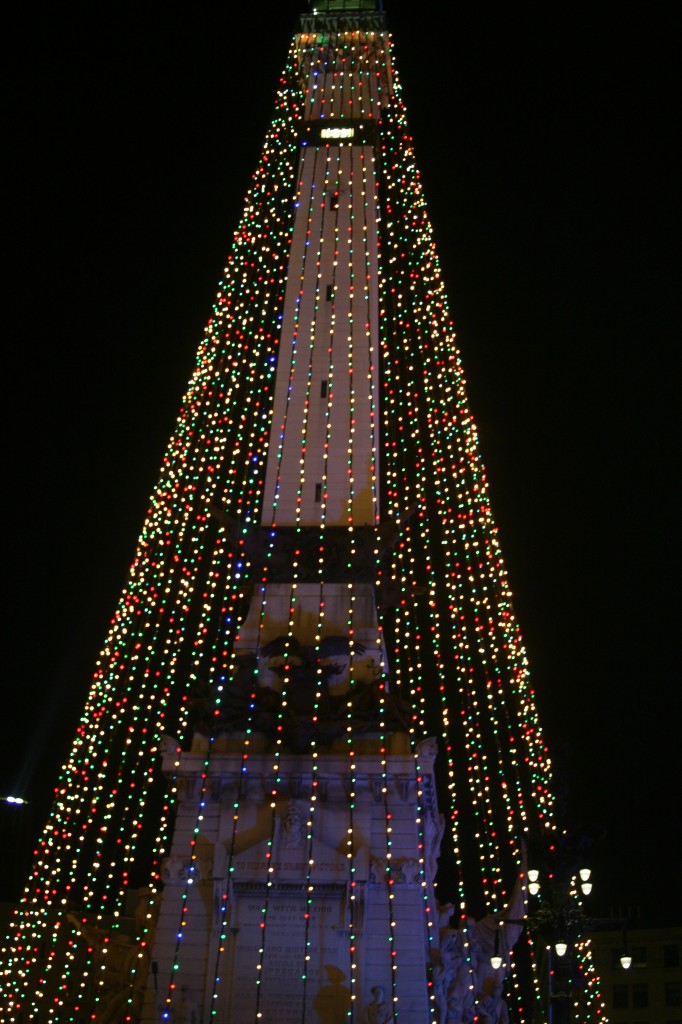
The “tree” was just as wonderful as I remembered it but I don’t know that it was worth parking and walking around the monument. There really wasn’t a lot there. Of course there was the tree, the large toy soldiers and sailors that stood along the edge of the monument and the beautiful Nativity scene in front of Christ Church Cathedral. I believe I would have enjoyed it just as much from my car window.

Christmas Tree at Monument Circle Indianapolis
I did find two reasons that you might want to get out of the car and walk around the Circle: The Rocket Fizz Soda Pop and Candy Shop and The Chocolate Café – The South Bend Chocolate Company. Both shops were open late on Saturday evening and had plenty of tasty treats to offer.

Since I like to include a little fun learning in my activities I wanted to share a few interesting facts I found in an article by Julie Sickel, a writer with the Indianapolis Star. The title of the article is “Here are 50 Facts Relating to the Long-Running Holiday Tradition”. I am going to list a few of my favorite facts but you should read the article to find the rest of them.
1. More than six miles of electrical wire and more than two miles of garland are used for the Circle of Lights.

2. There are 52 strands with 4,784 colored lights strung from the top of the monument to its base.

3. The colors of the bulbs represent different branches of the U.S. military: green for the Army, clear for the Air Force, blue for the Navy, yellow for the Coast Guard and red for the Marines.

4. There are 26 12-foot-tall toy soldiers and sailors and 26 10-foot-tall peppermint sticks surrounding the Circle. (This would be a great counting opportunity for your kids)

5. The ceremony’s most revered annual guest is Santa Claus, who arrives after the lights are switched on.

6. The switch to light the Monument is flipped by a child 12 or younger.

7. For more than two decades, the lucky child has been chosen through a coloring contest.

8. At 284 feet tall, the Soldiers and Sailors Monument is about 21 feet shorter than the Statue of Liberty and 16 feet short of a football field.

9. The Soldiers and Sailors Monument is the largest in the nation to be dedicated to the common soldier.

10. The 38-foot-tall bronze figure atop the statue is named “Victory” but also is called “Miss Indiana” by Hoosiers. She faces south to welcome soldiers returning from battle.

Here is a fun observation my daughter made when she was about 10 years old and I still see it every time we go to see the Christmas lights. (I’m going to give you some hints before I tell you what we actually saw. I want to give you a chance to see if you see the same thing we did.)

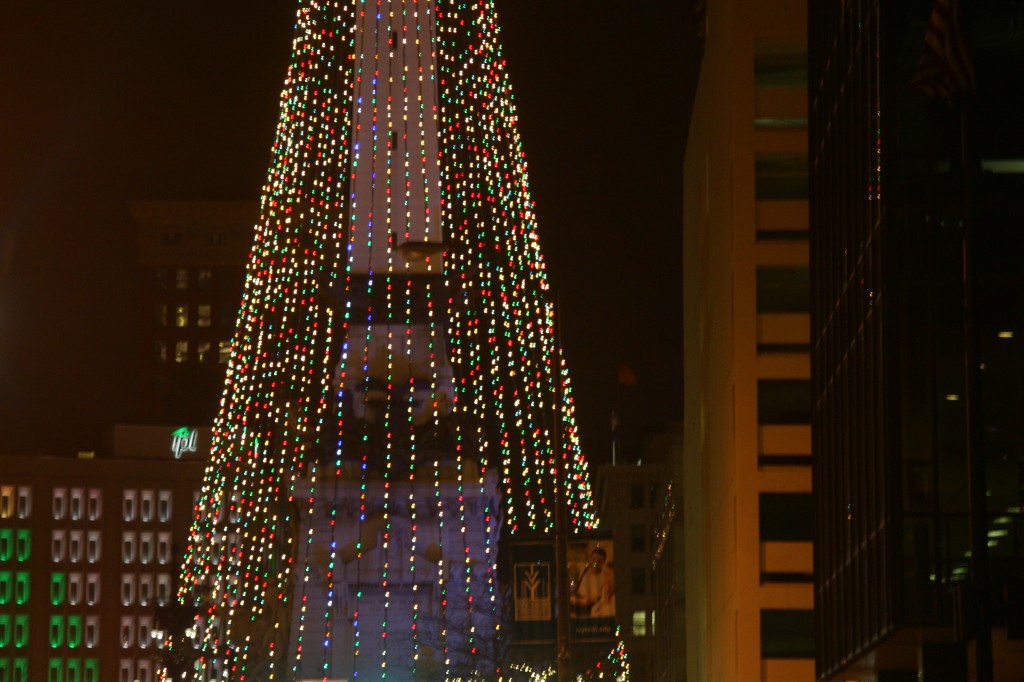
  • As we drove towards the Circle my daughter kept saying that she saw a certain character from the Rudolph the Red-Nosed Reindeer television special created by Rankin/Bass. I looked all around and couldn’t find it. I thought it was a character at the foot of the tree or in a store window. As it turns out, it was an illusion created by looking at the monument through the lights. Take a look at the picture below and see if you can figure out what character we see. Leave a comment as to who you think it is. Once you have made your guess you can click on the picture to see who the character is that we see.
Do you see a character from Rudolph the Red-Nosed Reindeer?

If you don’t see what we saw, then click on the picture below. I have created an overlay of the character on the portion of the monument that we saw it. See if that helps you see it when you look back at the Monument picture.

Do you see a character from Rudolph the Red-Nosed Reindeer?

So can you see him too or do my daughter and I just have vivid imaginations? If you take a drive downtown to look at the lights please leave a comment and let me know if you saw him. We usually see him as we are driving towards the Circle not once we are really close to it. Have fun enjoying the sights, lights and fun this holiday season.

You might also like:

Review: Christmas at the Indianapolis Zoo
Filed Under: Christmas, Holidays, Reviews Tagged With: christmas, December, family friendly, family friendly activities, family friendly events, holiday, holidays, Indiana, Indianapolis, laugh, learn, love, love to laugh, love to laugh and learn, love to learn, Monument Circle, santa, santa claus, tree of lights

  • « Previous Page
  • 1
  • 2
  • 3
  • 4
  • Next Page »

Subscribe

  • Facebook
  • Pinterest
  • Twitter
  • Instagram

Don’t Miss This Great Book

Categories

  • Articles
  • Attractions and Events
  • Autumn/Fall
  • Children's Books
  • Christmas
  • Coloring Pages
  • Colors
  • Community Helpers
  • Contest
  • Cooking with Kids
  • eBundles
  • Gardening
  • Halloween
  • Holidays
  • Learning Activities
  • Music
  • Reviews
  • Sensory Bins
  • Shapes
  • Thanksgiving
  • Uncategorized

Follow Me on Bloglovin

Follow on Bloglovin
Subscribe via RSS

Recent Posts

  • The American Flag and Its Hidden Message
  • Celebrating Flag Day
  • Celebrating the 4th of July with Children
  • “Someone I Love Has Gone to Heaven”
  • Memorial Day for Kids: Fun Activities That Teach Honor and Respect
  • Memorial Day Learning Activities
  • Dig into Gardening: Fun Activities, Science Projects, and Healthy Eating Tips
  • Police Officers: Love to Learn About Community Helpers

Check This Out

Holiday Toy List – STEM Toys

Books

US Family Guide

USFamilyGuide.com

Recent Comments

  • Mama Carmody on Your Favorite Childhood Book
  • Lisa Smiley on Your Favorite Childhood Book
  • Harlow's Harvest on Eggs in a Nest: Cooking with Kids

Copyright © 2025 · Lifestyle Pro Theme on Genesis Framework · WordPress · Log in